
‘Tis the season for a wrap-up post! Let’s take a lookie-loo at what I was up to in 2025, shall we?
King David’s Crown Quilt for Fat Quarter Shop
First up in 2025 was a new pattern for Fat Quarter Shop’s “Classic and Vintage” series of patterns: King David’s Crown. I sewed it up in Corey Yoder’s “Cali & Co.” after falling in love with her choices for background fabrics in the collection. Which is odd, but whatever, the heart wants what the heart wants. I love this quilt so much! It’s so pretty!
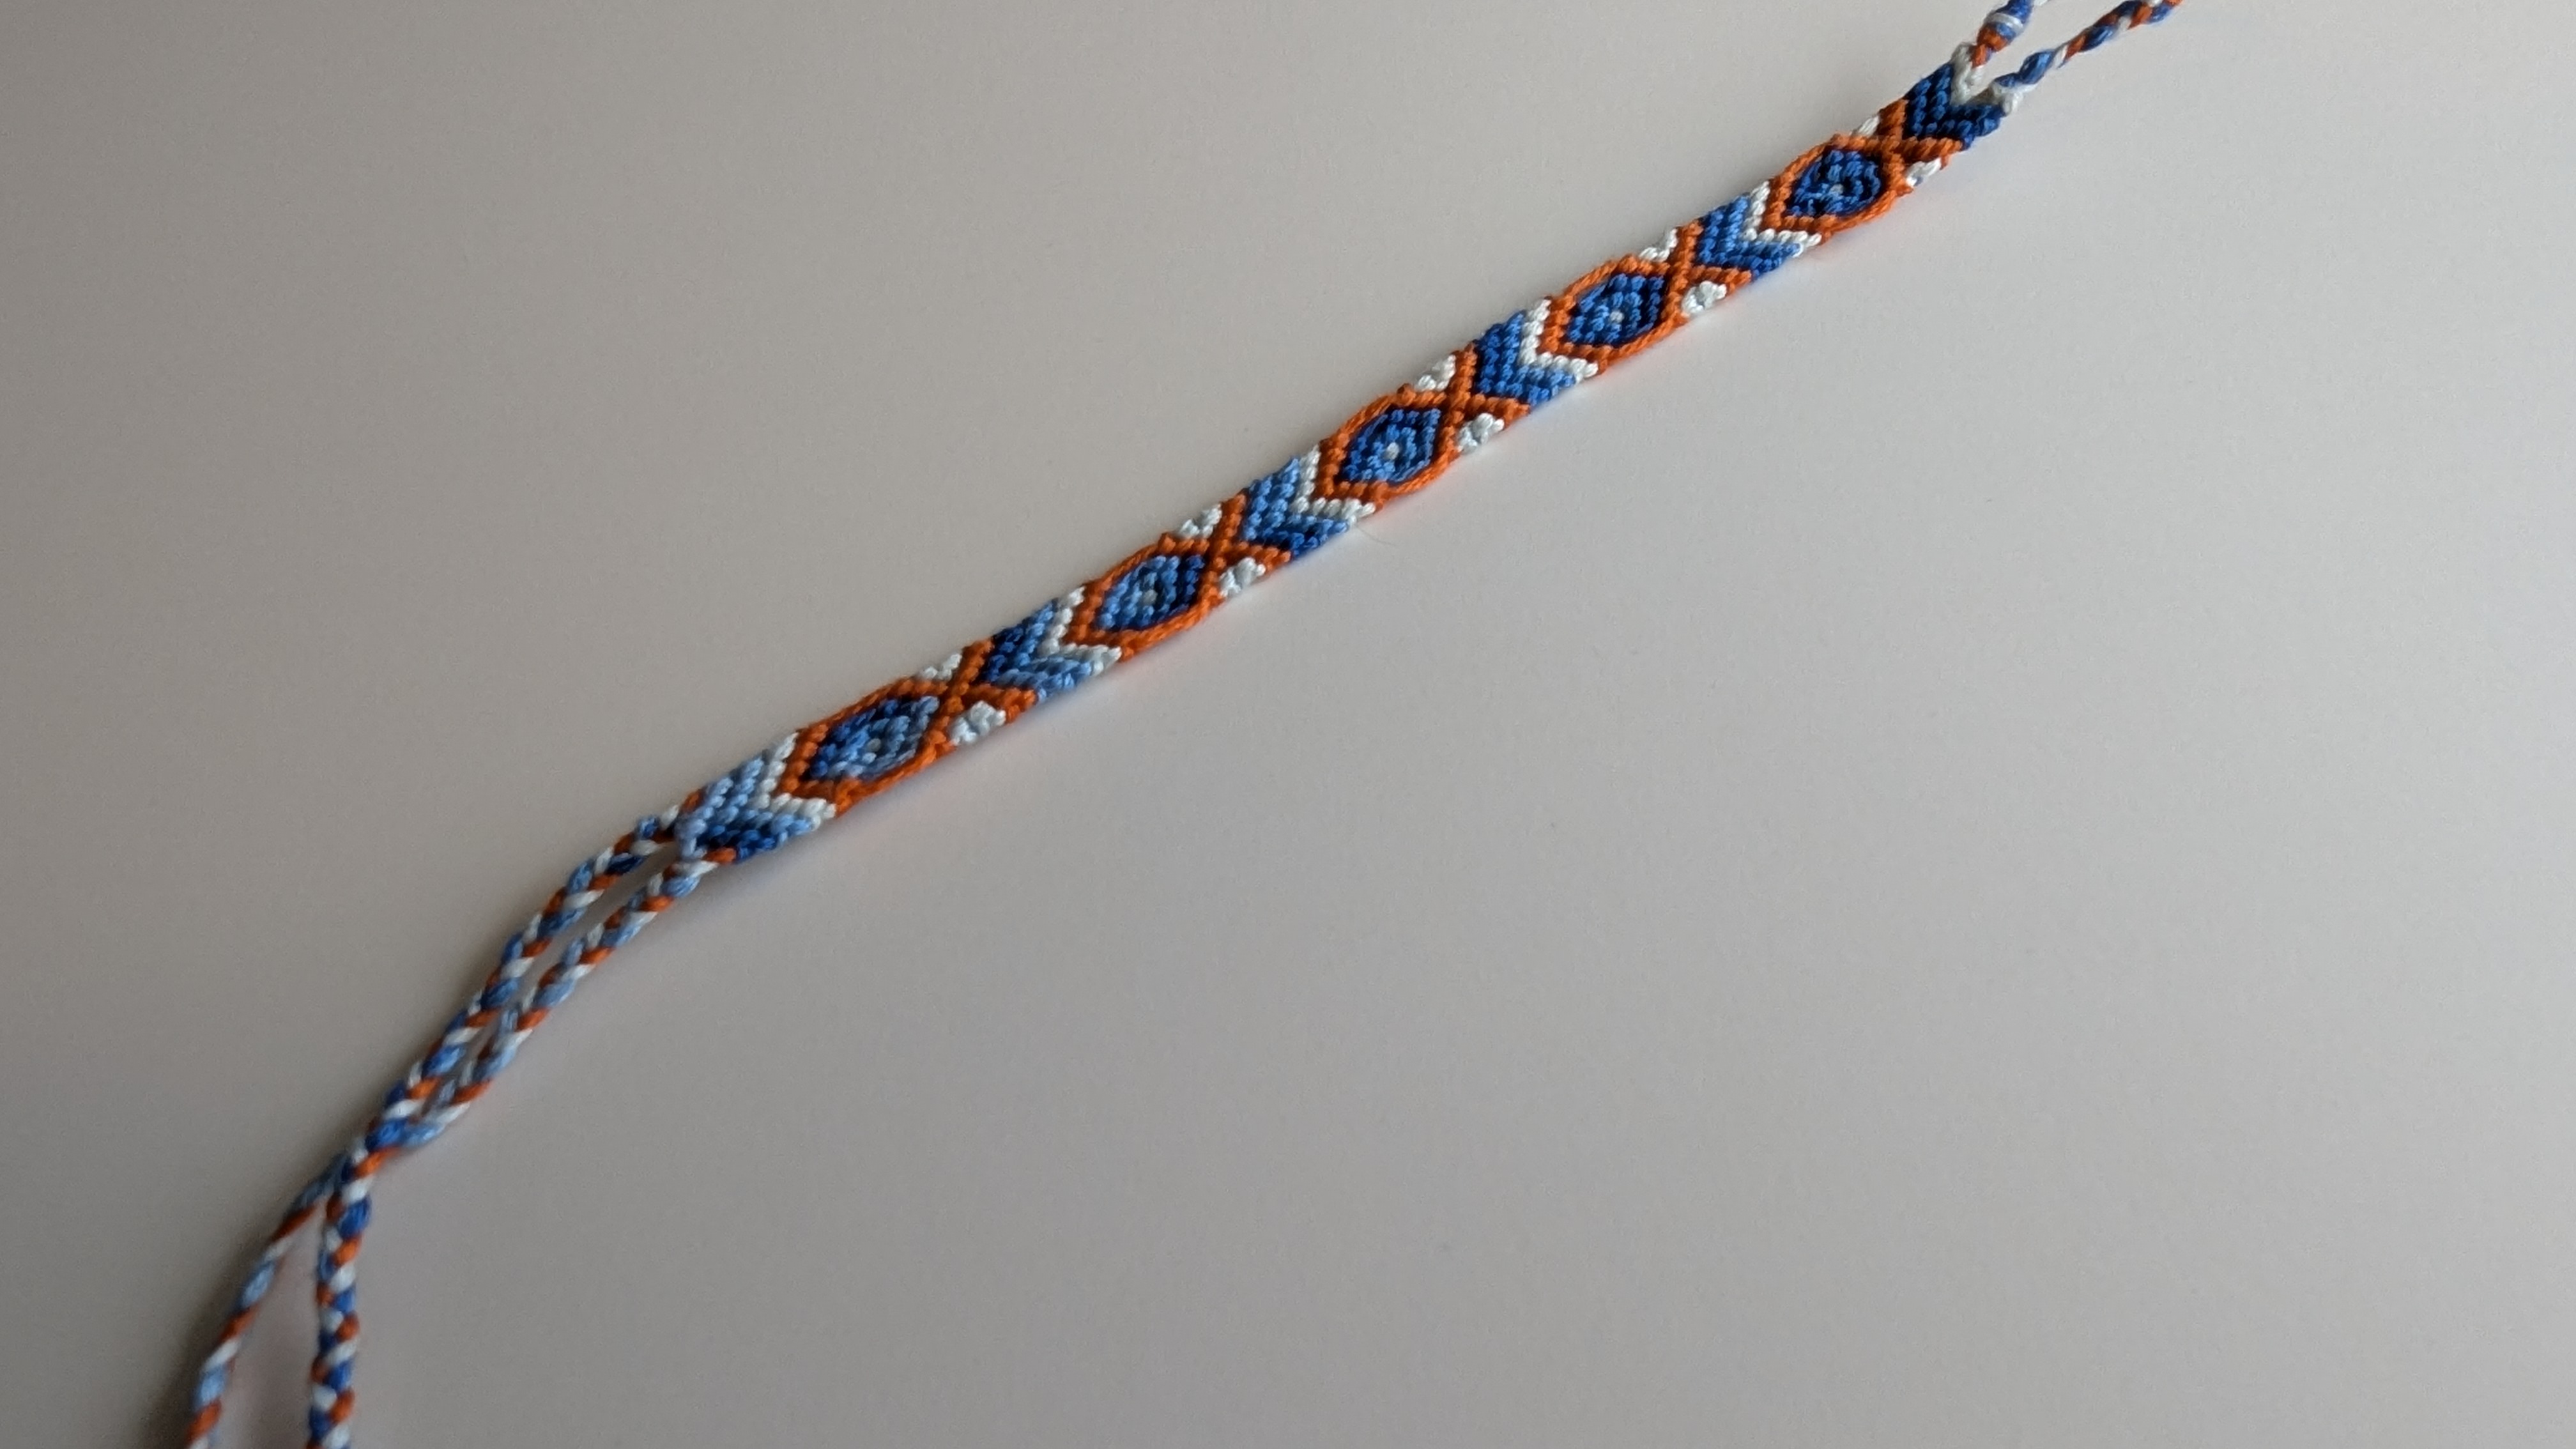
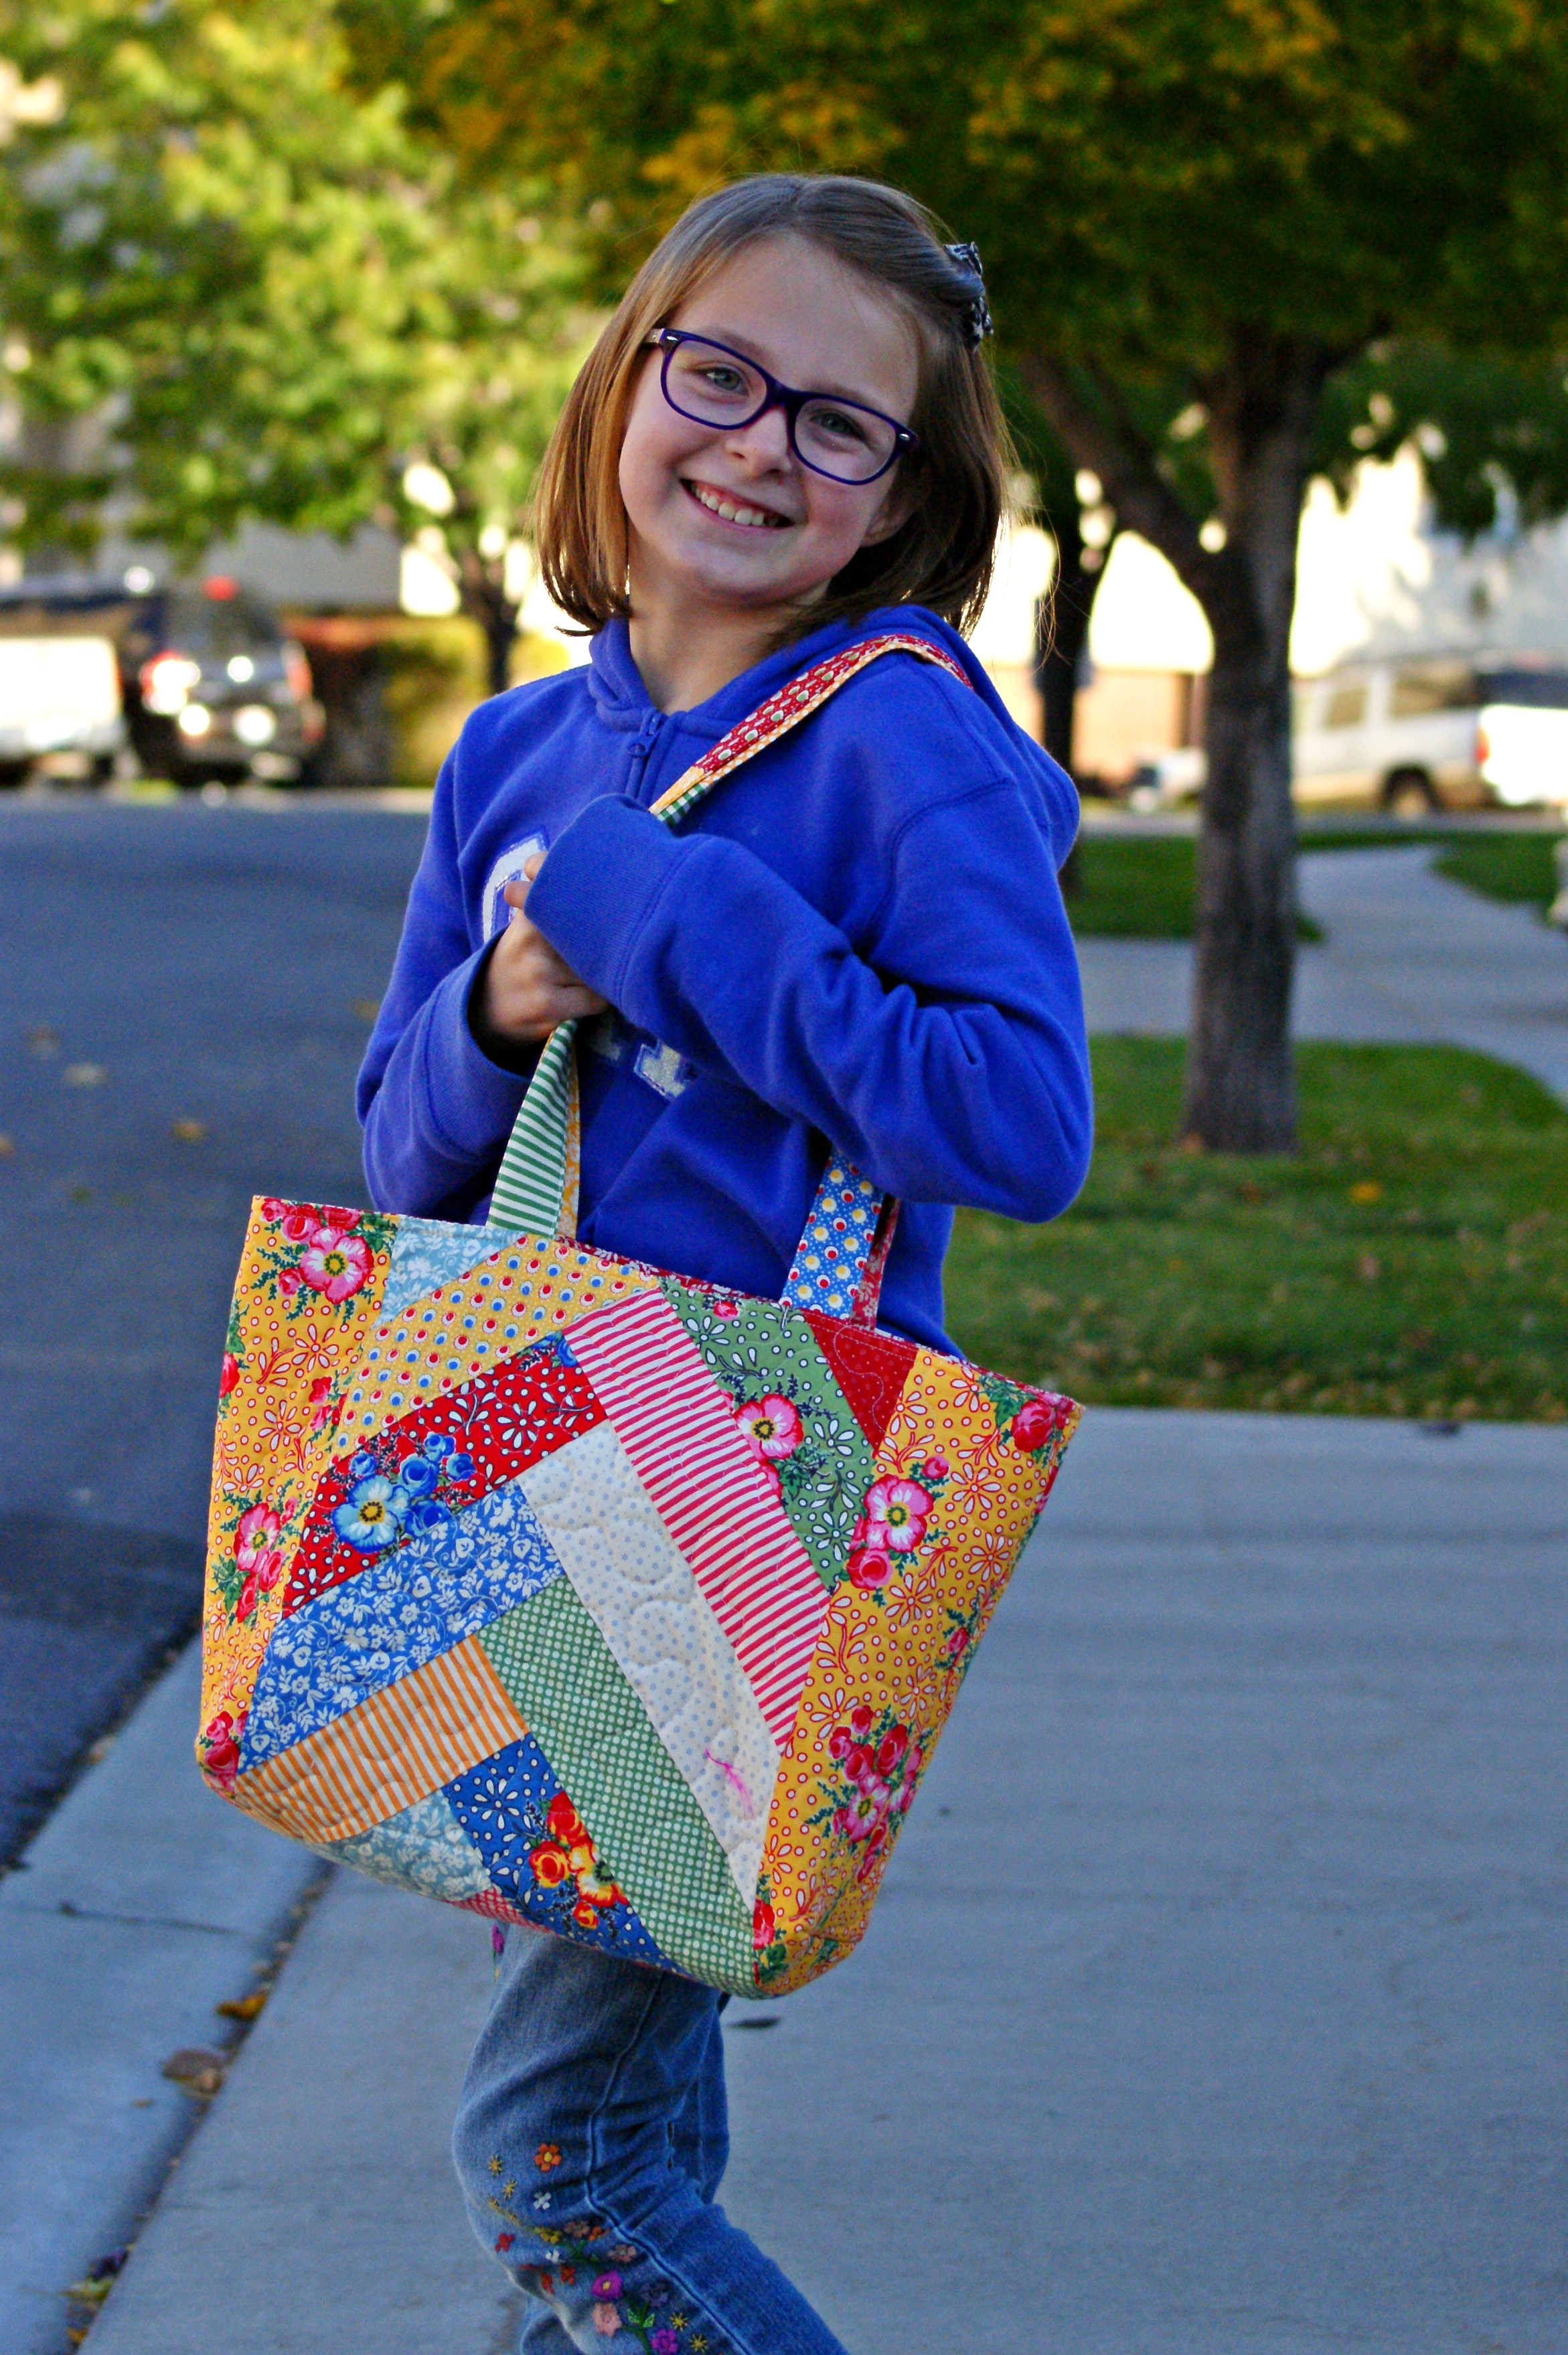
Fish Friendship Bracelet for Rachel
I’m not sure I ever posted about this, but it happened. Rachel was helping me declutter my craft room and she came across my tattered collection of friendship bracelet instructions from my middle school days. As she flipped through them she saw the fish pattern and commented that it’d be cool to have, so I made one for her for her birthday. Not a big deal, project-wise, but it was fun to dust off that very, very old skillset.
Star Climber Scrap Quilt
This is still a project-in-progress, but I’m loving it. Star Climber is another free pattern from Fat Quarter Shop, created especially for scrap-busting.
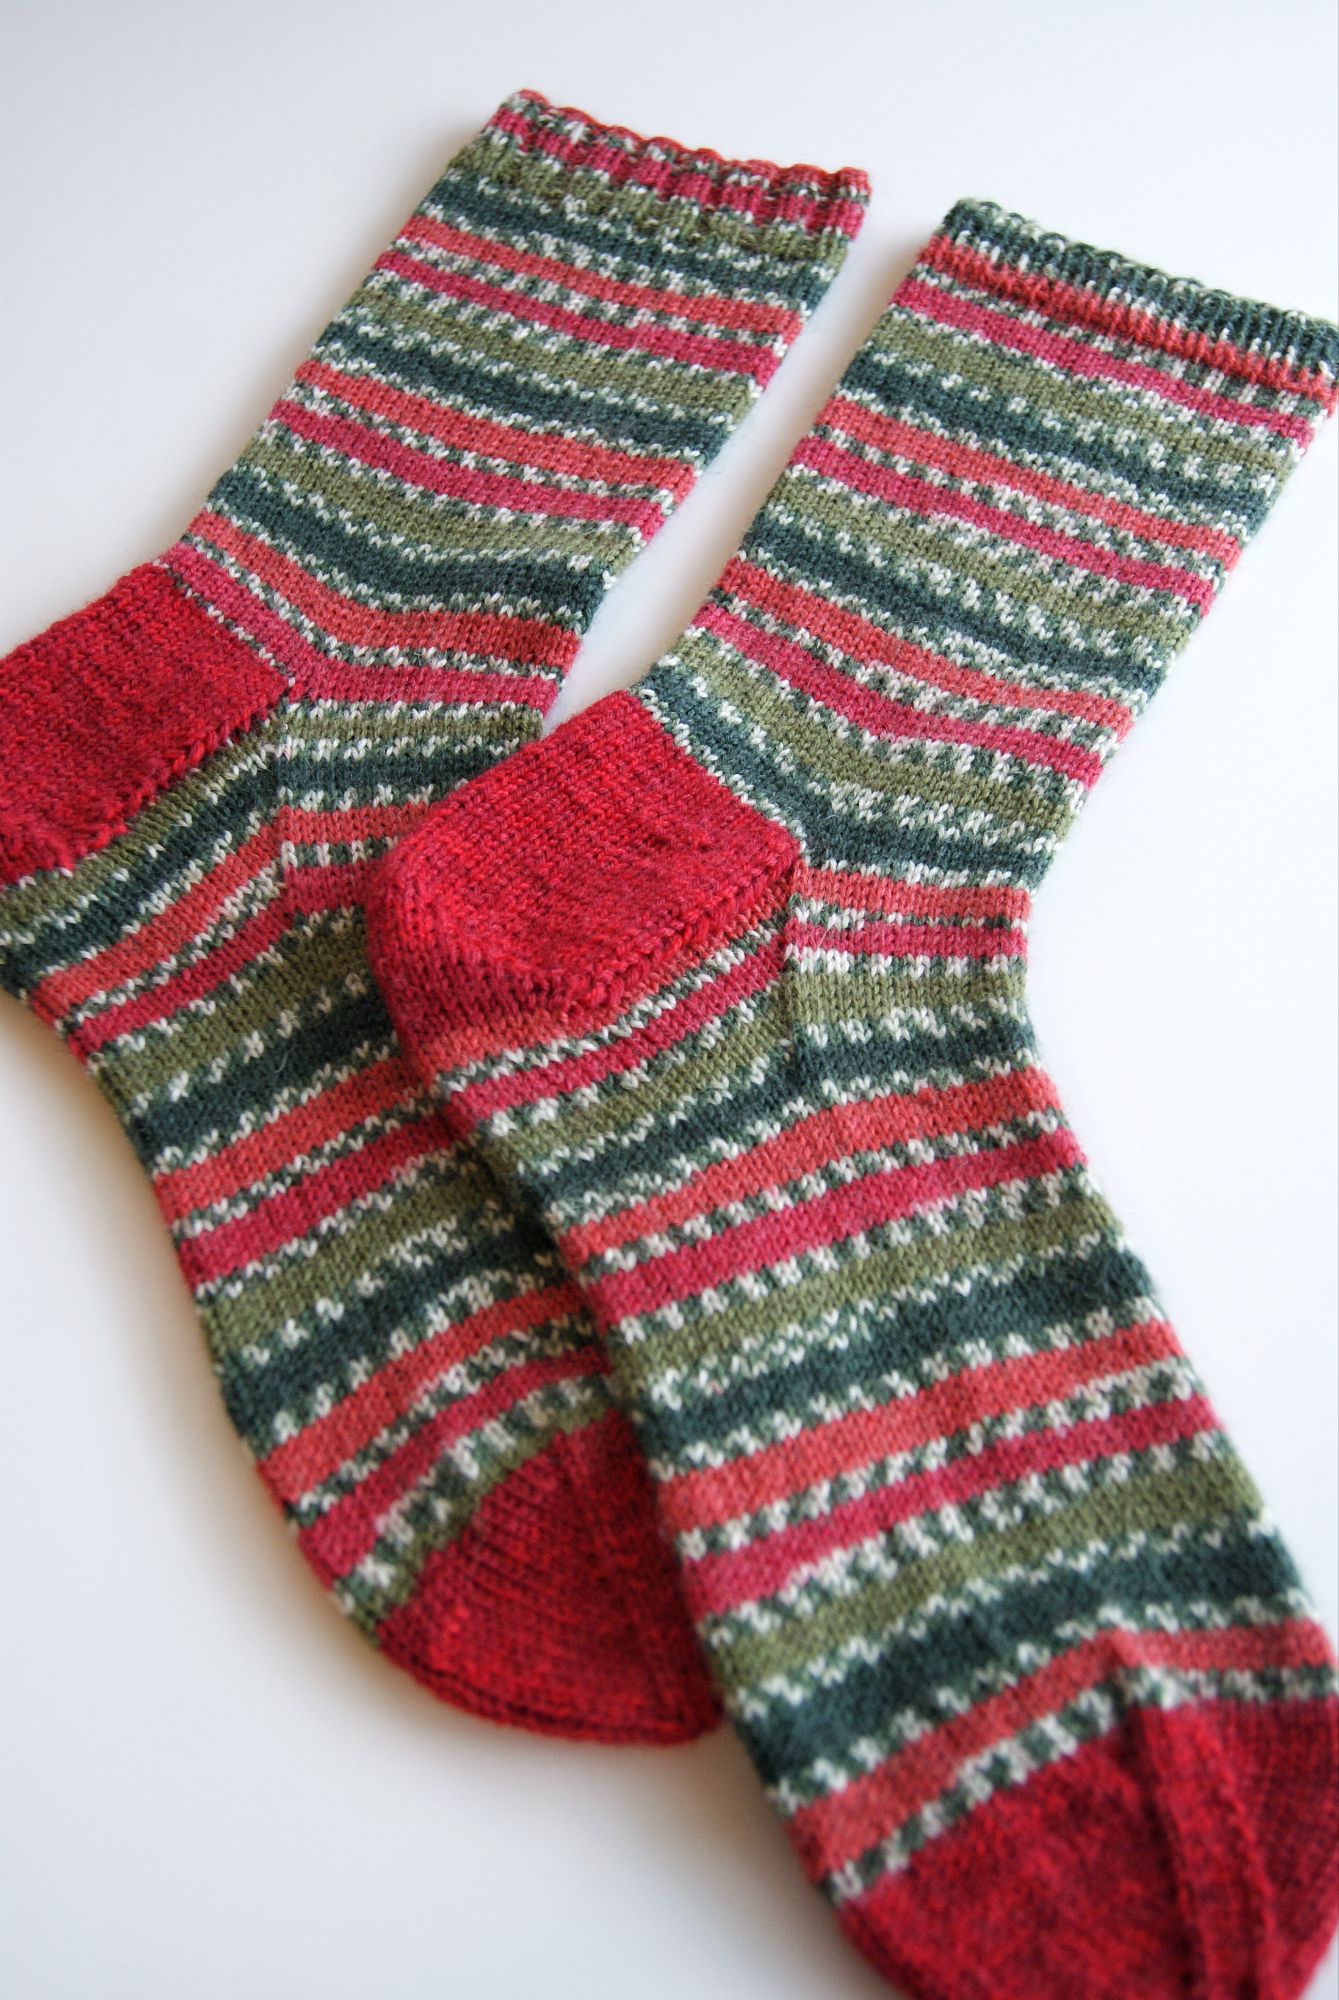
Stripey Christmas Socks
Started in 2024, but not finished in time for last year’s Christmas, so I got them done in February. I loved wearing these fabulous Christmas socks this Christmas season! I’m on the hunt for all the different Christmas colorways of this West Yorkshire Spinners’ Signature 4-ply yarn so I can own the entire holiday rainbow!
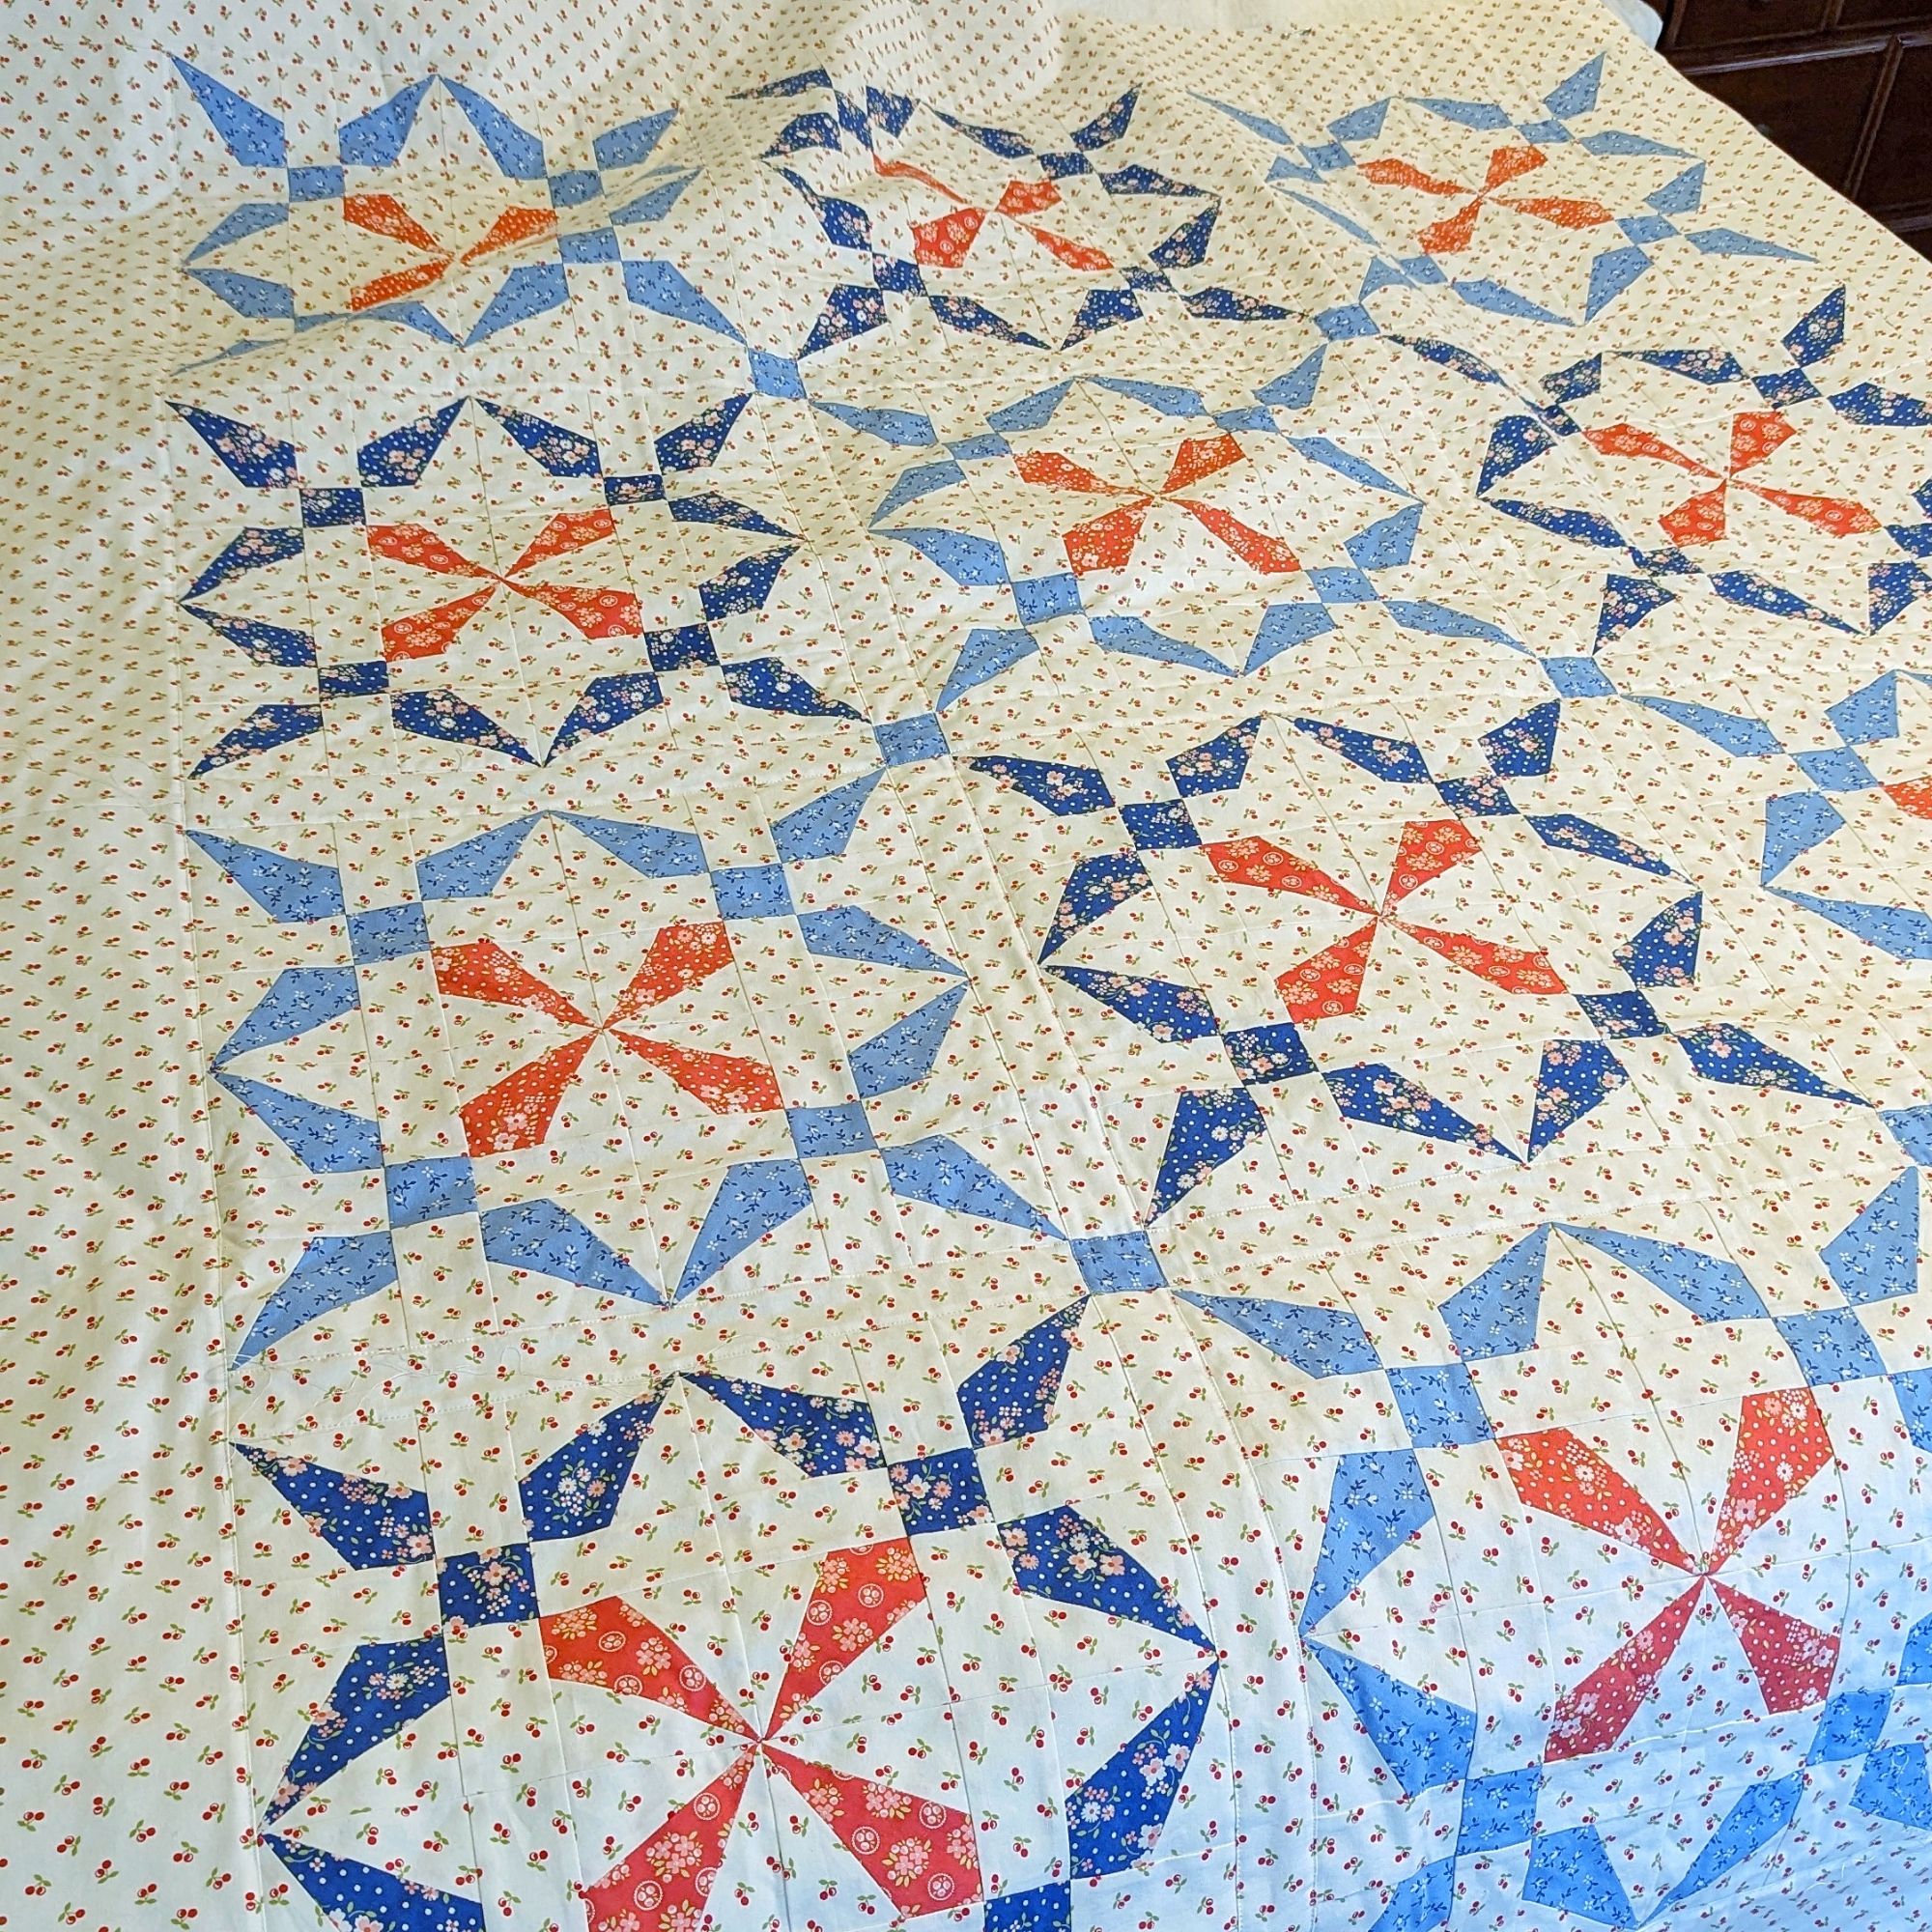
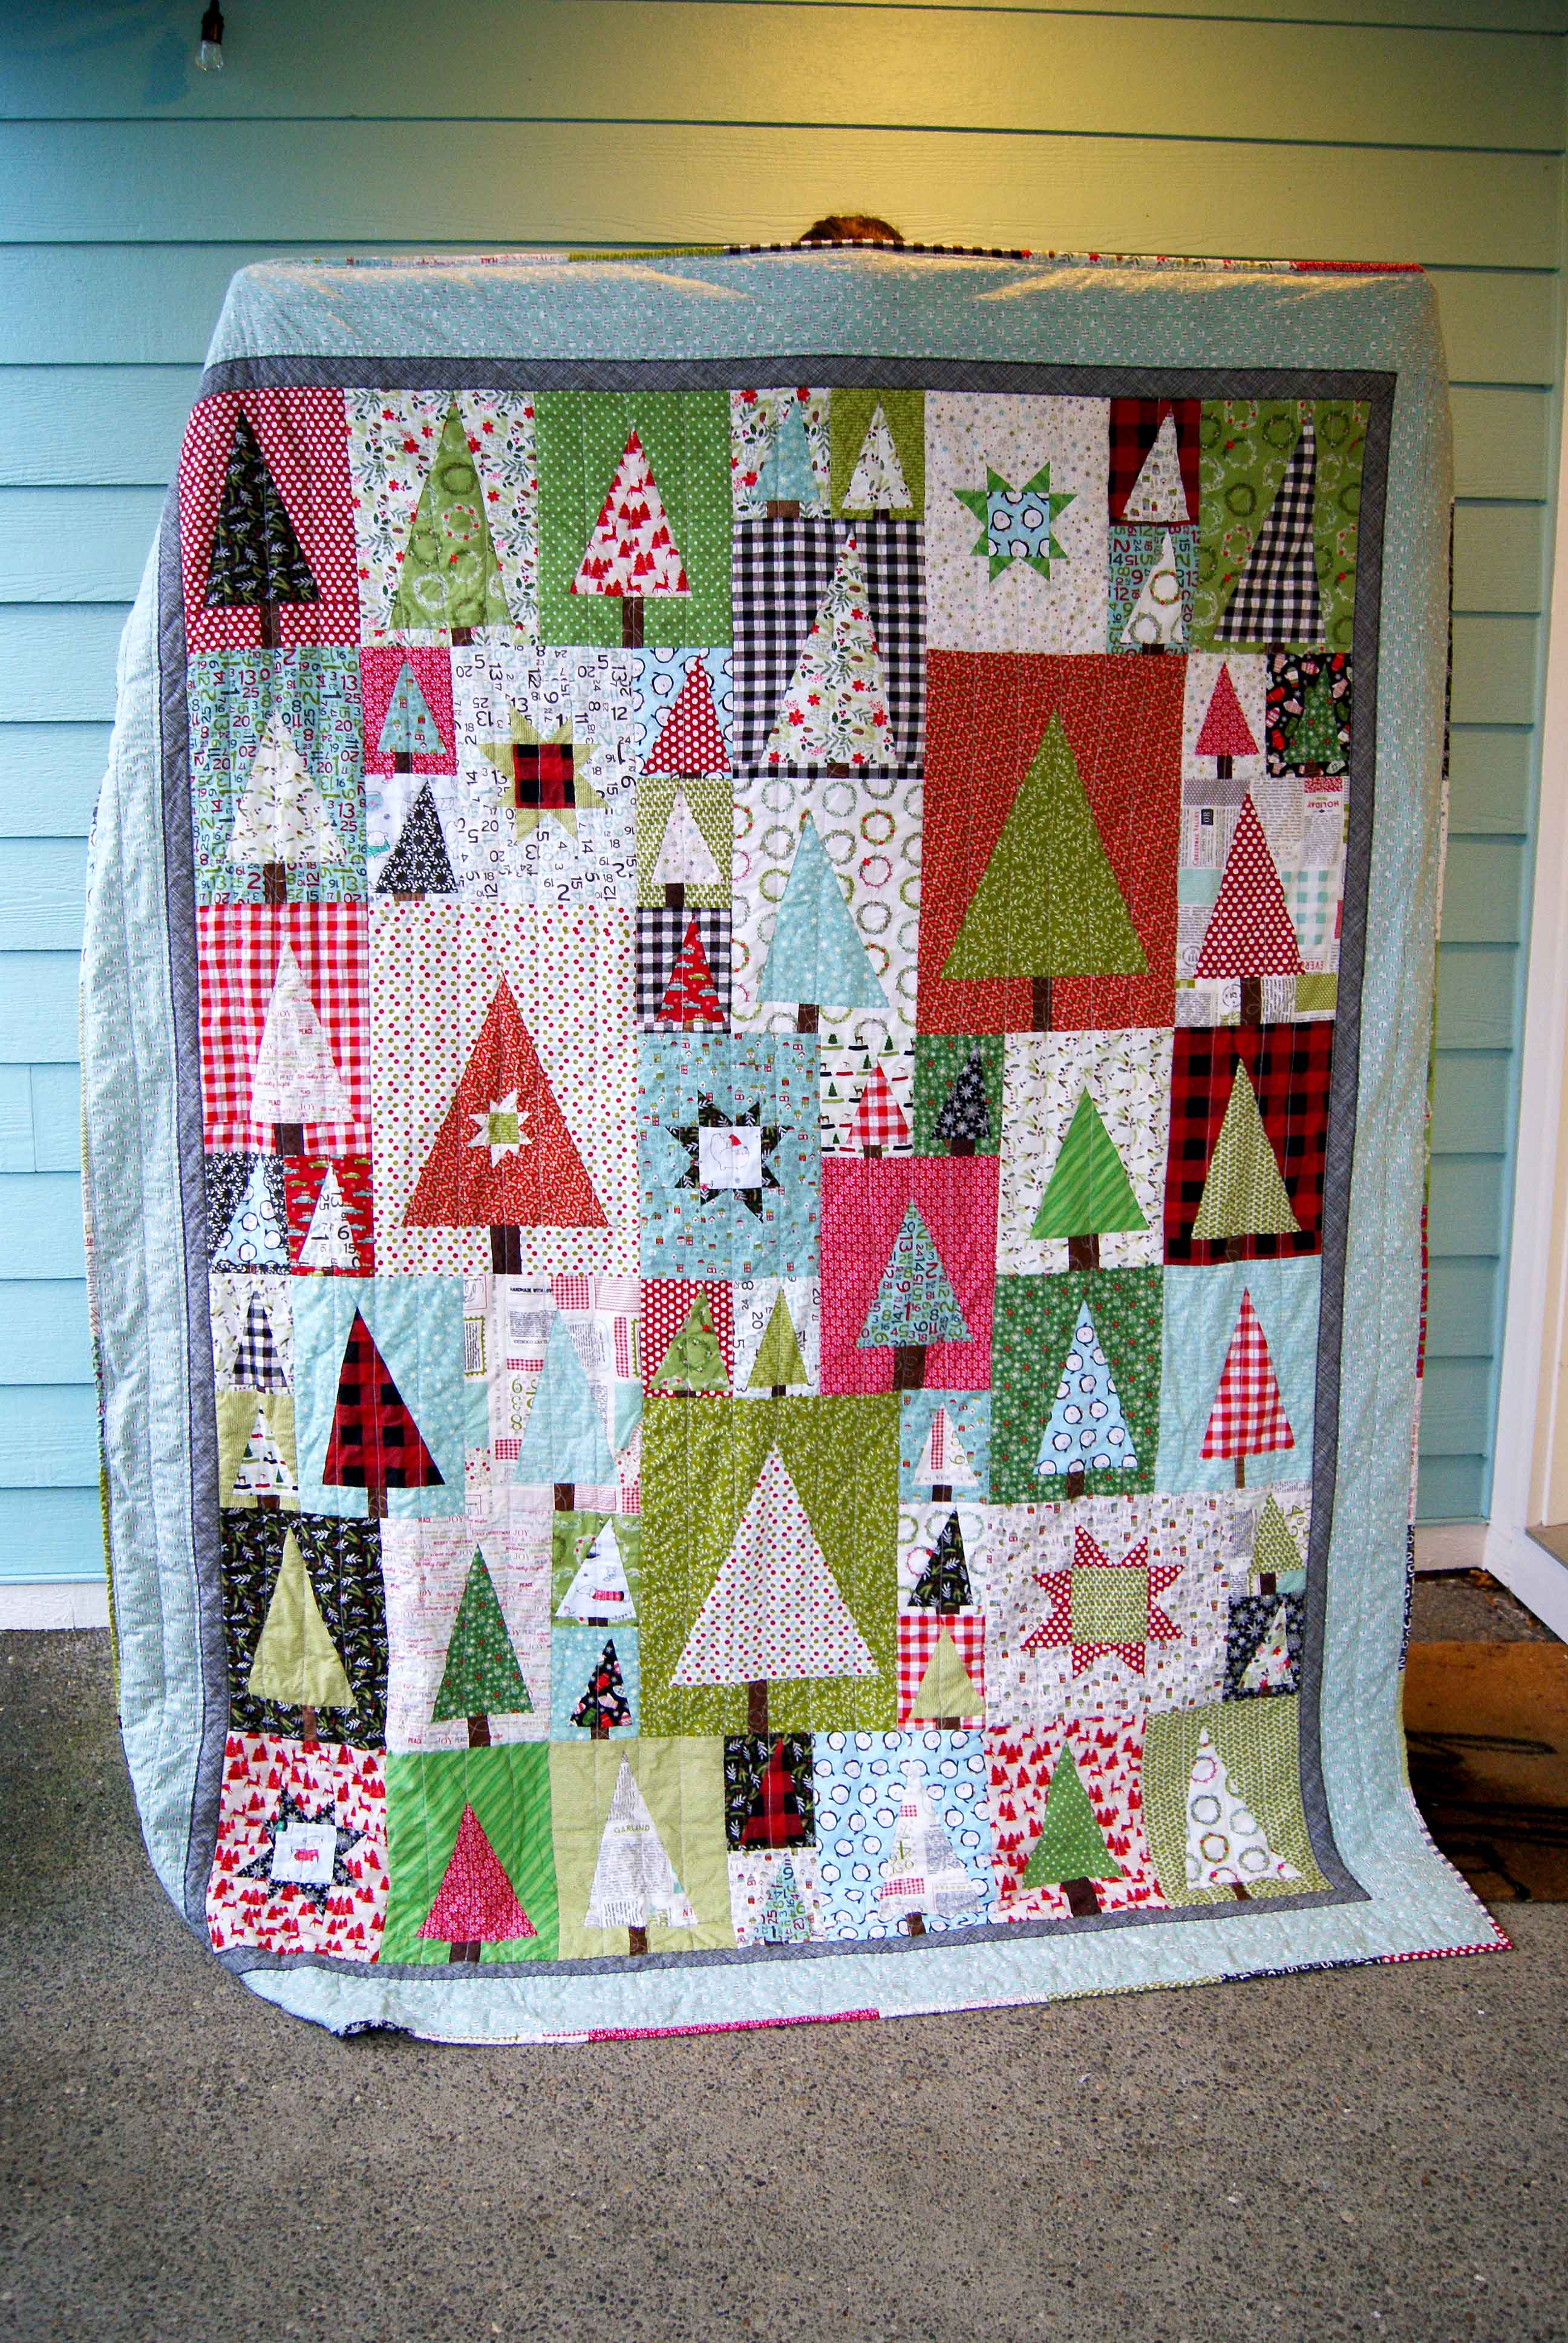
Layer Cake Crêpe Quilt for Fat Quarter Shop
You never saw this, and neither did the rest of the quilting world because I shut down my blog in from May through September of this year, with the full intention of never coming back. I had a stalker in the last part of 2024 and was granted a restraining order that forbade him from making any contact with me for an entire year. However, in the spring I started seeing some activity in my analytics that suggested he might be checking up on me via the blog and it spooked me, so I made the decision to stop feeding the monster and walk away.
But it turns out that I really love blogging and sharing my creative endeavors on social media, and I resented that I had been forced out of the things I loved by that dude. After some serious therapeutic work, I made the decision to come back online in September because I don’t think it’s fair that I be expected to abandon what I love because of someone else’s poor behavior. It’s definitely a personal, multi-faceted choice, and I do worry that it might be a foolish one, but I don’t want to spend my life hiding my talents under a bush just because someone got weird about it all. How do you continue going on if, every time you get good at something, someone behaves dumb about it and you’re expected to quit your hobby because of their choices? It’s crazy. Nope, no thanks.
So, here it is for the first time ever, my Layer Cake Crêpe quilt:
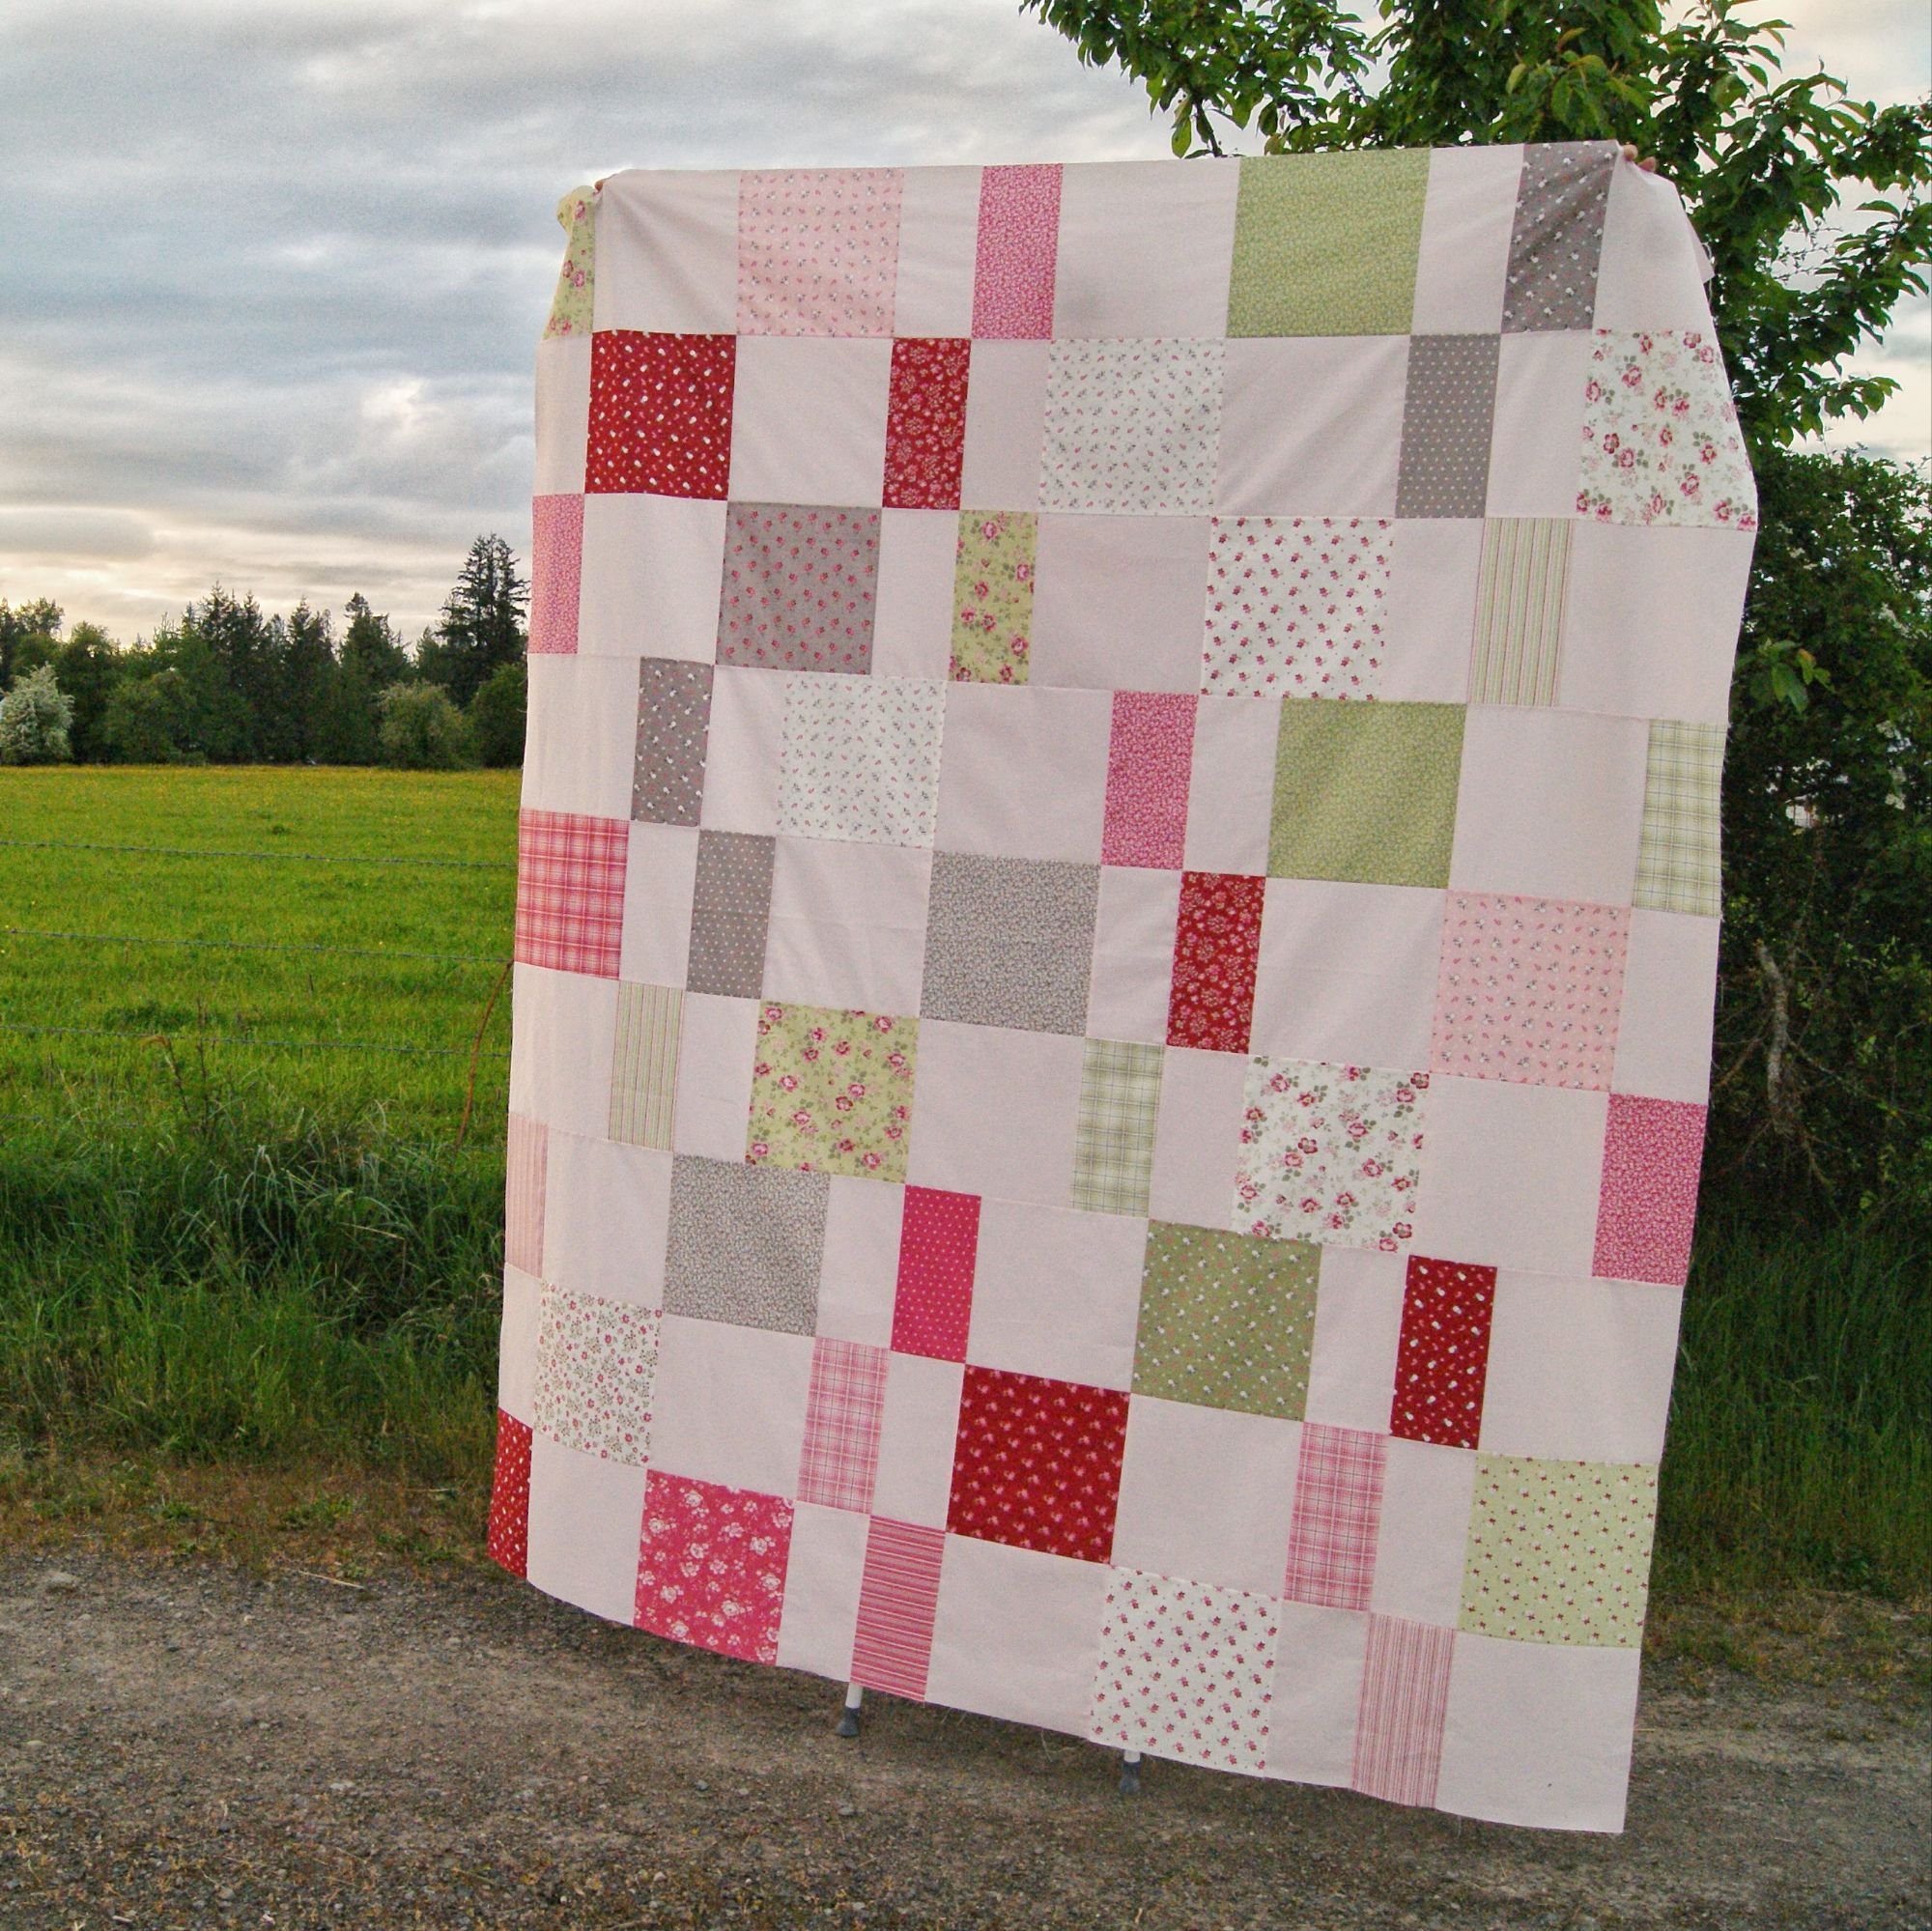
I used the “A Very Sweet Christmas” collection by Bunny Hill Designs, along with Moda Bella Solids in Baby Pink (#9900-30). It’s a super fast pattern to put together because the blocks are HUGE. It’s available for free over on Fat Quarter Shop’s website. Thank you, Fat Quarter Shop, for our ten years (!) of working together on projects like this. I’ve really enjoyed it all.
Hemming Rachel’s Prom Dress
I know that hemming isn’t an interesting “project,” but I have to include it on my list of projects because SO MUCH OF MY CRAFTING TIME is taken up with hemming formal dresses for Rachel, and I forget that I did the hemming and then wonder what was up with my time management skills because I don’t seem to get any projects done these days. Except I do; it’s just that it’s tailoring and hemming ballgowns for my daughter.

Marching Band Uniform Repair
I just want an excuse to share this picture with you because I absolutely love it:
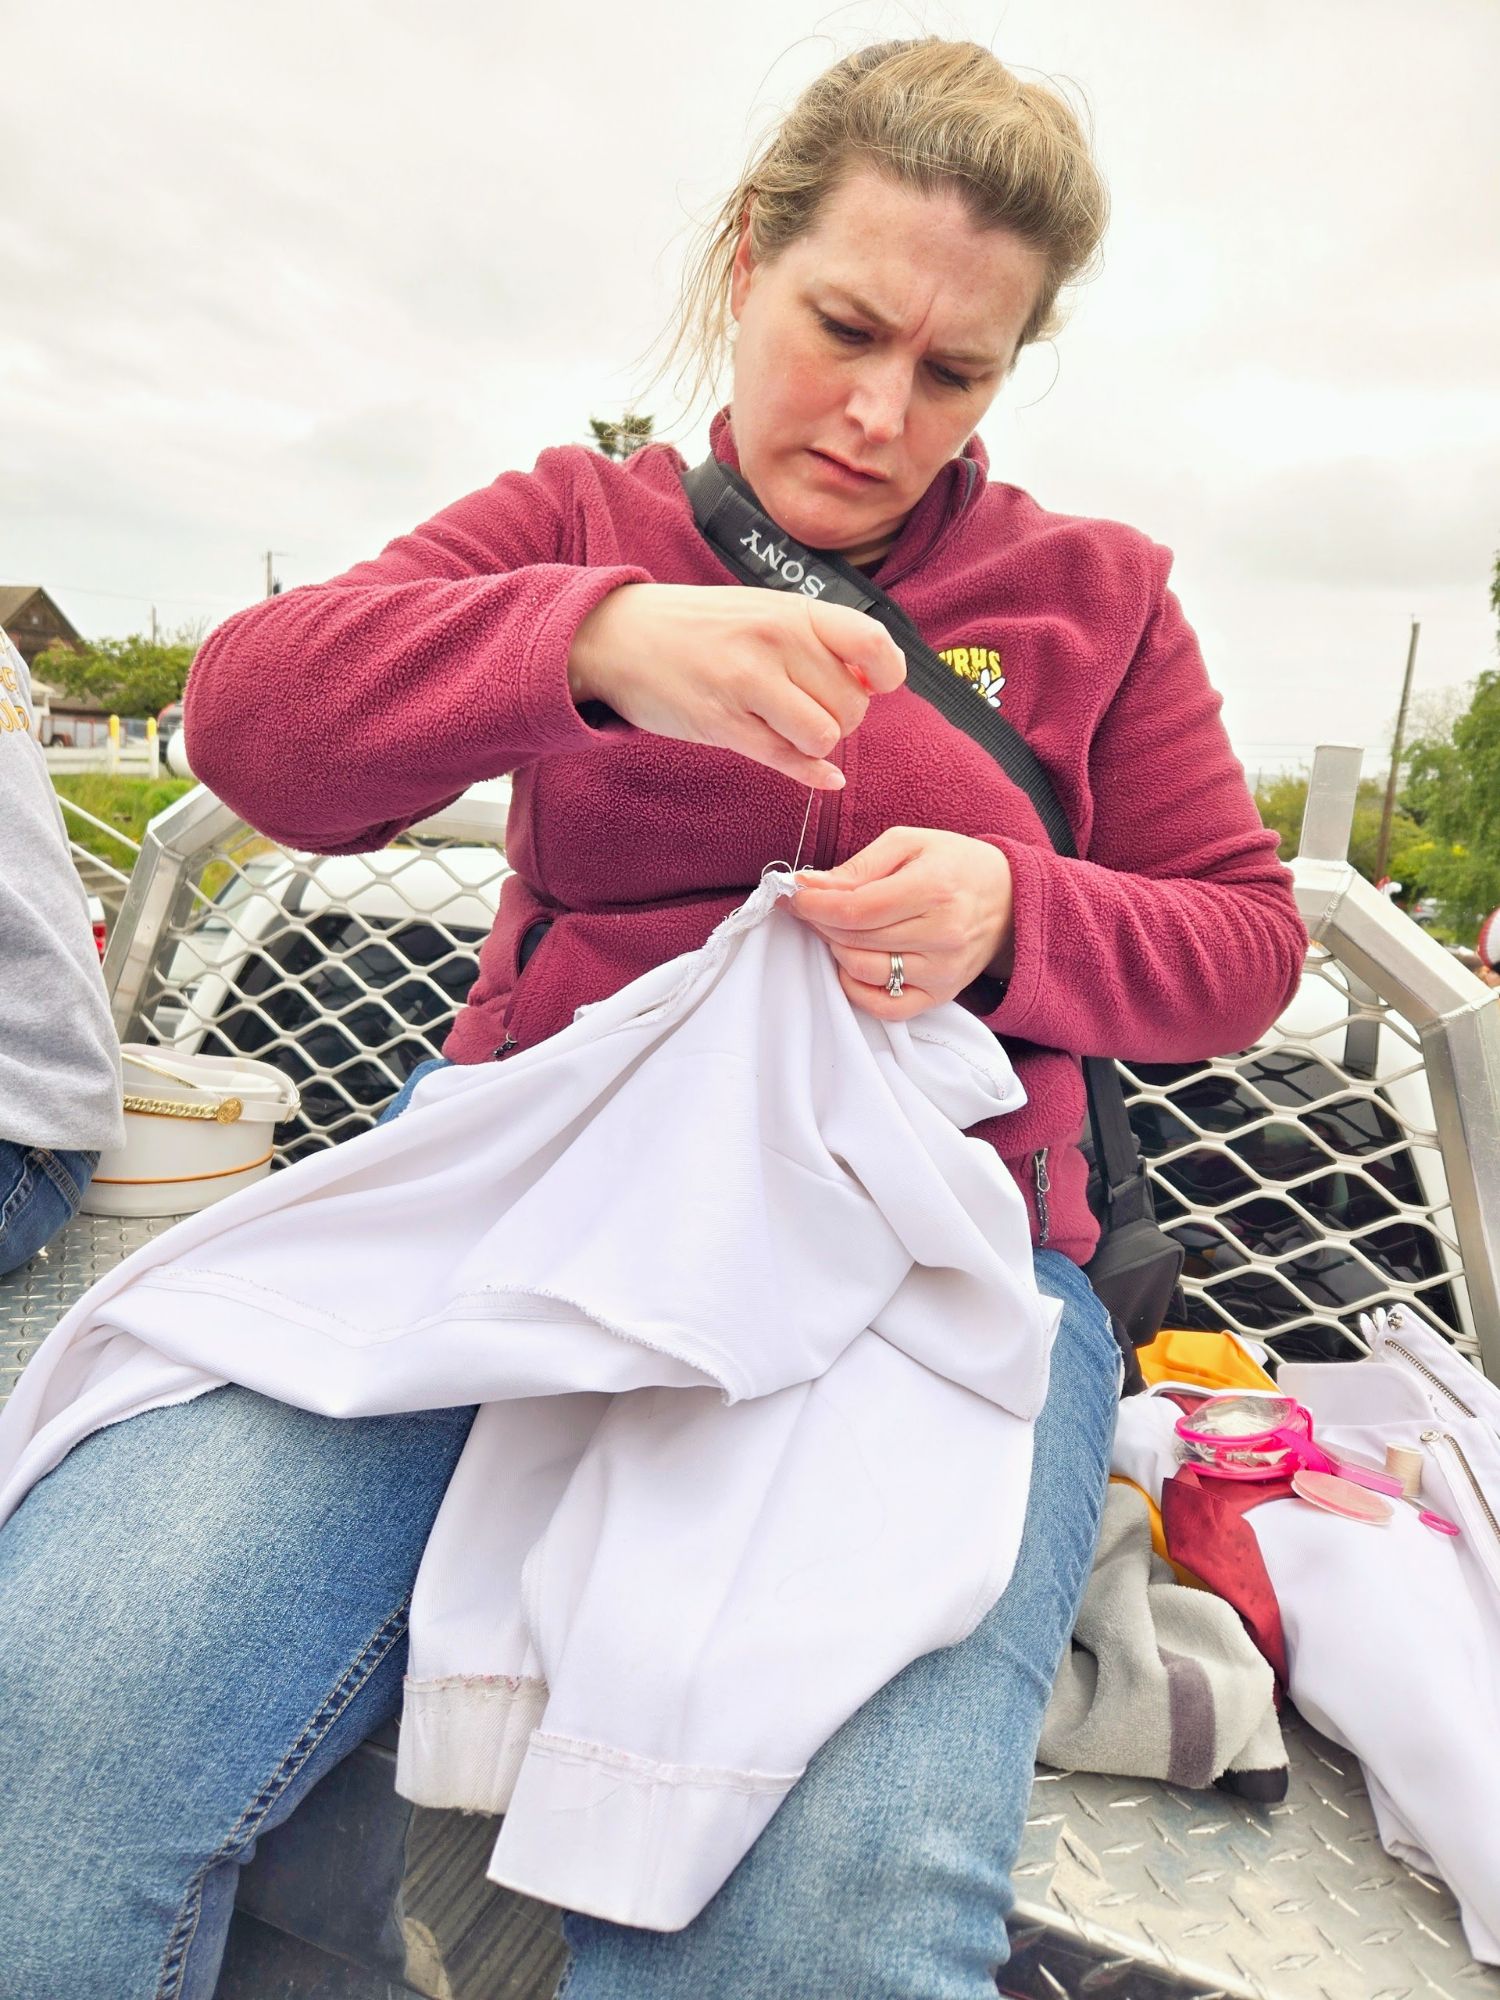
One of the drum majors’ pants split right before a parade, so they were tossed to me in the back of the band trailer truck bed and I sewed as fast as I could as we travelled down the back streets of whatever town we were in to get to our starting location for the parade. Ha ha ha, another mom snapped this photo and I was very quick to ask them to share it with me because I knew I’d love it. (Pants were completed just in-time!)
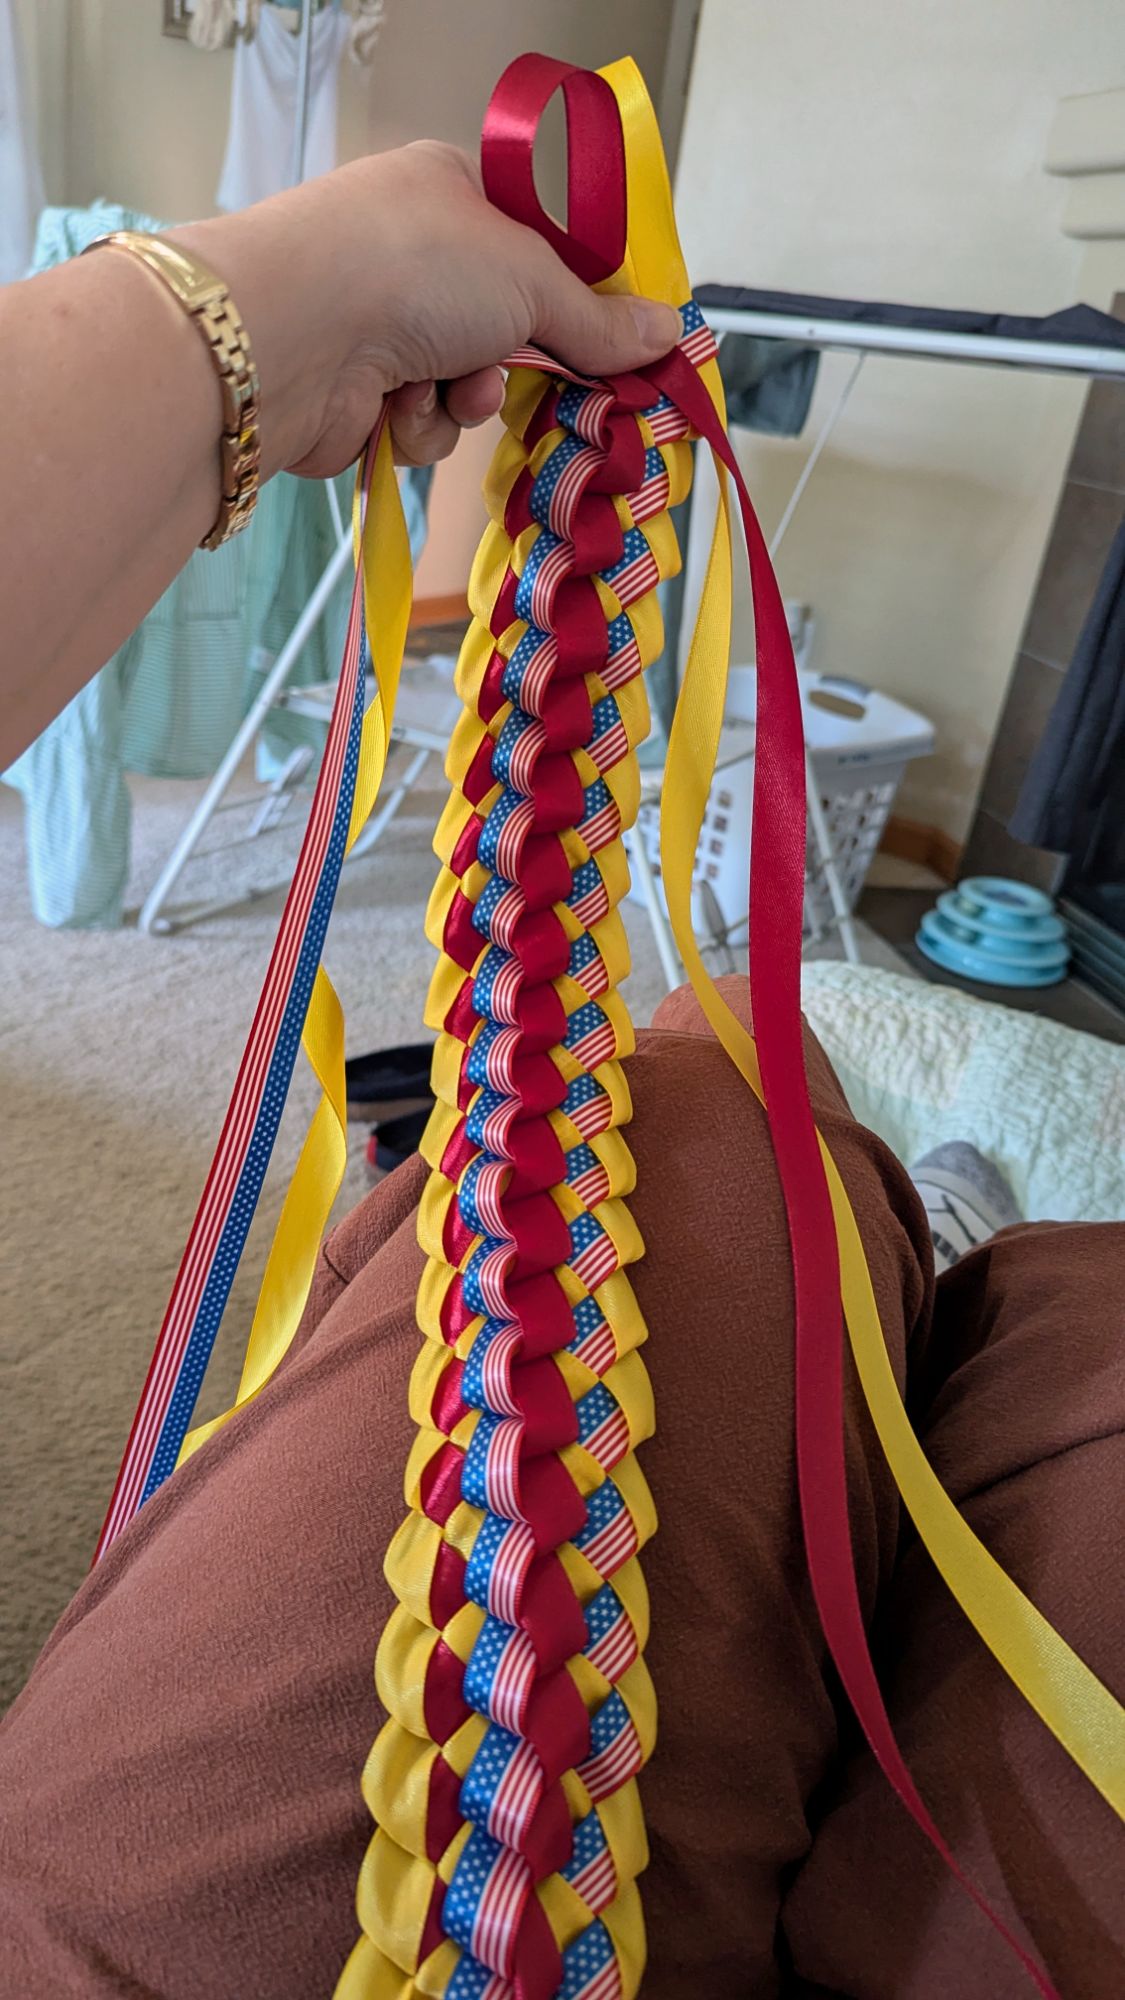
Patriotic Graduation Lei
I made a bunch of music-themed graduation leis in 2024 for my daughter and her band friends, and one of the parents reached out to me this year and asked if I could make one for her graduating daughter, but with American Flag ribbon. I was pleased with how it turned out.
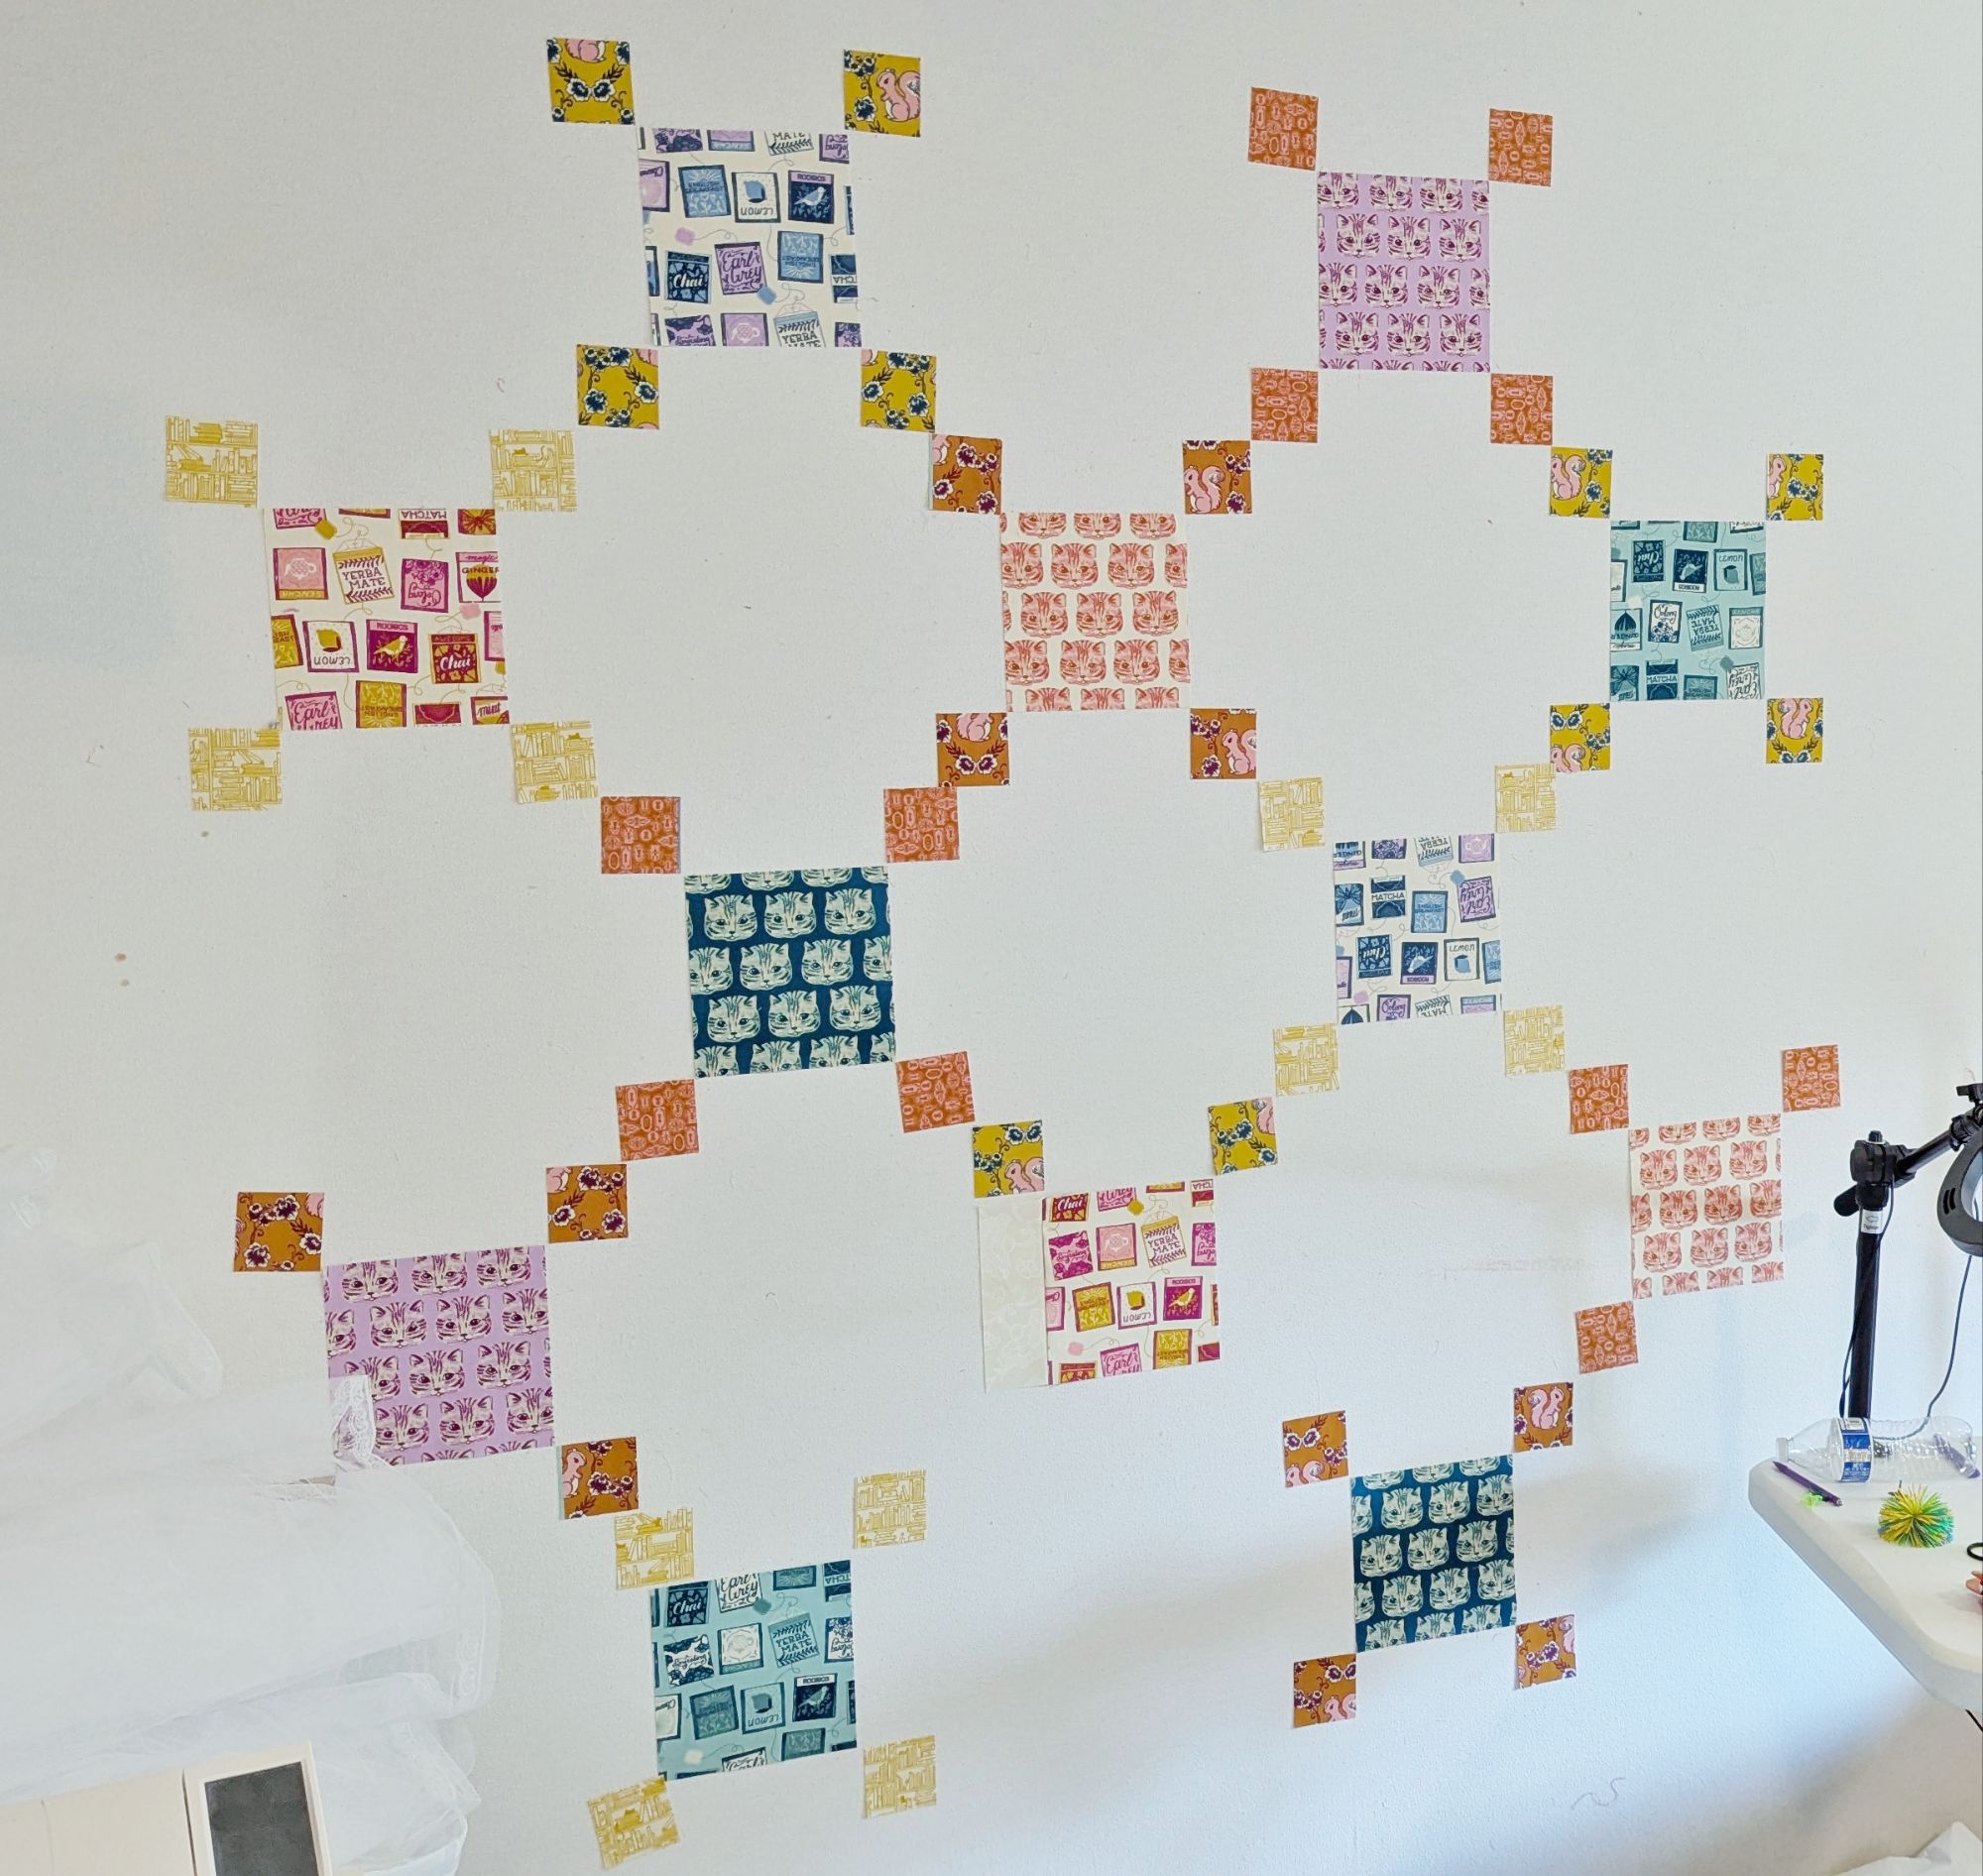
Smitten Quilt
All the individual blocks are pieced! I think I started this during 2020 Lockdown, so it’s been a slow and steady work. I started attaching the blocks into rows this summer, but it will probably take a long while before this quilt is actually done. I tend to only work on it in the summer.
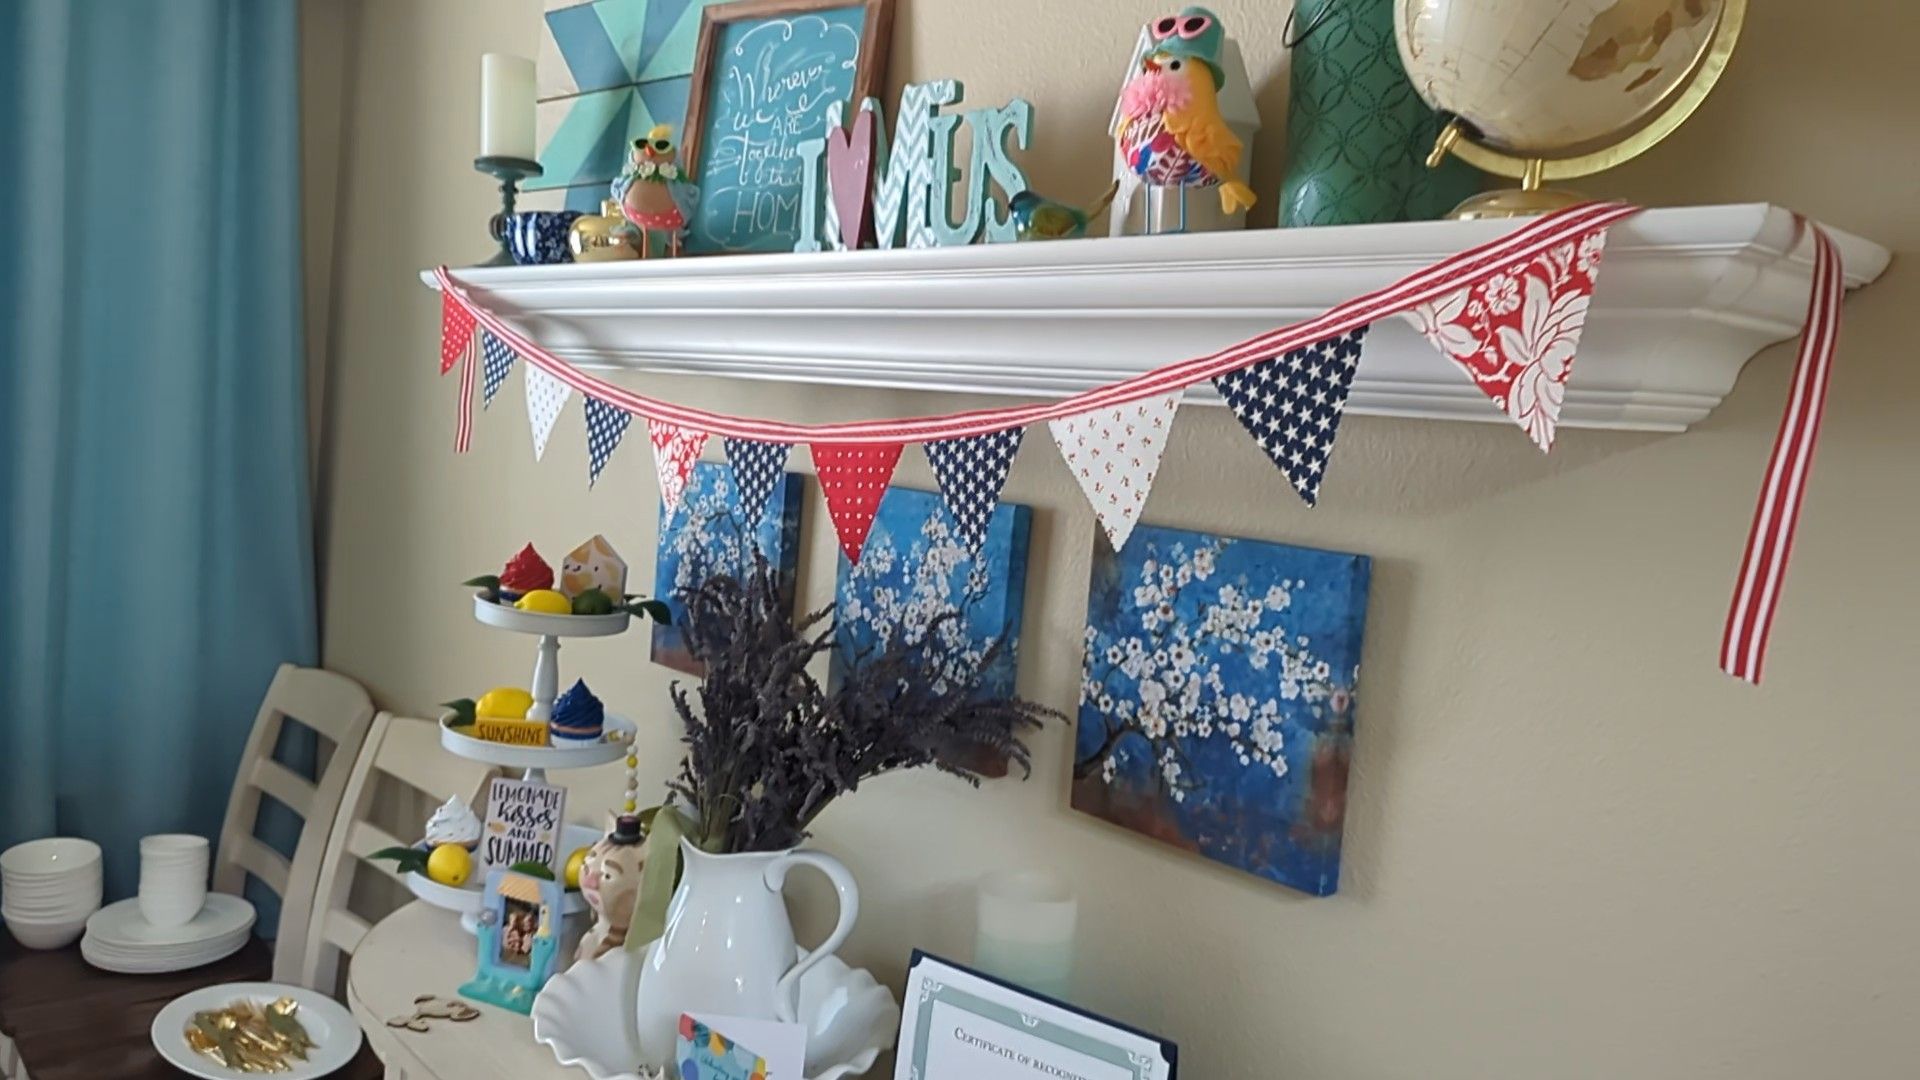
Fourth of July Pennant Banner
I’m realizing, between the patriotic graduation lei, my husband’s Christmas socks, and now this little banner, that I’ve done a lot of Americana-themed stuff this year. I threw this together one day in June because I was decorating for the upcoming holiday and wanted my mantel to be a little cuter, so it happened.
Reading Nook Cottage Quilt
I briefly mentioned this as a possible crafty goal in 2024. I ordered the fabric while I was completing my Master’s degree back in…2023(?), promising myself that I’d make something nice for myself with it once I graduated. Well, I was busy when I graduated and then everything went crazy, so I didn’t get to actually working on it until the summer of 2025. It’s a pattern of my own design, but nothing special; anyone could reverse-engineer it pretty fast. It’s still a work-in-progress; I decided to set it aside so I could resume working on Ren’s Penguin quilt.
Penguin Parade Quilt
This is the quilt that never ends. I really thought 2025 was going to be the year, but alas, it was not. Fingers crossed for 2026!

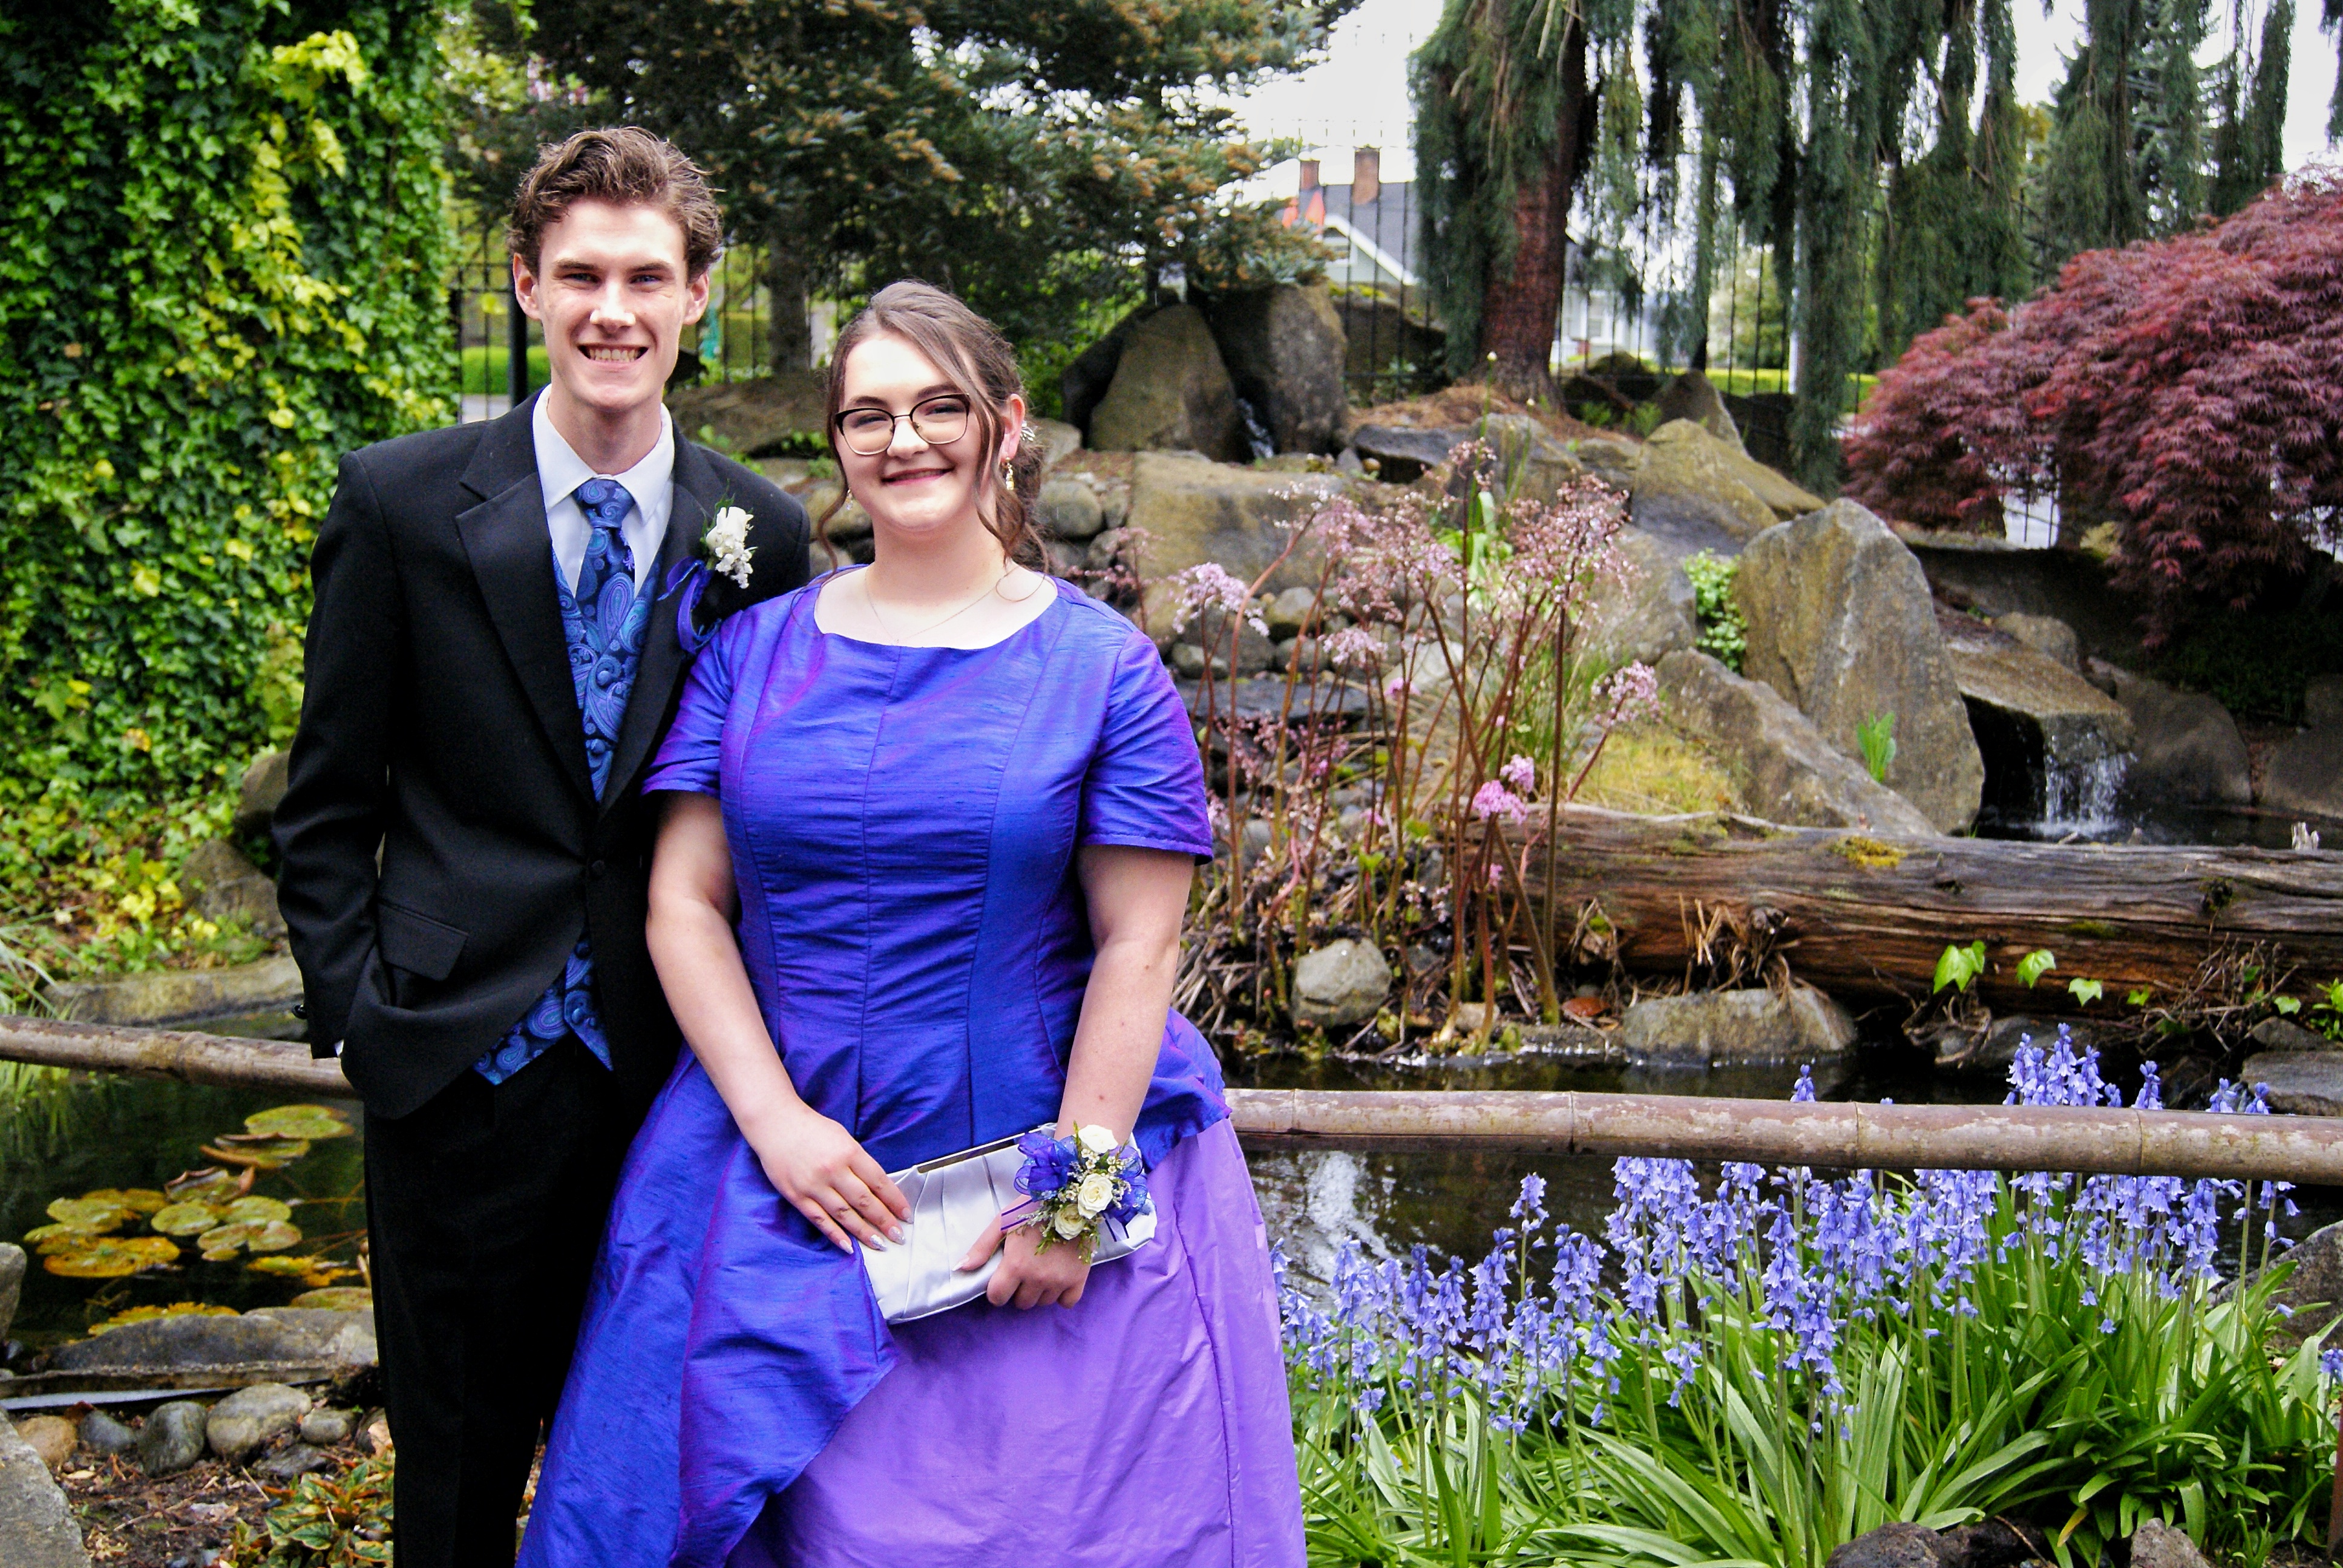
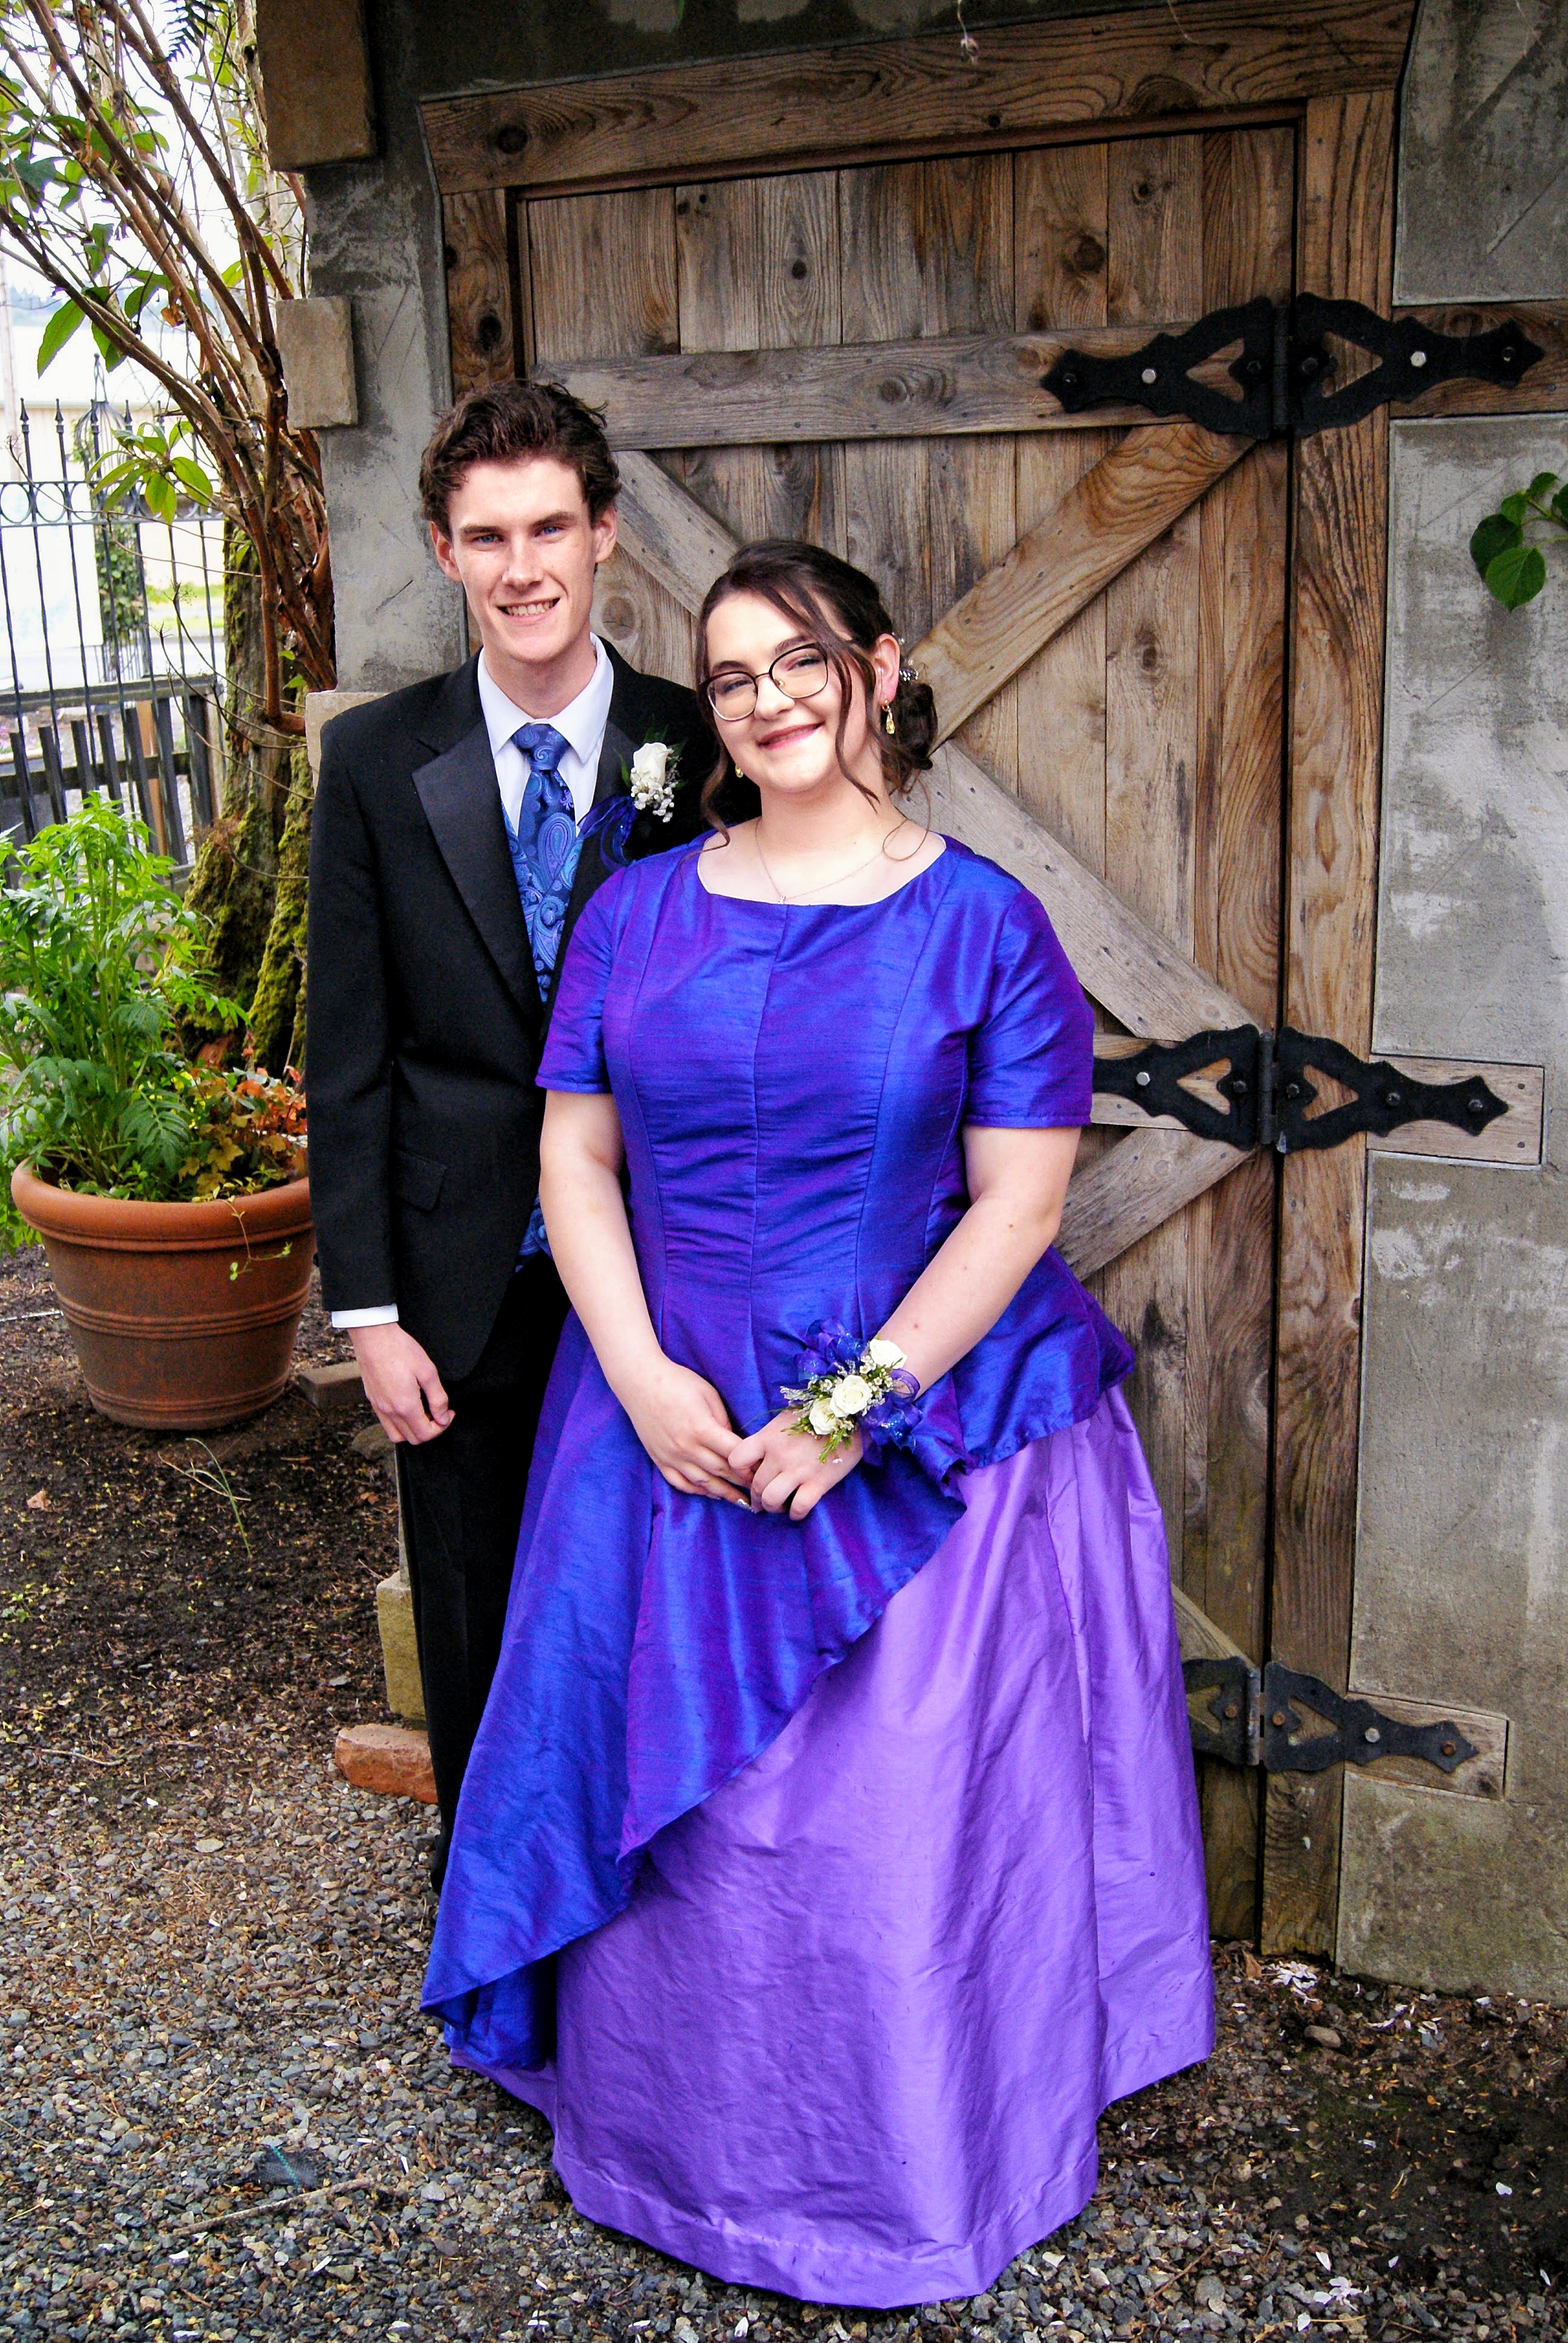
Hemming Rachel’s Homecoming Dress
Such a pretty dress, but I was sick while I hemmed it and when she went off to the dance, so I don’t really have any photos of it.
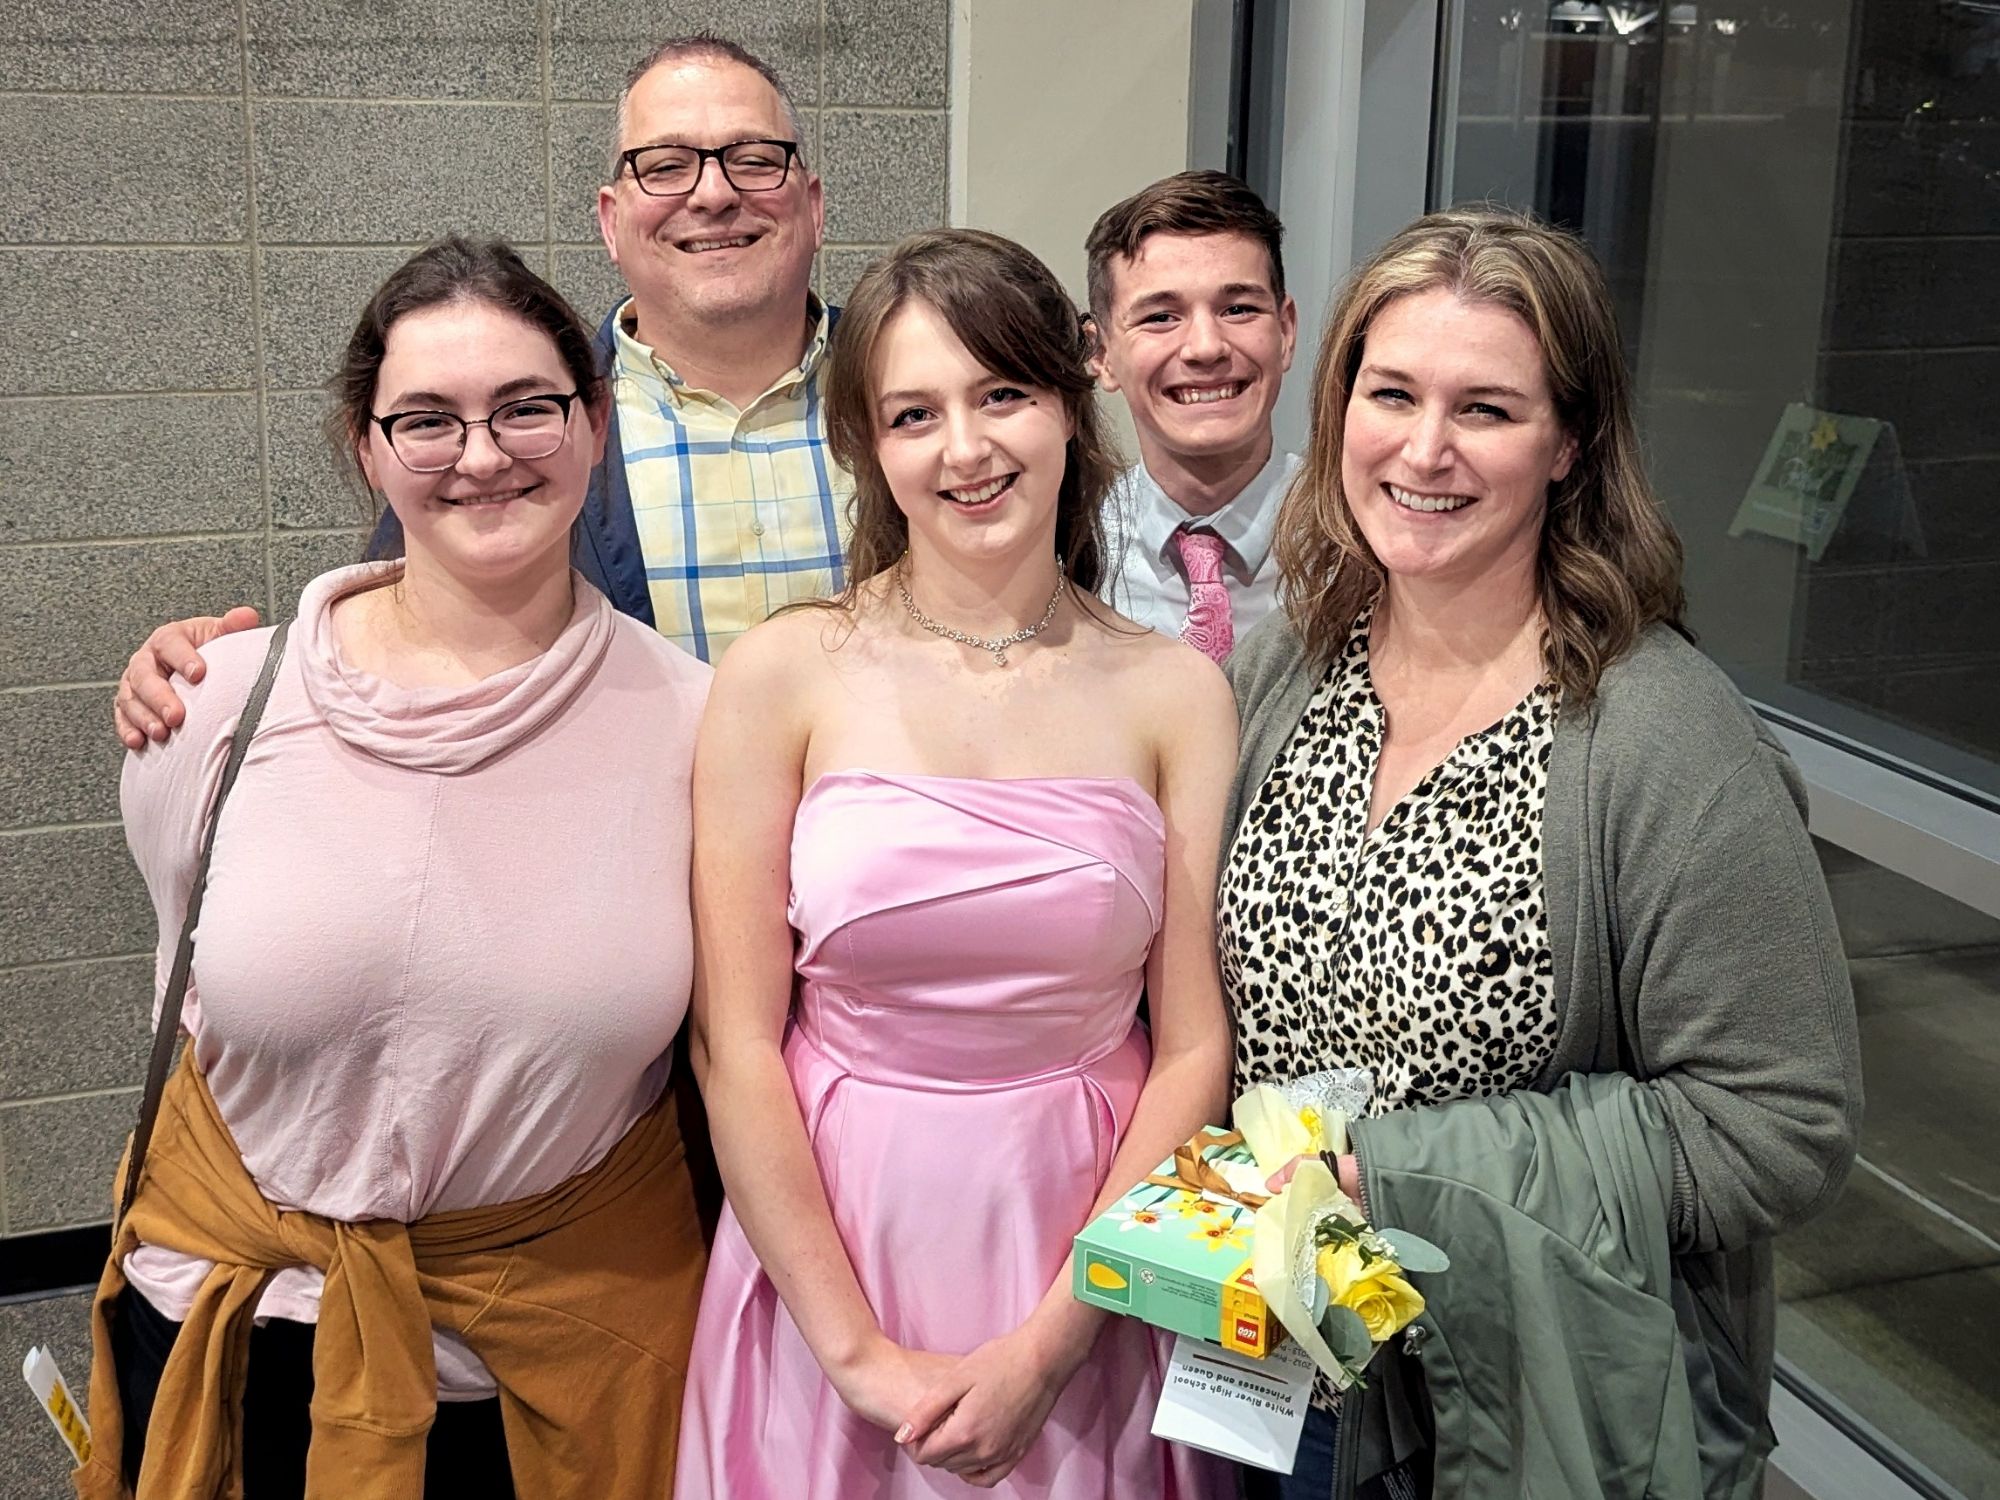
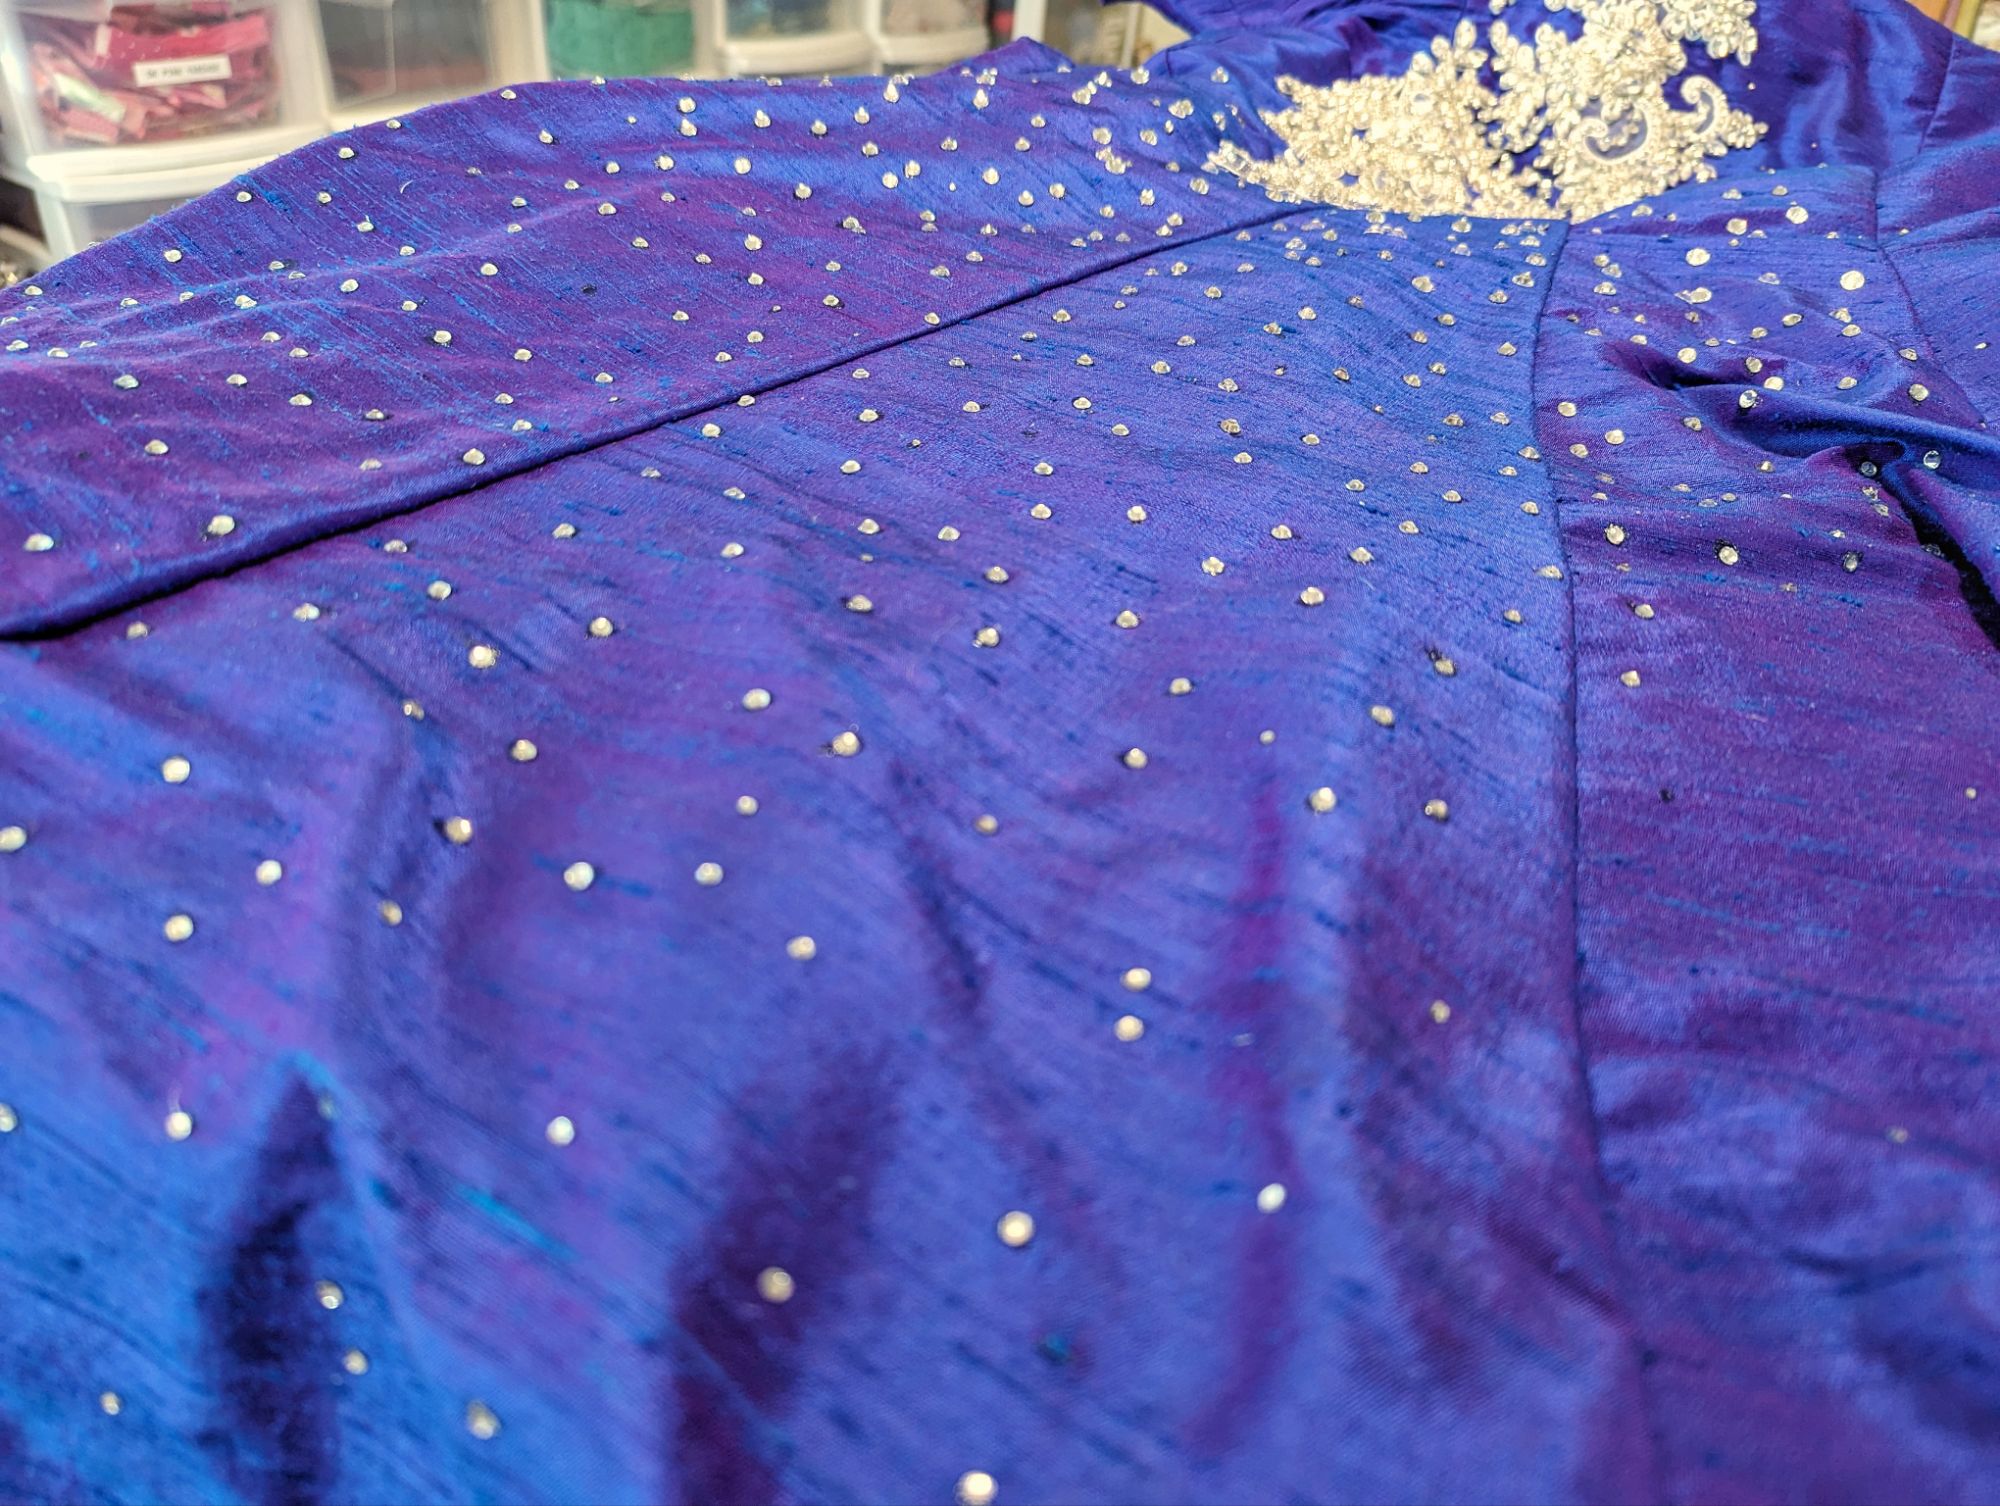
Hemming Rachel’s Daffodil Princess Selection Dress
Oh my gosh, I am sick of hemming formal dresses. I would so much rather make the entire dress than hem a store-bought one. Hemming the dress is the worst part, and Rachel does not enjoy the process of being fitted for a handmade dress, so I no longer get to experience the exciting parts of dressmaking, just the worst parts. Boo. (She did look so pretty in this dress at the Daffodil Princess Selection Ceremony, though! Still proud of her!)
Christmas Alphabet Embroidery Sampler
I really enjoyed working on this. It is FINISHED, but awaiting framing. The frame has even been purchased, but between the Thanksgiving bout of COVID, the Montana funeral chaos and all the schedule upsets that accompanied the Epic Washington State Flooding in December, I haven’t yet gotten to framing it.

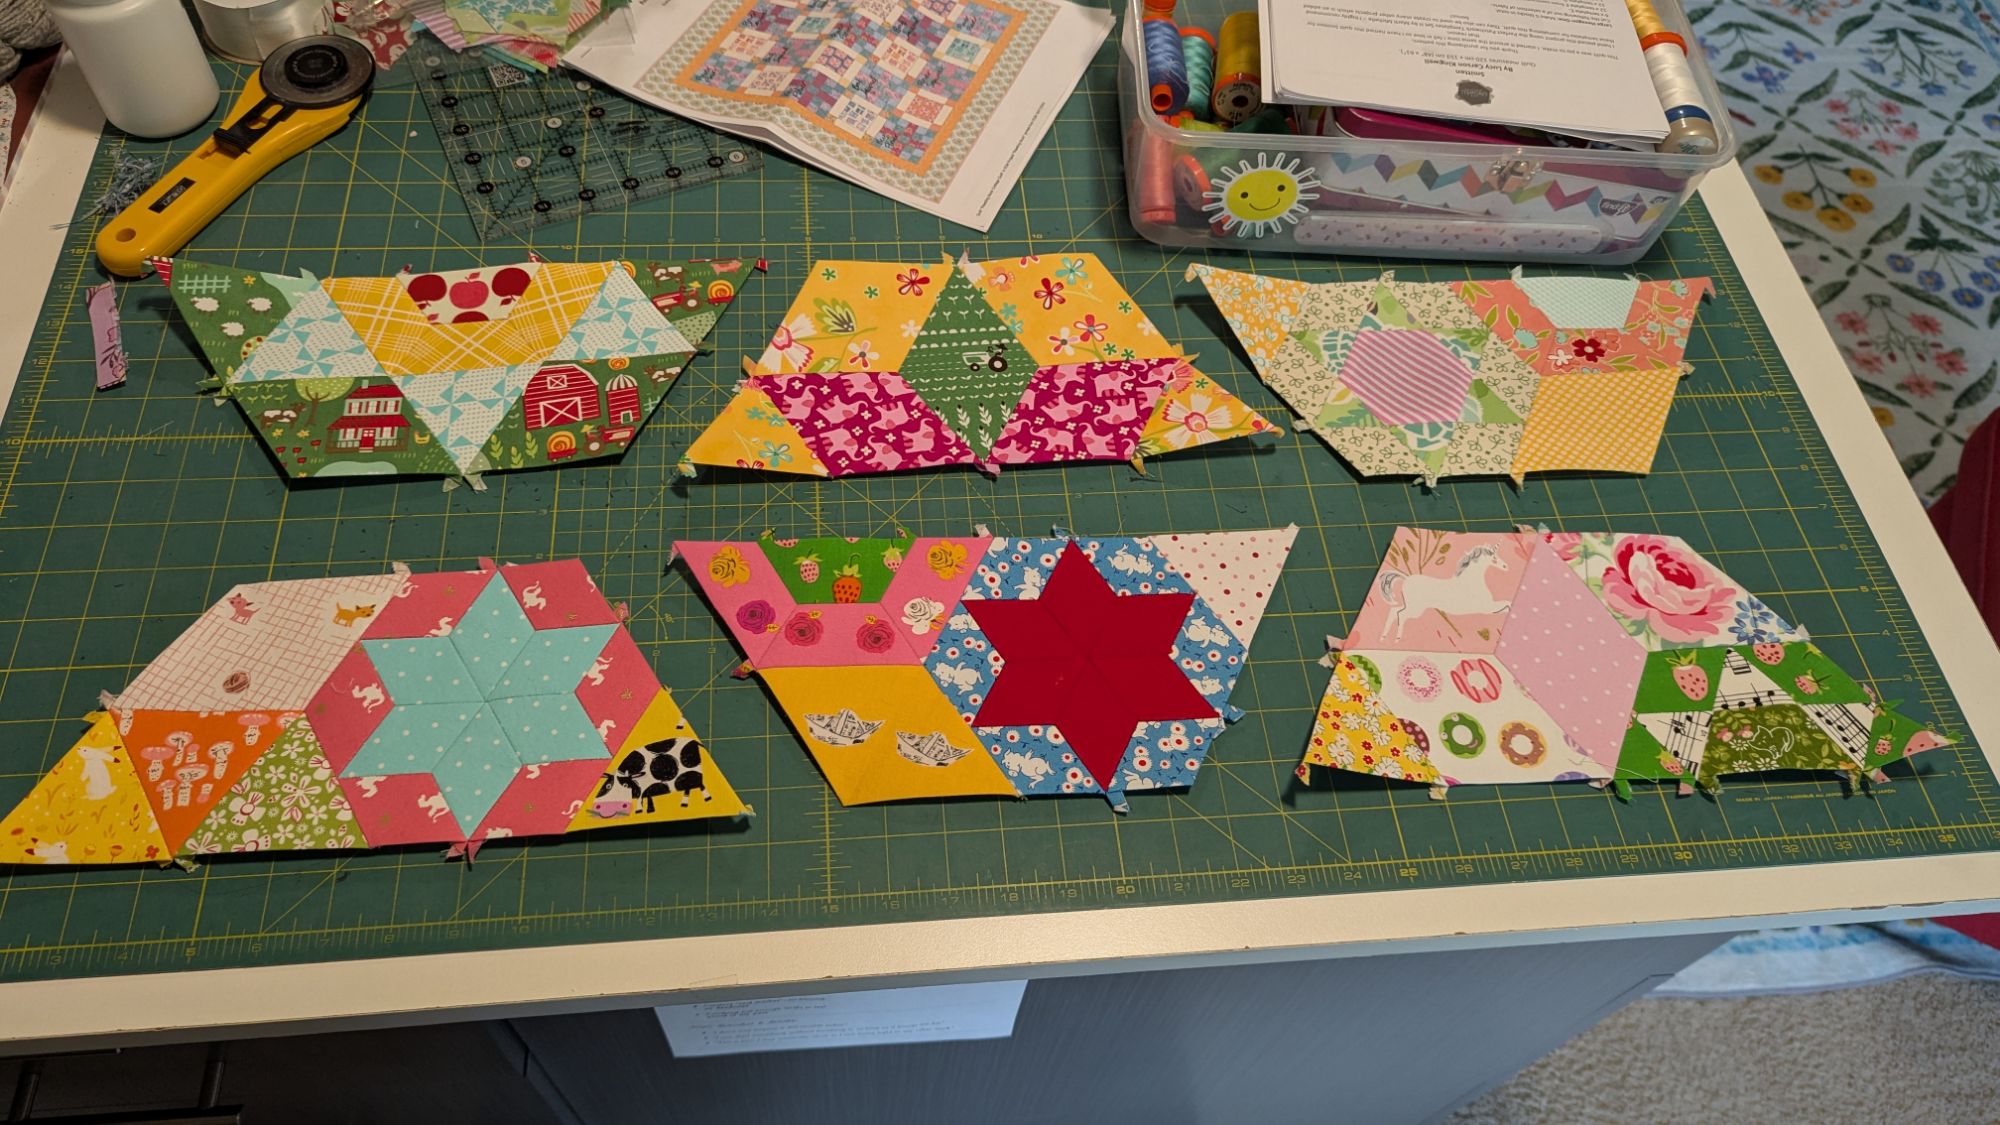
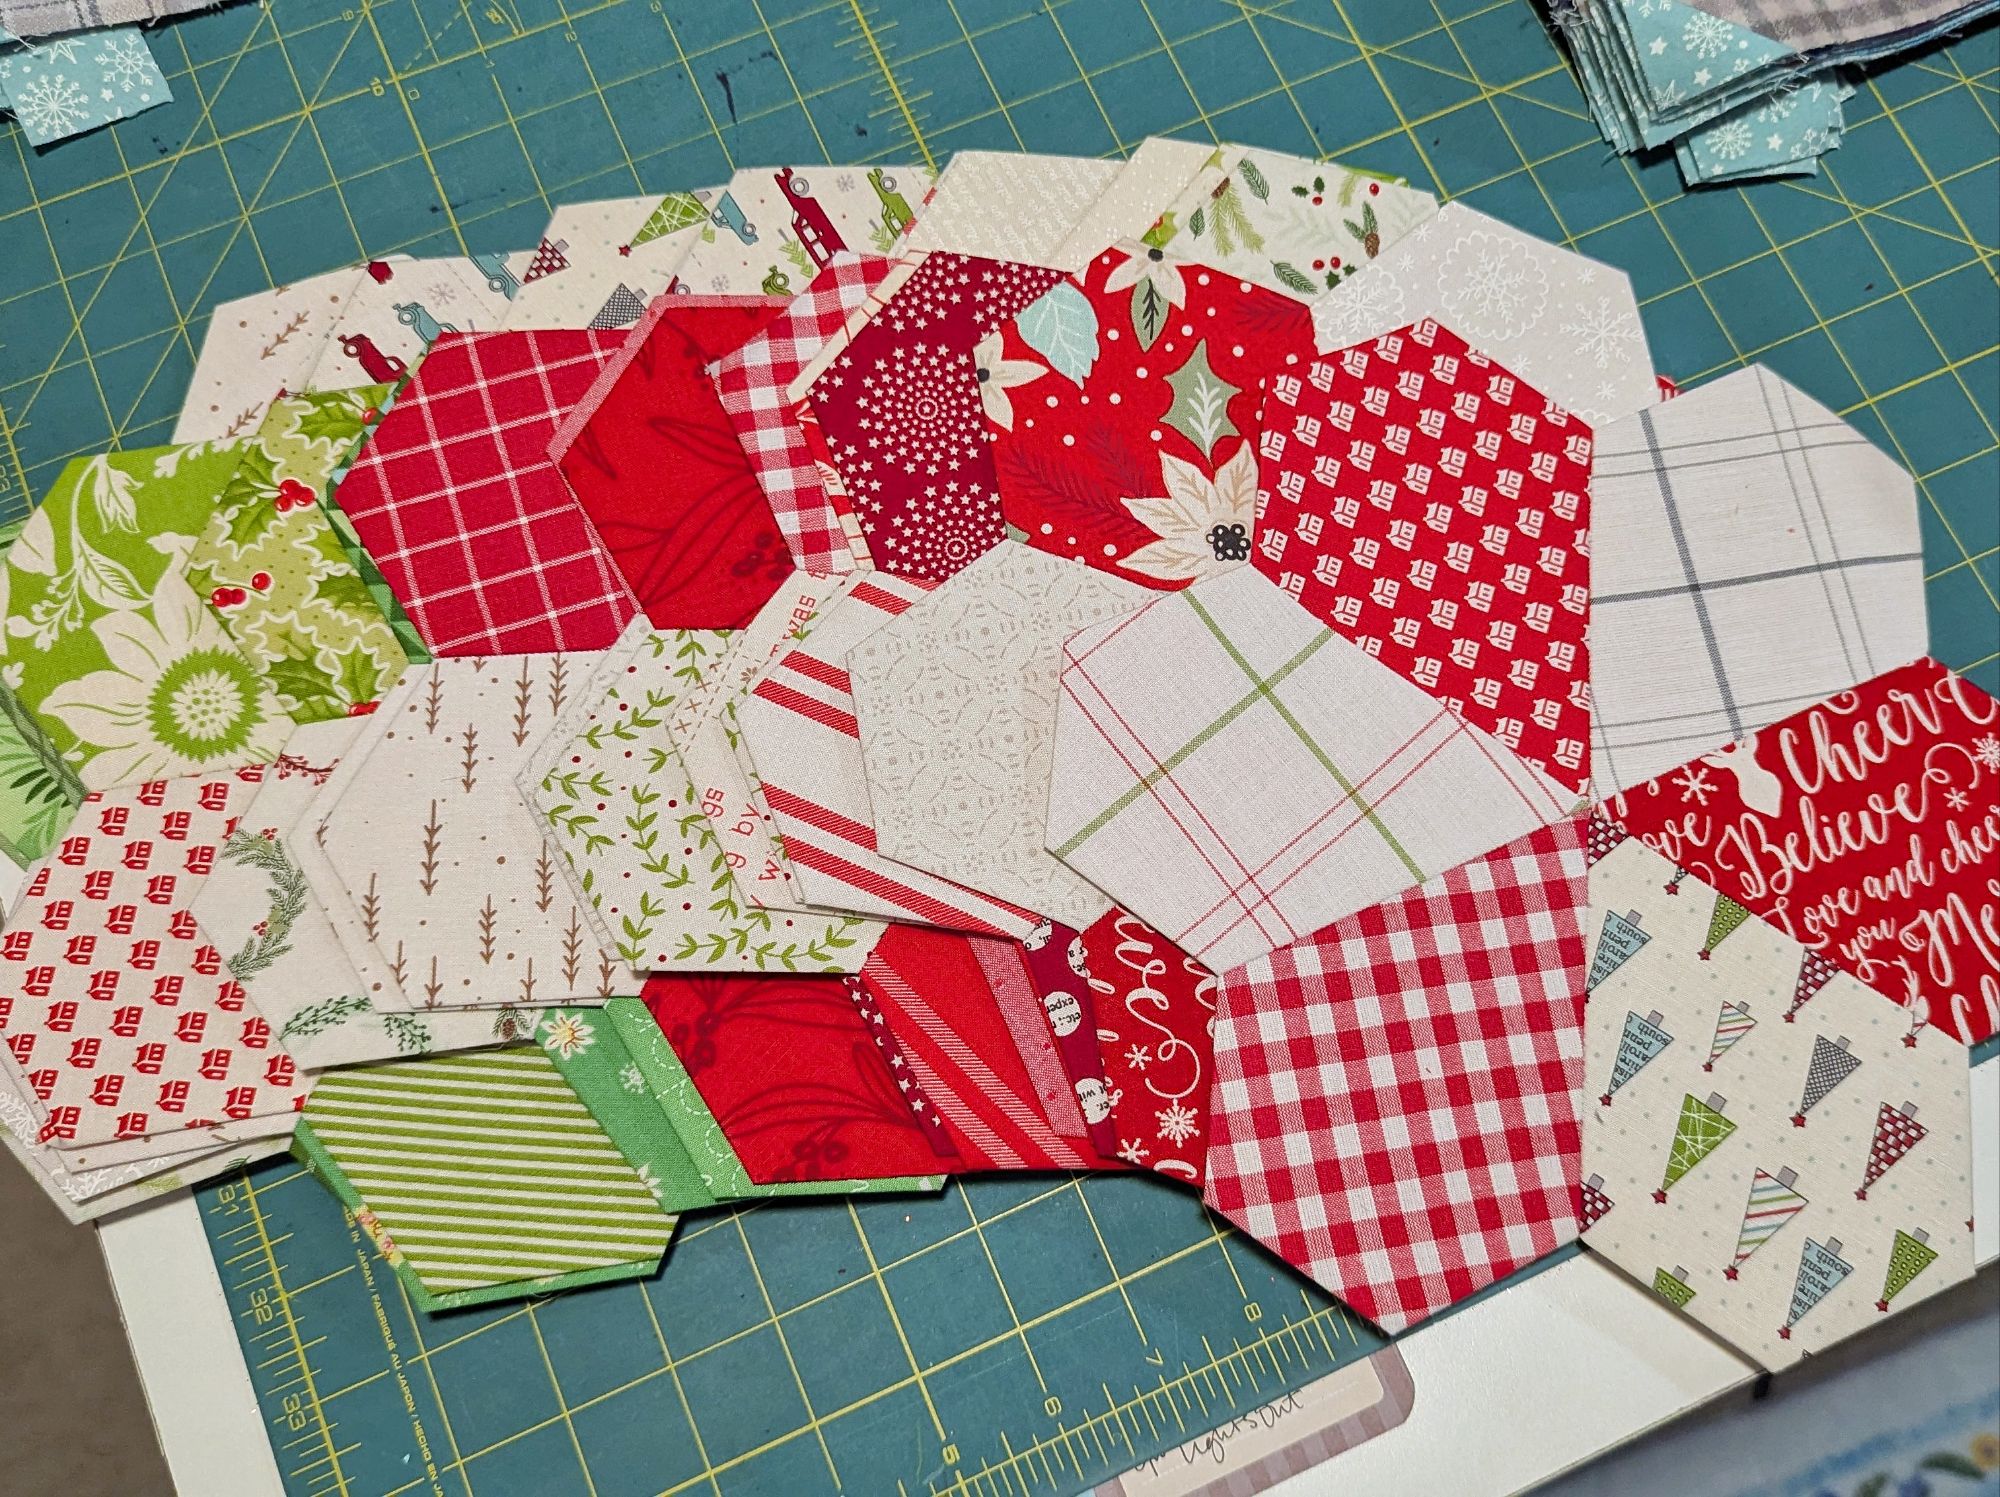
Peppermint Blossoms EPP
I think I’m going to scale down this project. I’m tired of it. It’s cute-ish, but I’m just not seeing a vision for it anymore.
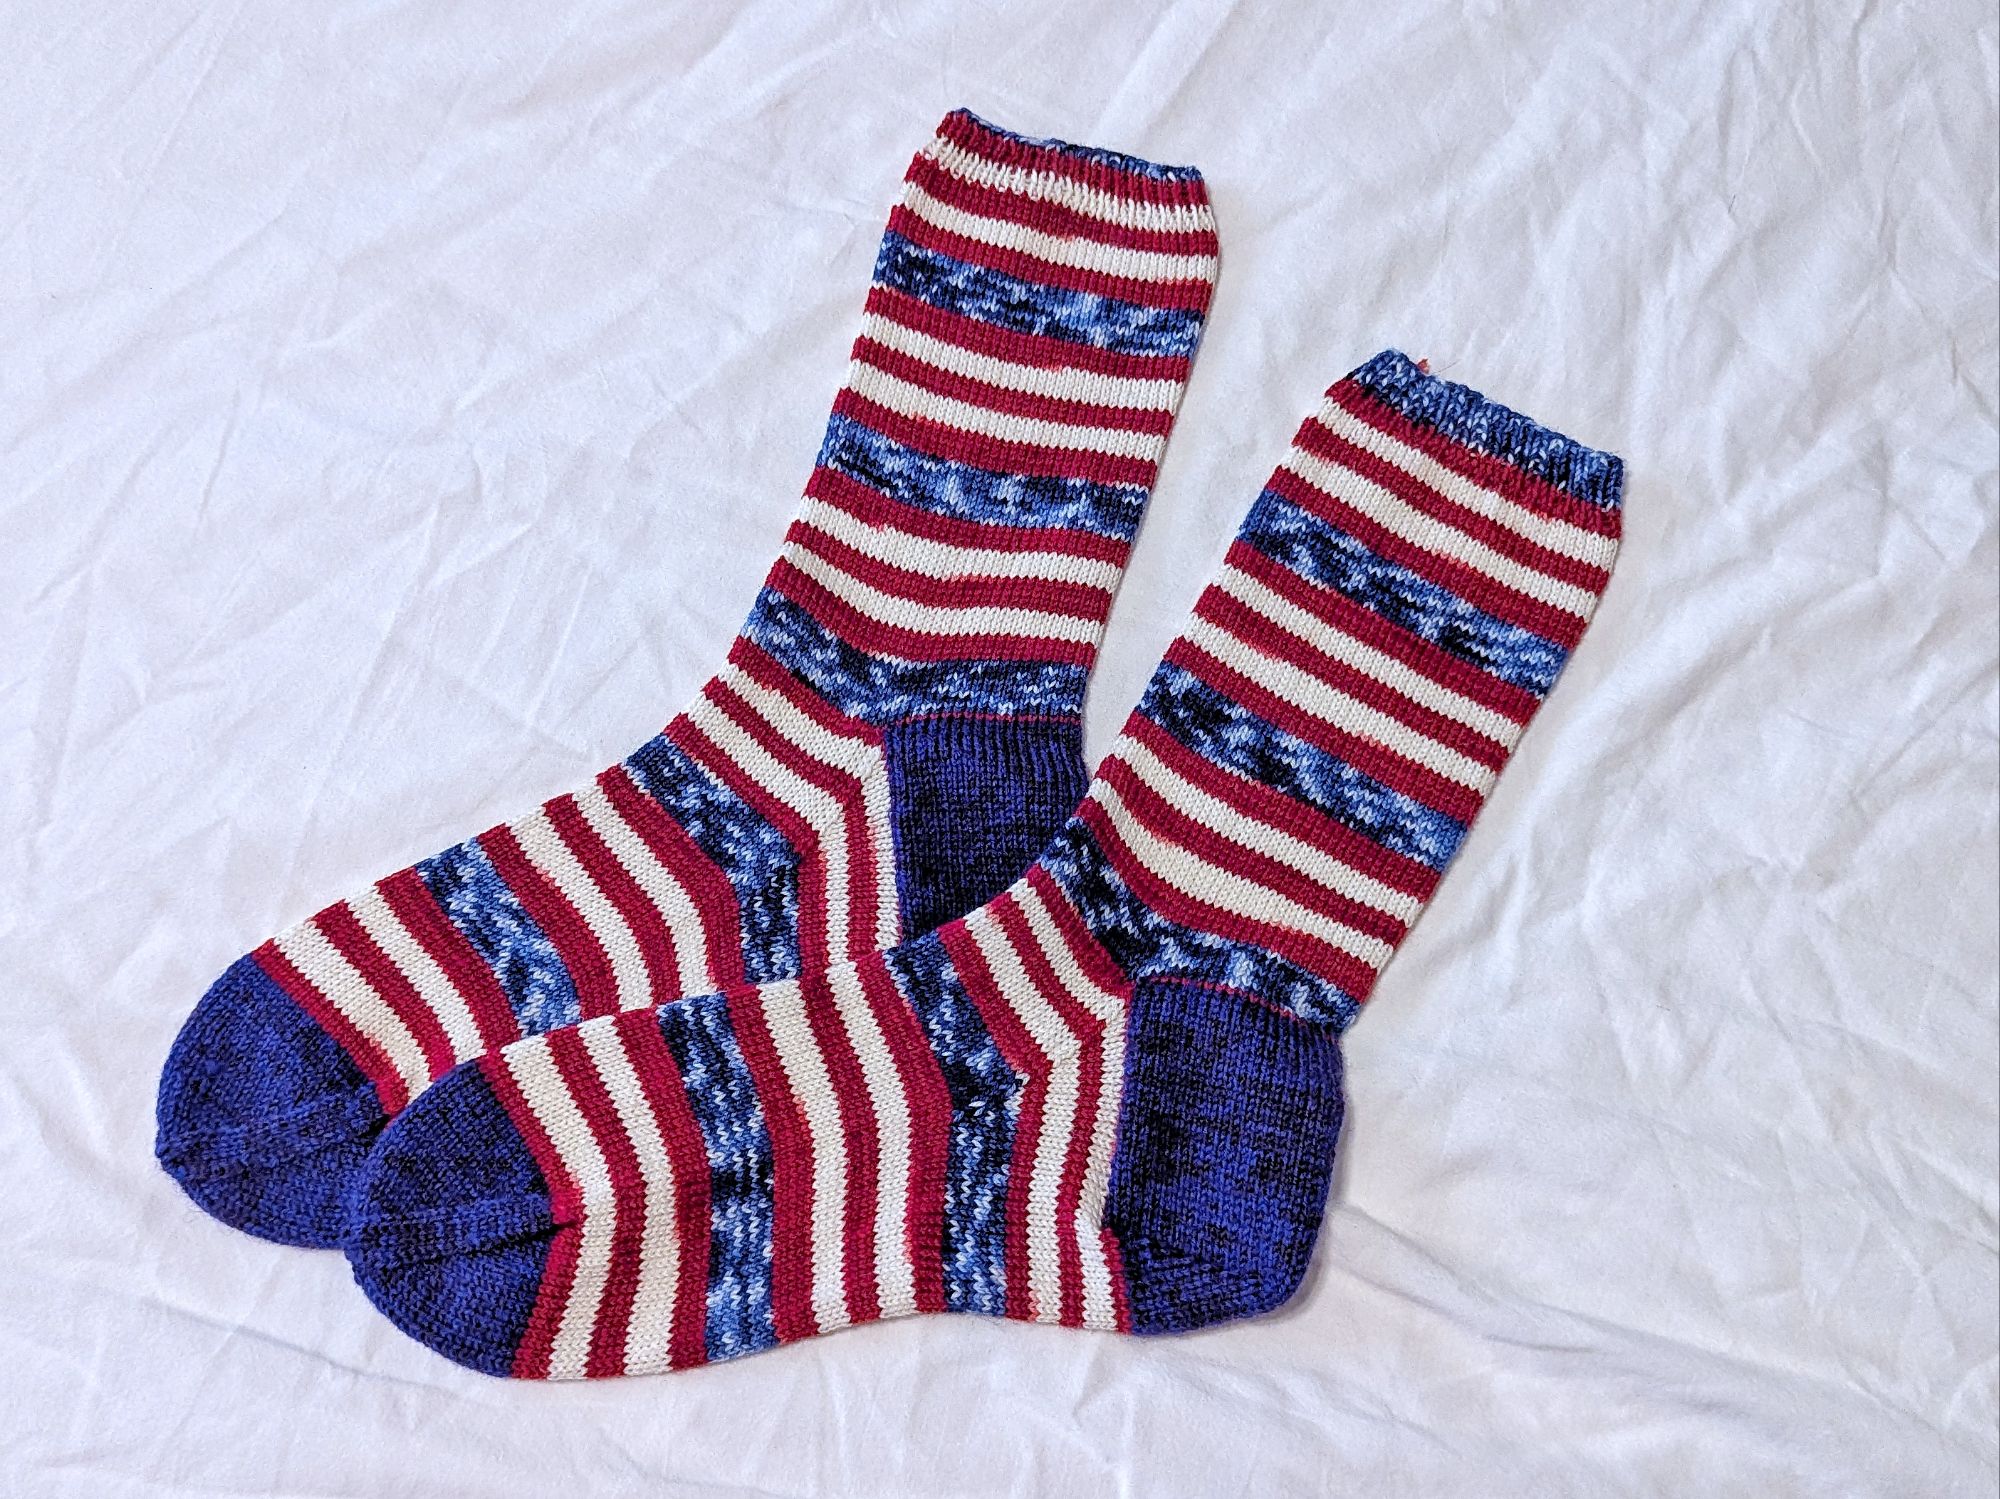
Hubby’s Christmas Gift Socks: American Flag Socks
They turned out pretty amazing. He loves them! Such a fun yarn colorway, and I’m really enjoying throwing contrasting heels and toes onto self-striping yarn socks. If only I could remember to also do the cuff/ribbing in the contrasting color as well! It makes my heart happy to see another set of socks in his growing pile of gifted Christmas socks.
Knitted Christmas Ornaments
I started both the Wee Woolly Sheep and an Arne & Carlos Christmas Ball, but neither are complete due to the craziness of December. Hopefully I’ll pick them up again and finish them by Christmas 2026.


Looking Ahead to 2026
I am really hoping to do more creating in 2026. 2025 was a tough year that was spent in a quasi-paralysis as I recovered from the complications of my 2024 surgery, the trauma of the stalker, and adjusting to some big life changes. I have high hopes for 2026 because, really, things should definitely trend upwards after all the weird upsets we’ve experienced recently. The law of averages works that way, right?
So, hopefully, part of the reason that 2026 will be better than 2025 is that I’ll do more creating in the craft room. Fingers crossed!


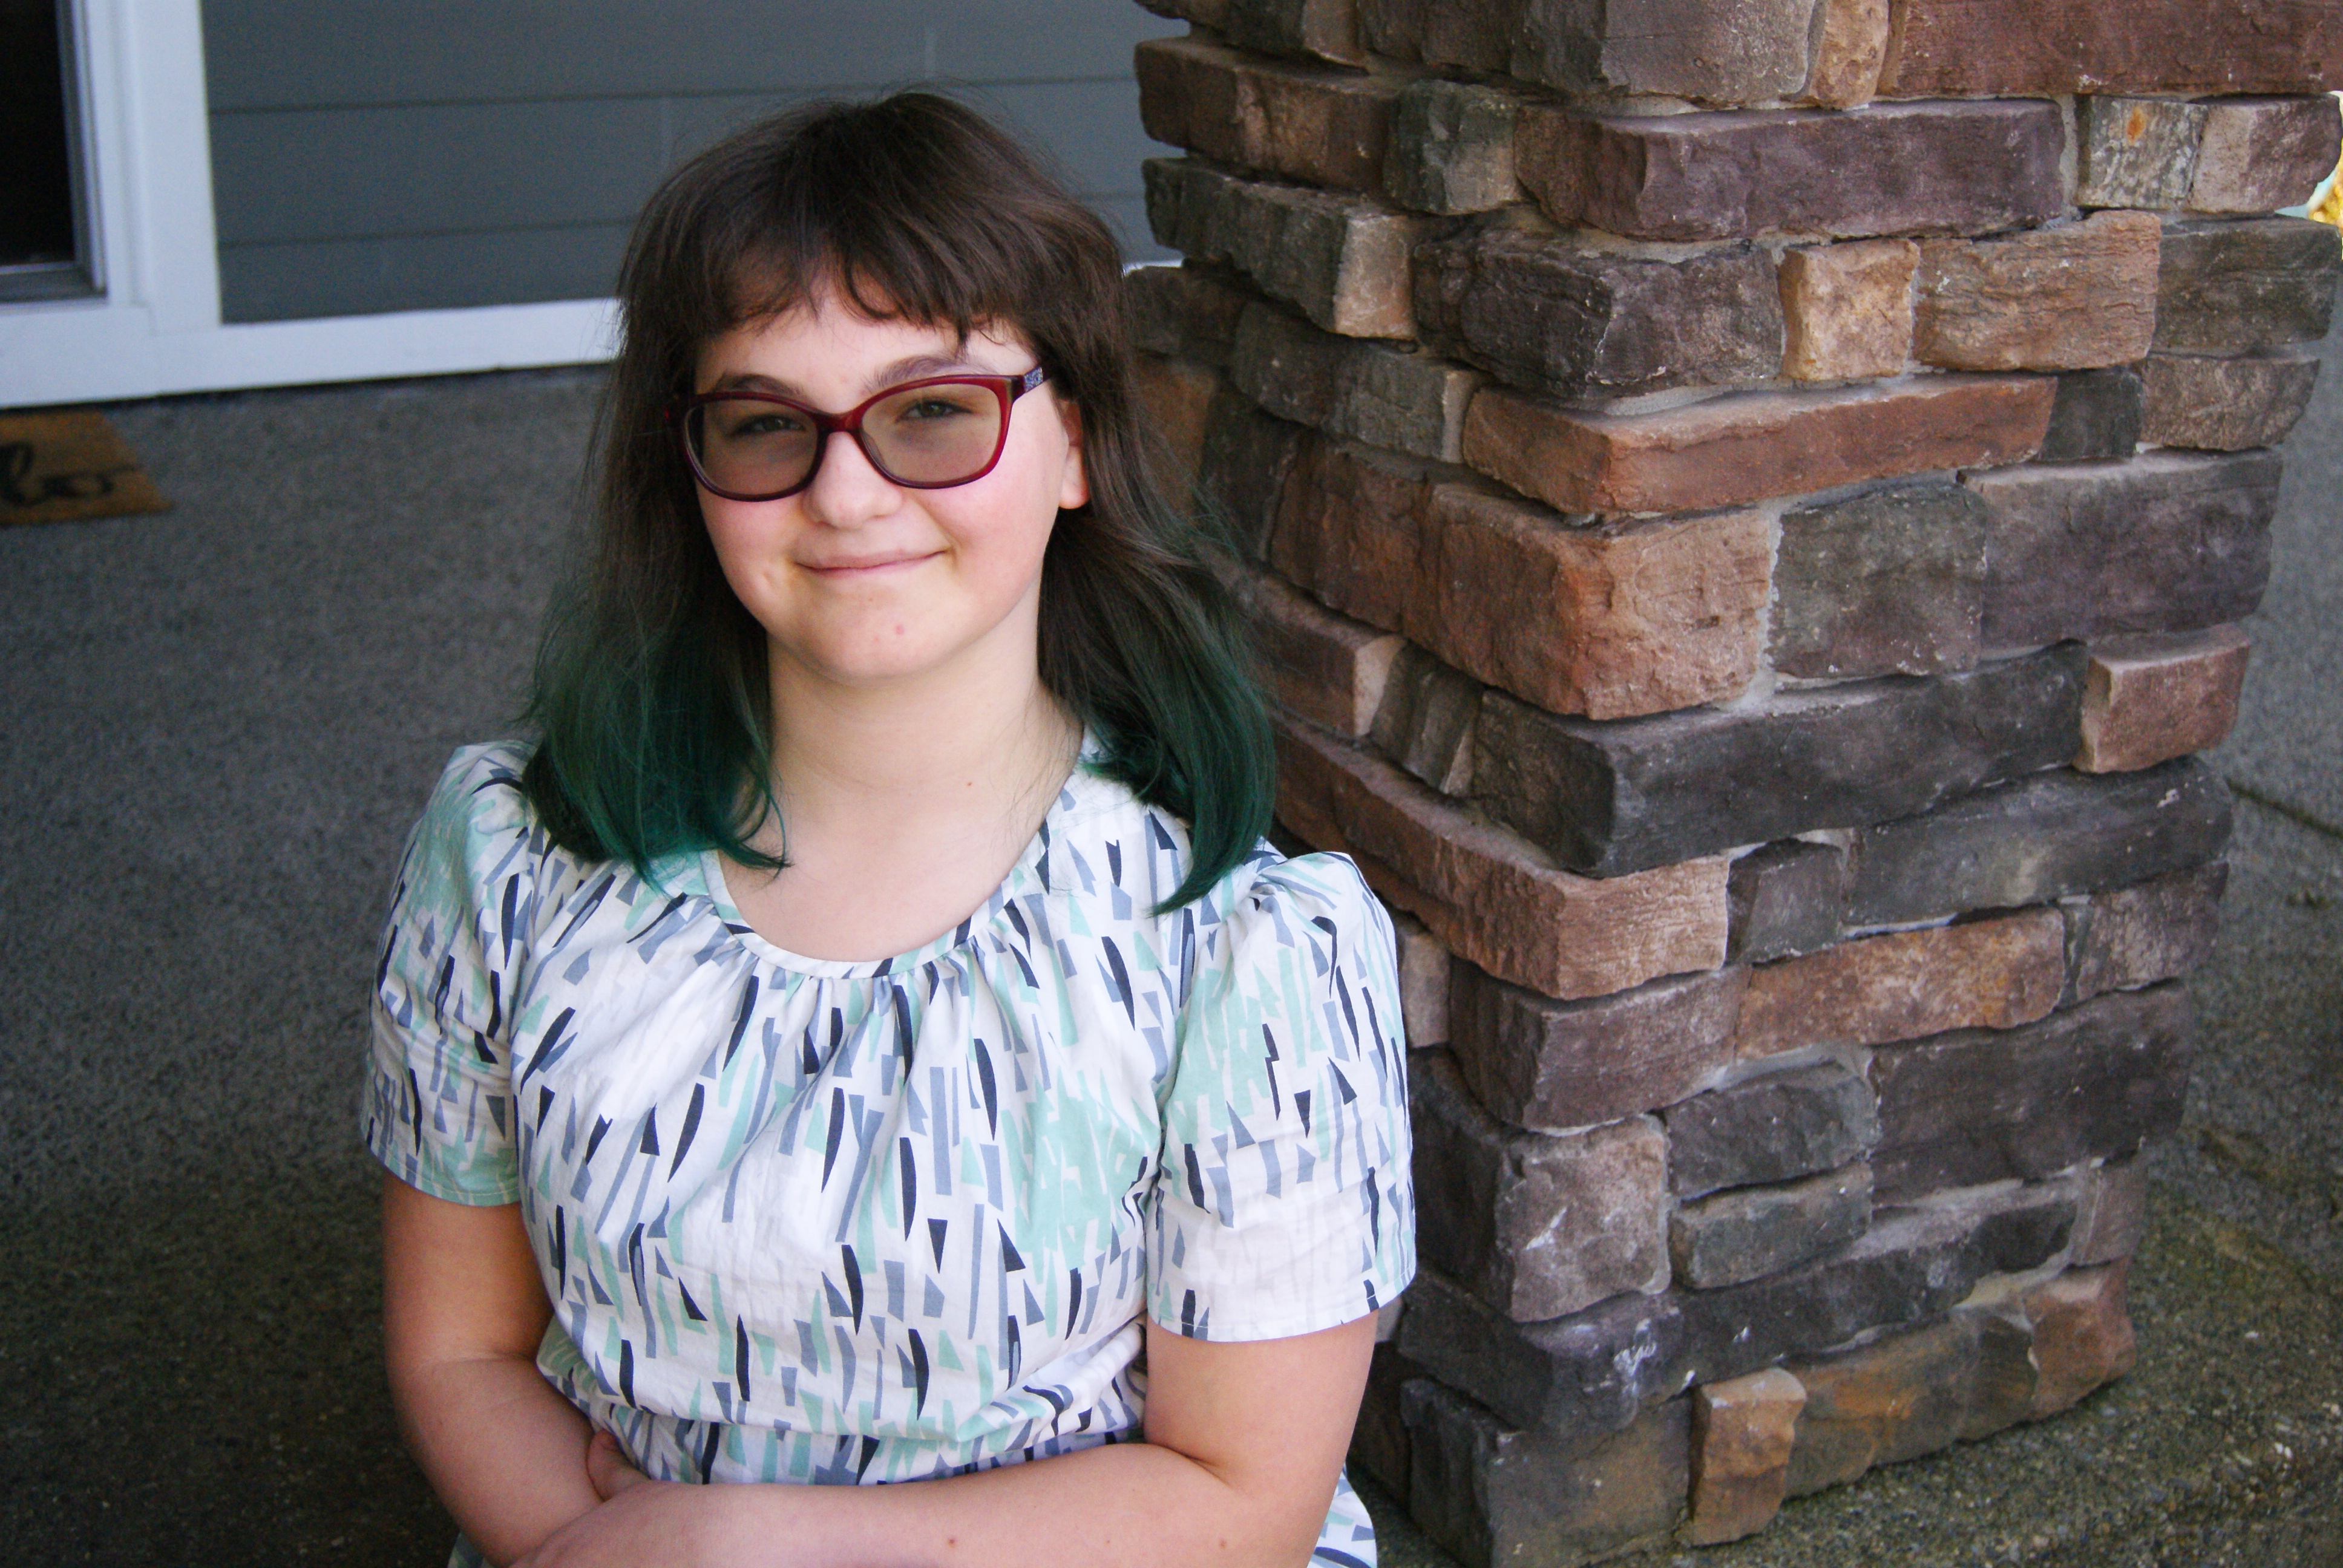


 Because I was waiting to see if I’d get a package from Jaftex today, I didn’t want to start cutting out a dress or anything big, so I whipped up a couple of hair scarves from a pattern I bought when I went to Sew Expo a couple of weeks ago. (And I have no idea why my hair looks so short in that photo, but it’s definitely making me think that a chop-off would look super cute!)
 I did grit my teeth and make my youngest daughter a Little Red Riding Hood costume for Halloween because I did have time for it, and her little brother decided to be a wolf so he could match her, and I think they were adorable! Her costume was an exercise in frustration–I could not locate the pattern in her size ANYWHERE. And my best friend rode in for the rescue and bought the pattern* at her local JoAnn Store, not realizing that it came in adult OR child size, and sent me the adult size. (Oh gosh, we laughed…) So the costume ended up being the Adult Small skirt, minus five inches around the waist; a plain white t-shirt with aspects of the original costume appliqued onto the shirt; and I tracked down a different pattern** for the cape/hood. She was so pleased with it all, and totally didn’t care that it was a crazy hodge-podge costume. A woman stopped me at the school Halloween party to liberally compliment me on the costume, so I’m pretty pleased with the experiment. (And totally want to make more things edged with eyelet lace! Such a sweet look!)
 And right now I am eyeballs-deep in making linen napkins for my Thanksgiving table because I’ve always wanted linen napkins and I have no crafty deadlines on my plate at the moment. It’s been so. much. fun. researching hemstitching and heirloom sewing, and oh my goodness, do I love me some beautiful heirloom sewing. So much drooling.