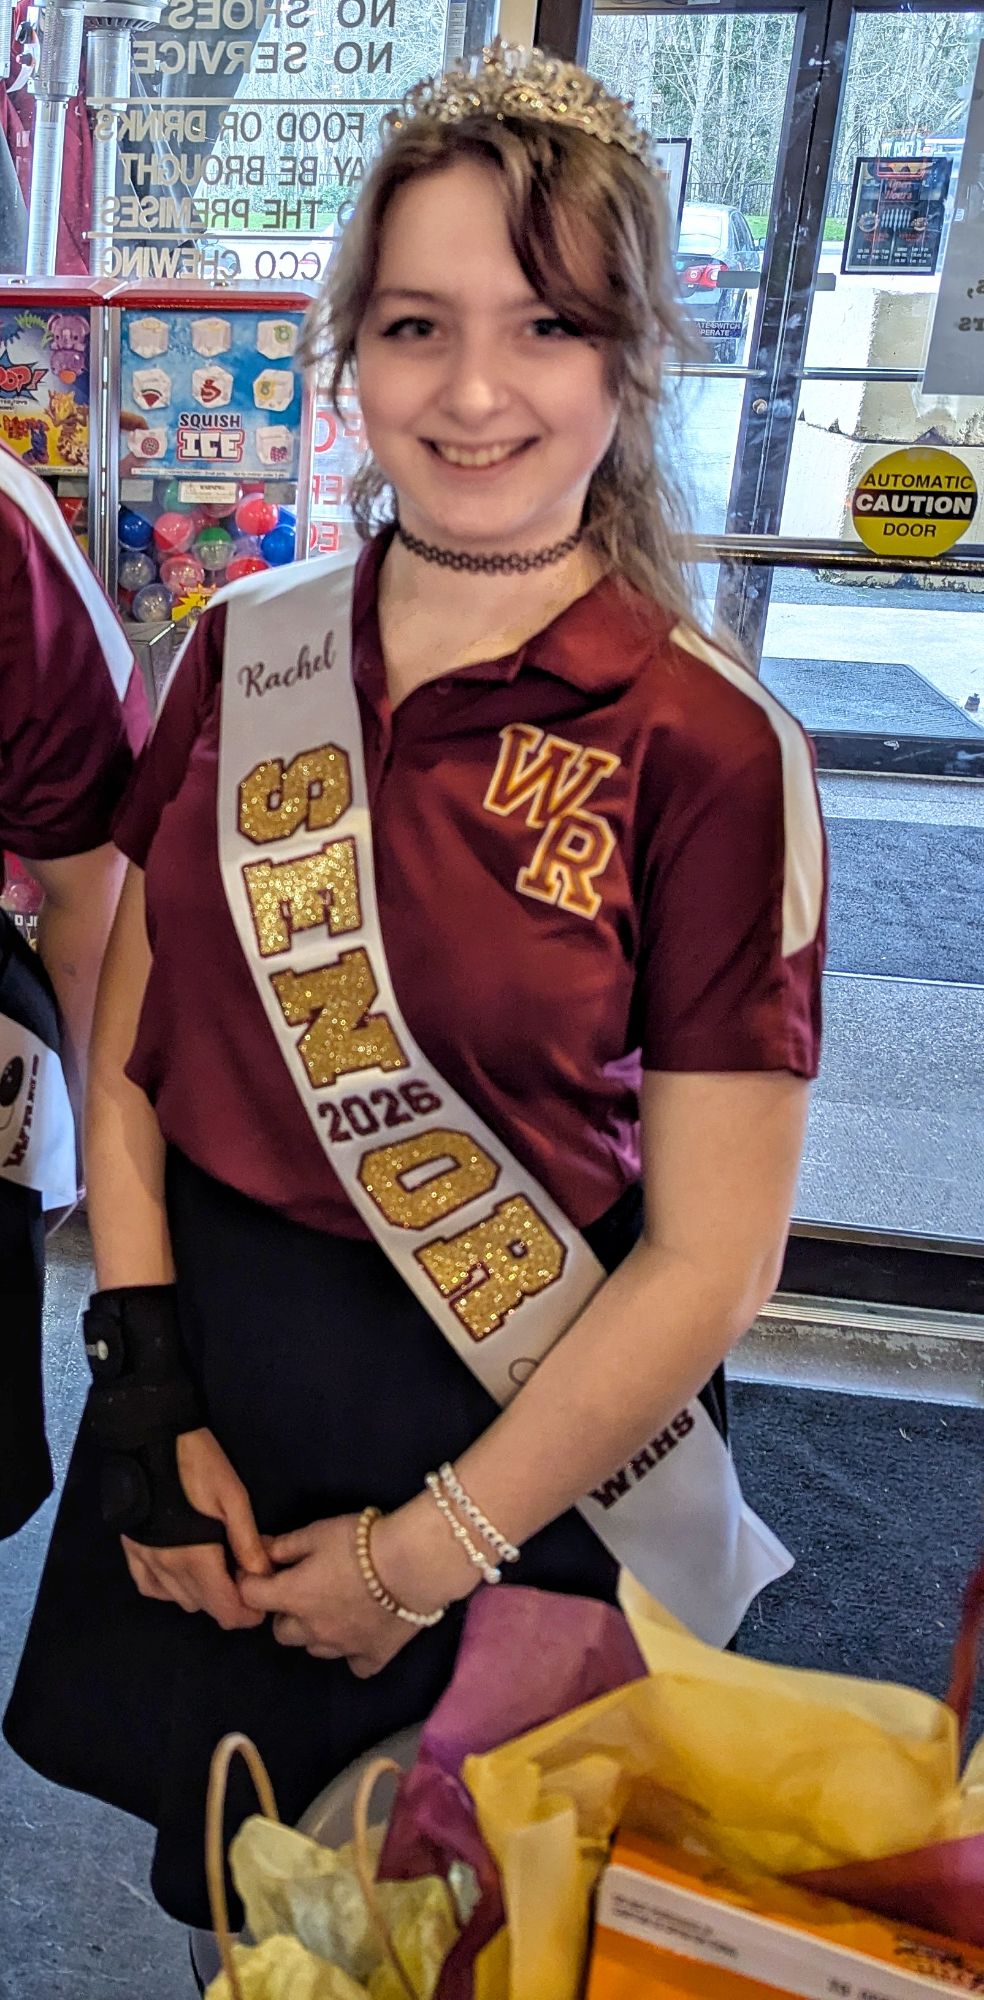
I’ve been busy in the craft room preparing for Rachel’s Senior Night for bowling. There were two seniors on the team this year, so I was able to do a little bit of extra special stuff because I only had to produce two of each thing. Rachel is such a princess girly-girl who likes to sparkle, so I decided to just run with it and hit ‘em with the full princess treatment for Senior Night: Tiaras, sashes, and everything personalized and sparkly!
I’m not a regular user of my Silhouette cutter so I always feel like I’m discovering how to even use the thing beyond its most basic of functions, but I saw some really cute examples of senior sashes on the internet and decided to give it my best try. Now I can proudly say I understand what “offset cutting” is and how to apply it! I love how the sashes turned out!
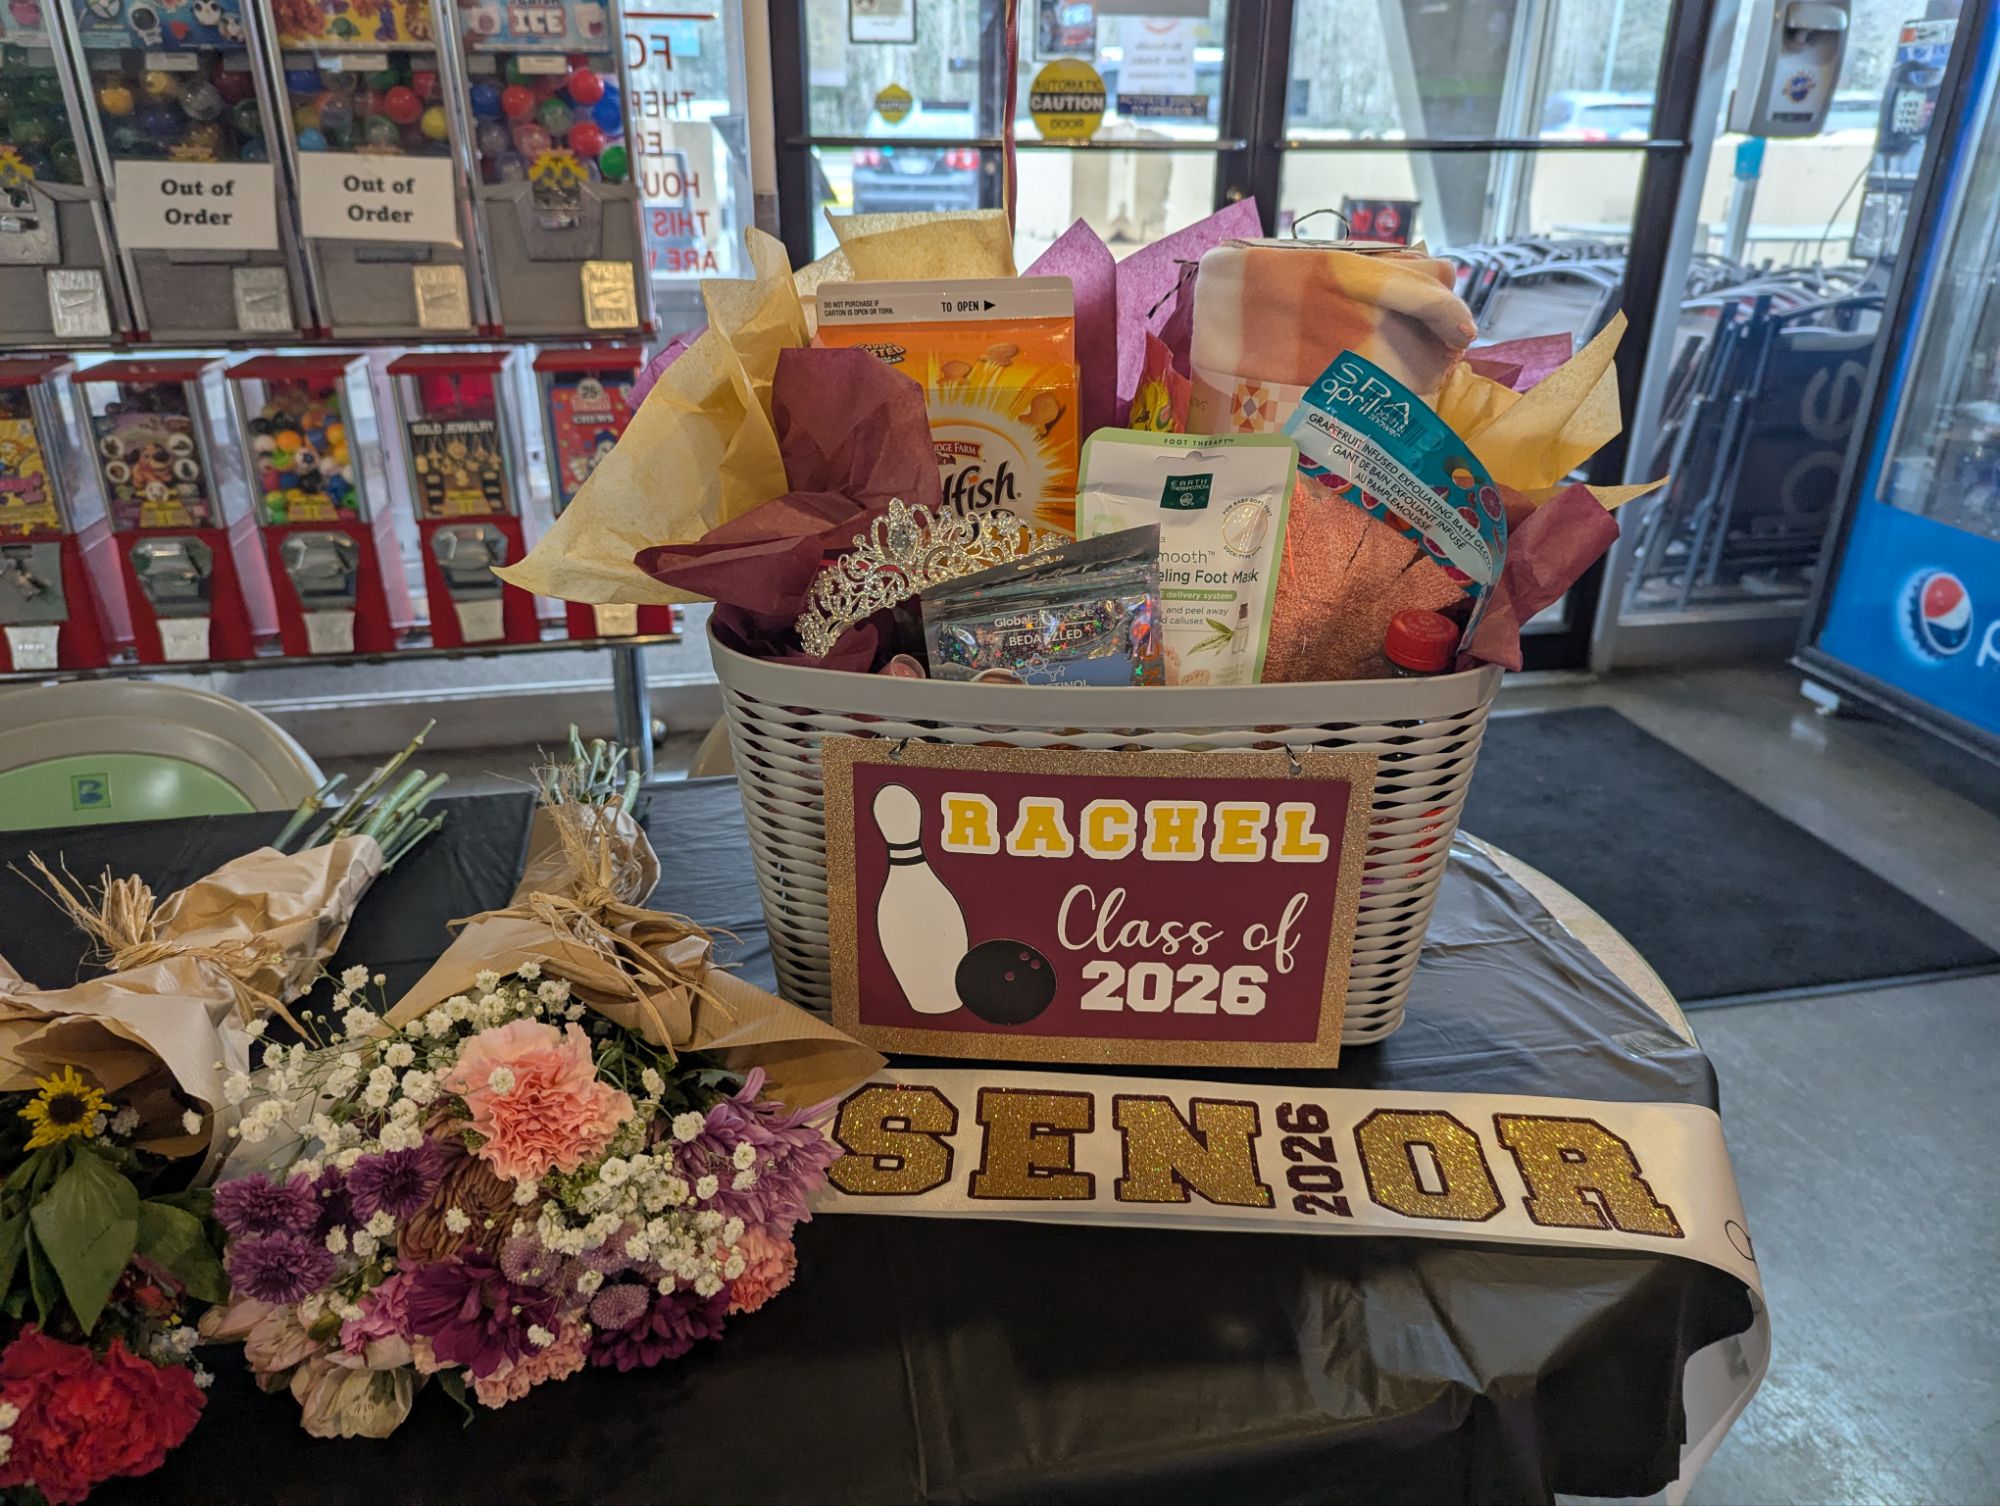
I also put the Silhouette cutter to use for the tags for the signed bowling pins and the name plates for the gift baskets.
The mom of the other senior supplied the flowers and balloons and it all looked so, so cute!
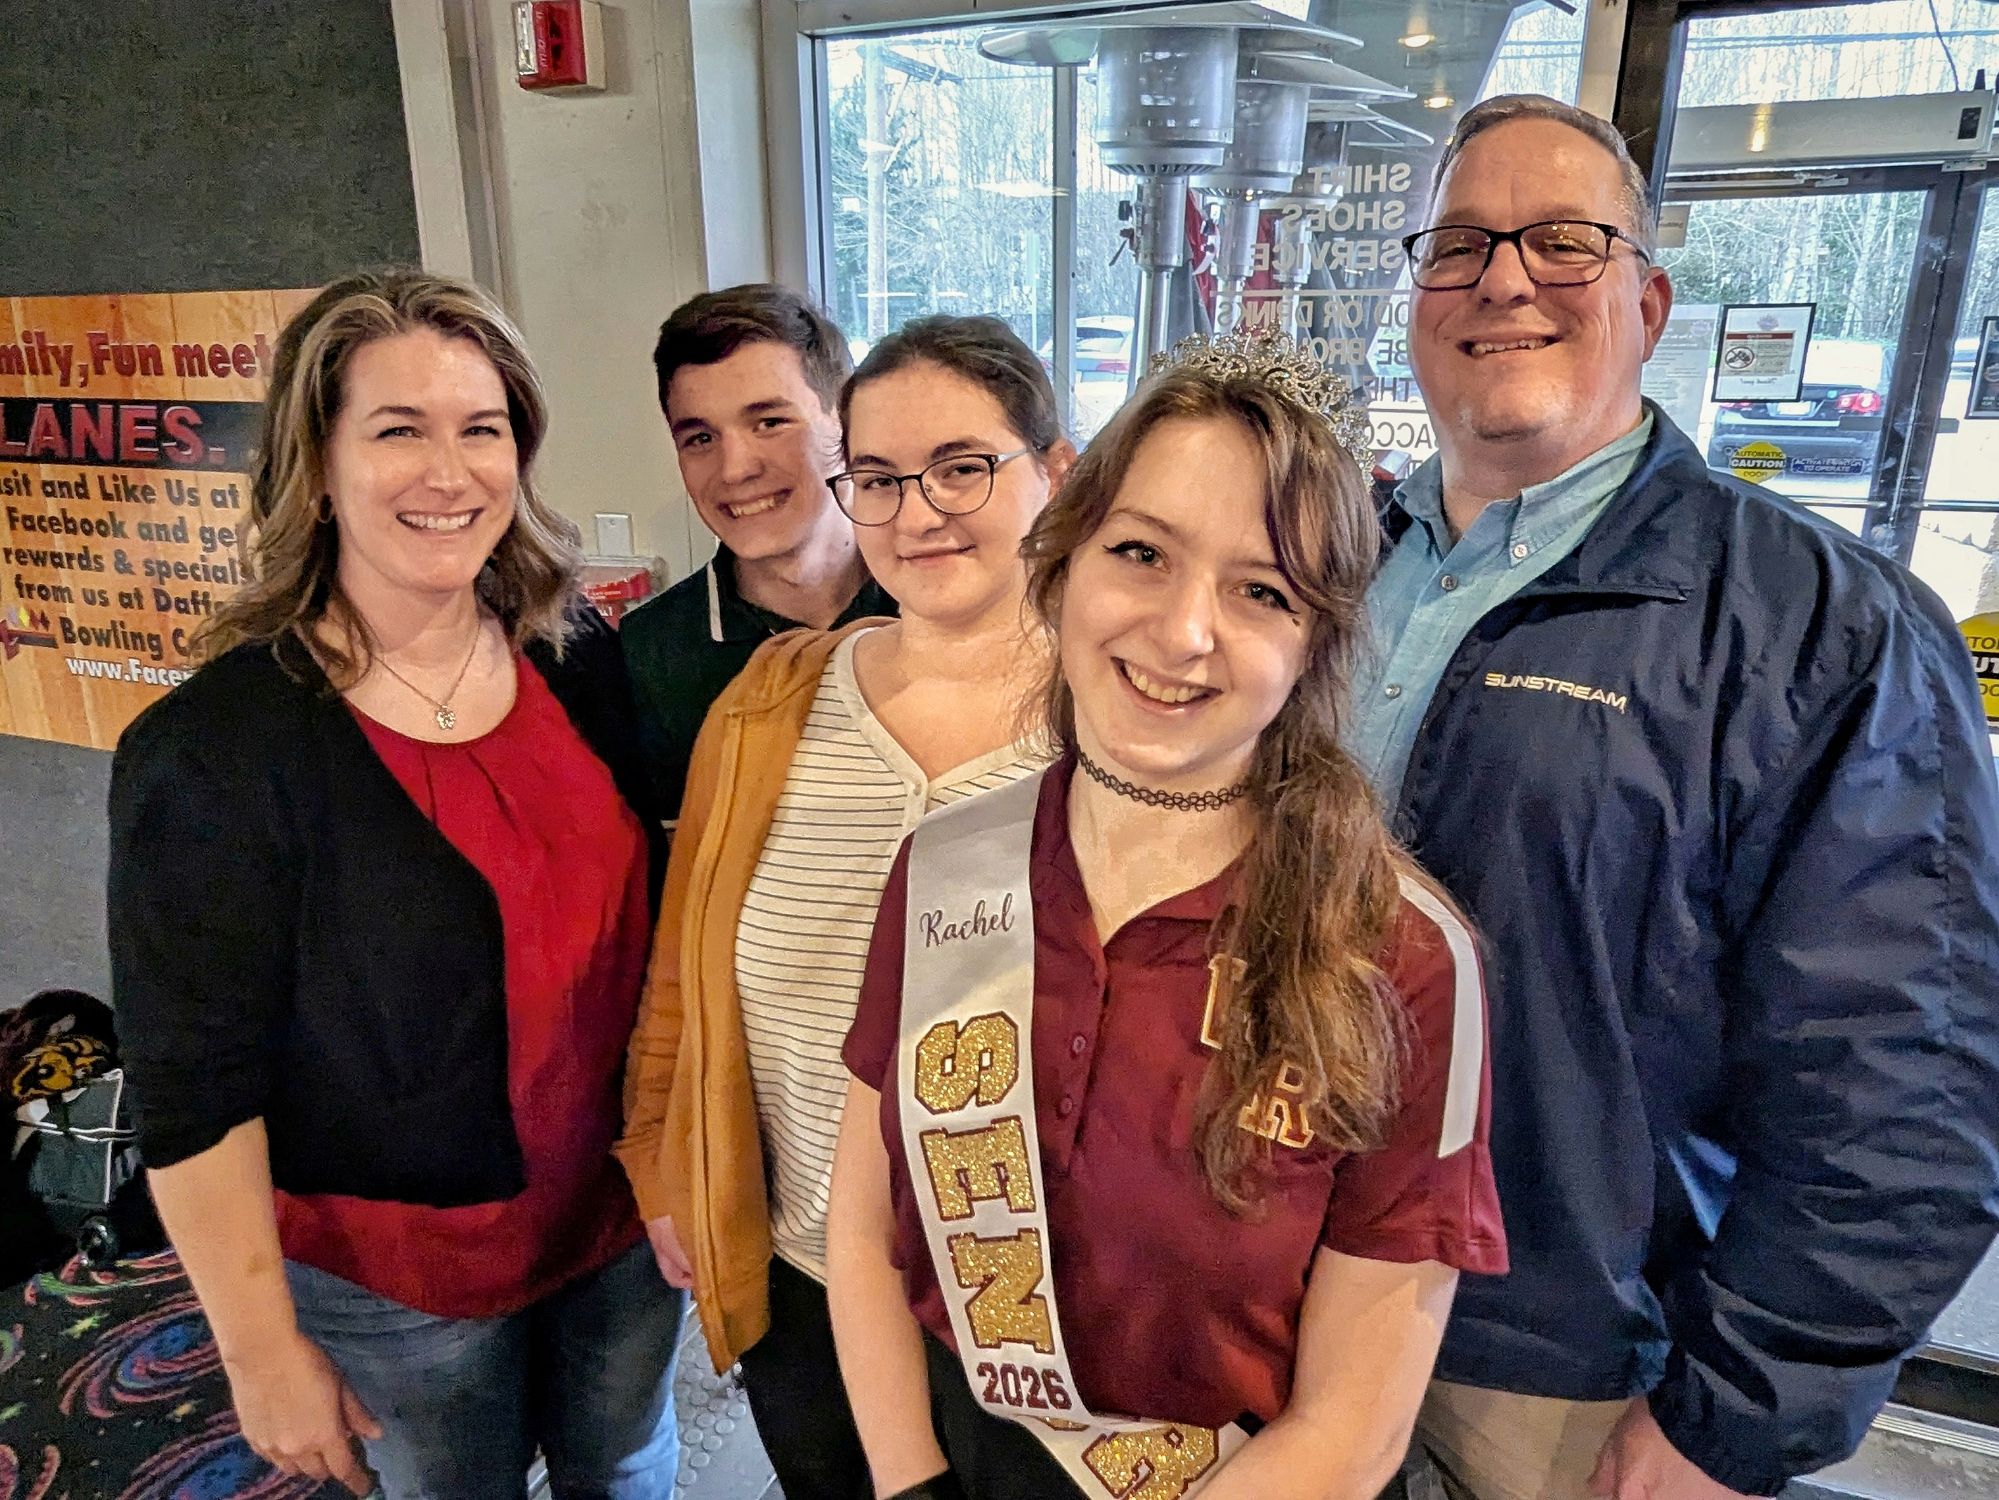
Senior Year feels like it’s officially underway with this event done and dusted. It’s just going to be a flurry of senior events from here on out, I think. Sigh, another baby bird getting ready to leave the nest. It’s good, but tugs at the heart pretty hard.
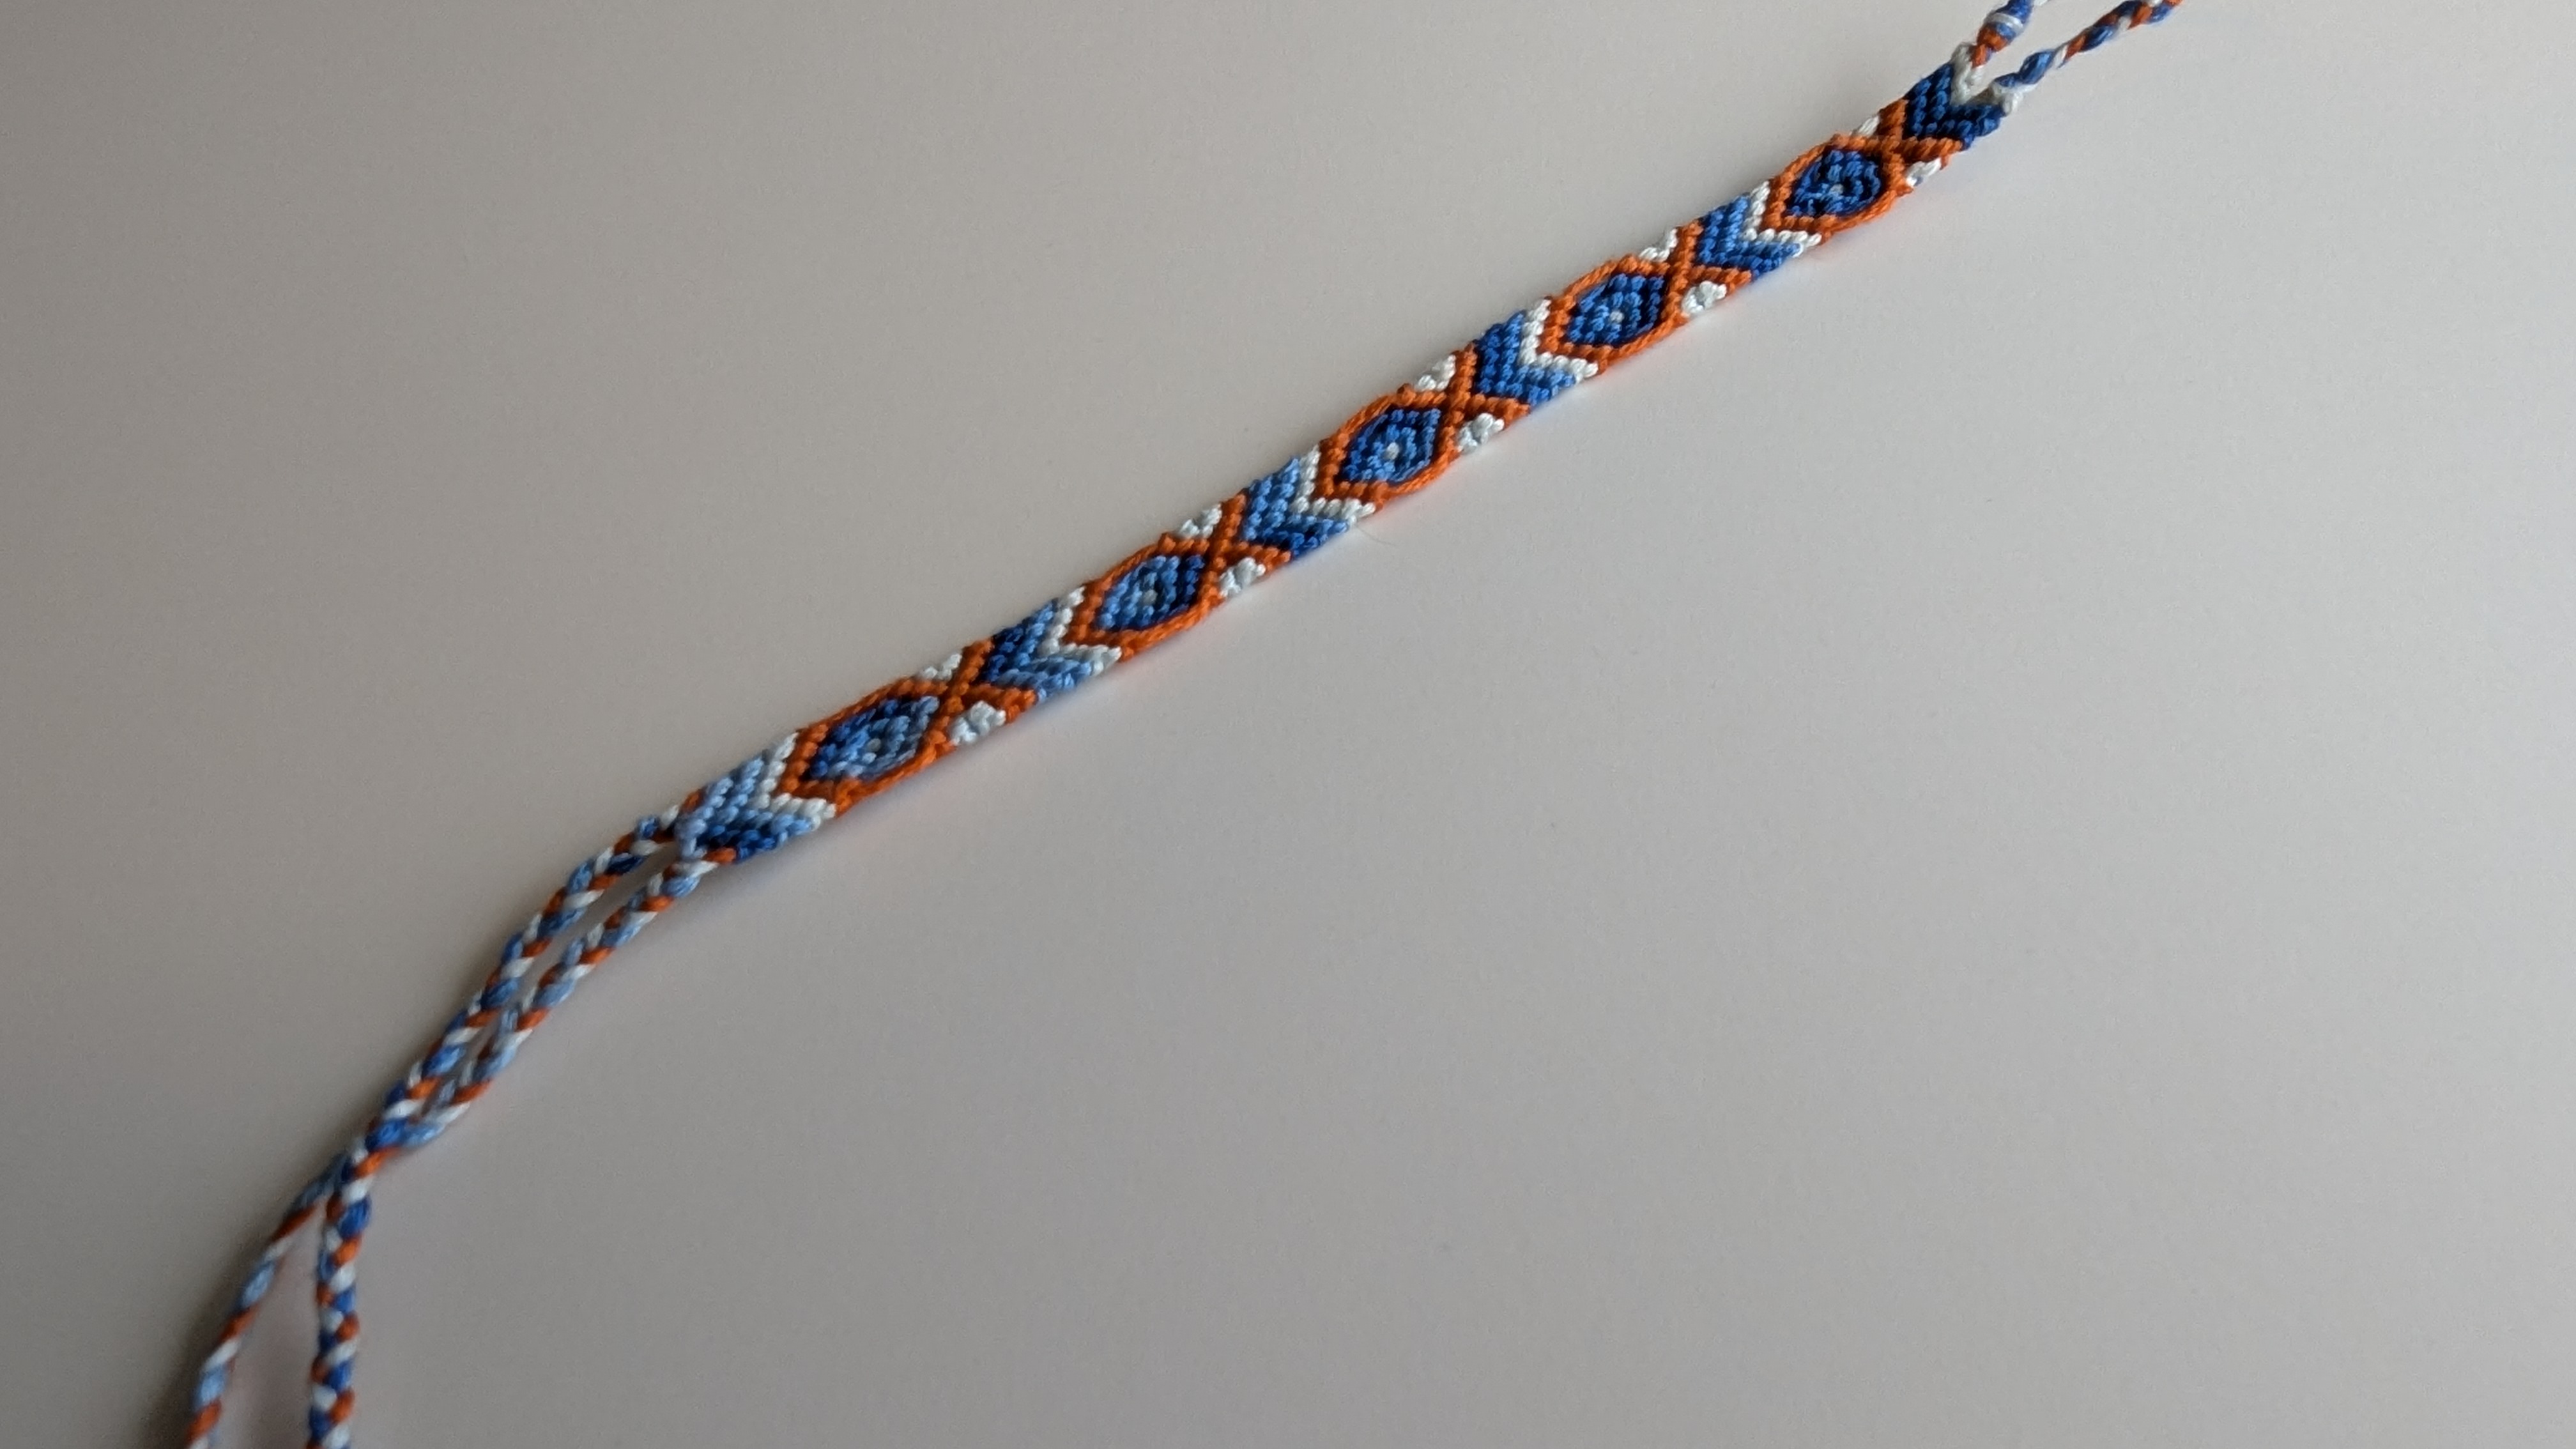
I’m not sure I ever posted about this, but it happened. Rachel was helping me declutter my craft room and she came across my tattered collection of friendship bracelet instructions from my middle school days. As she flipped through them she saw the fish pattern and commented that it’d be cool to have, so I made one for her for her birthday. Not a big deal, project-wise, but it was fun to dust off that very, very old skillset.
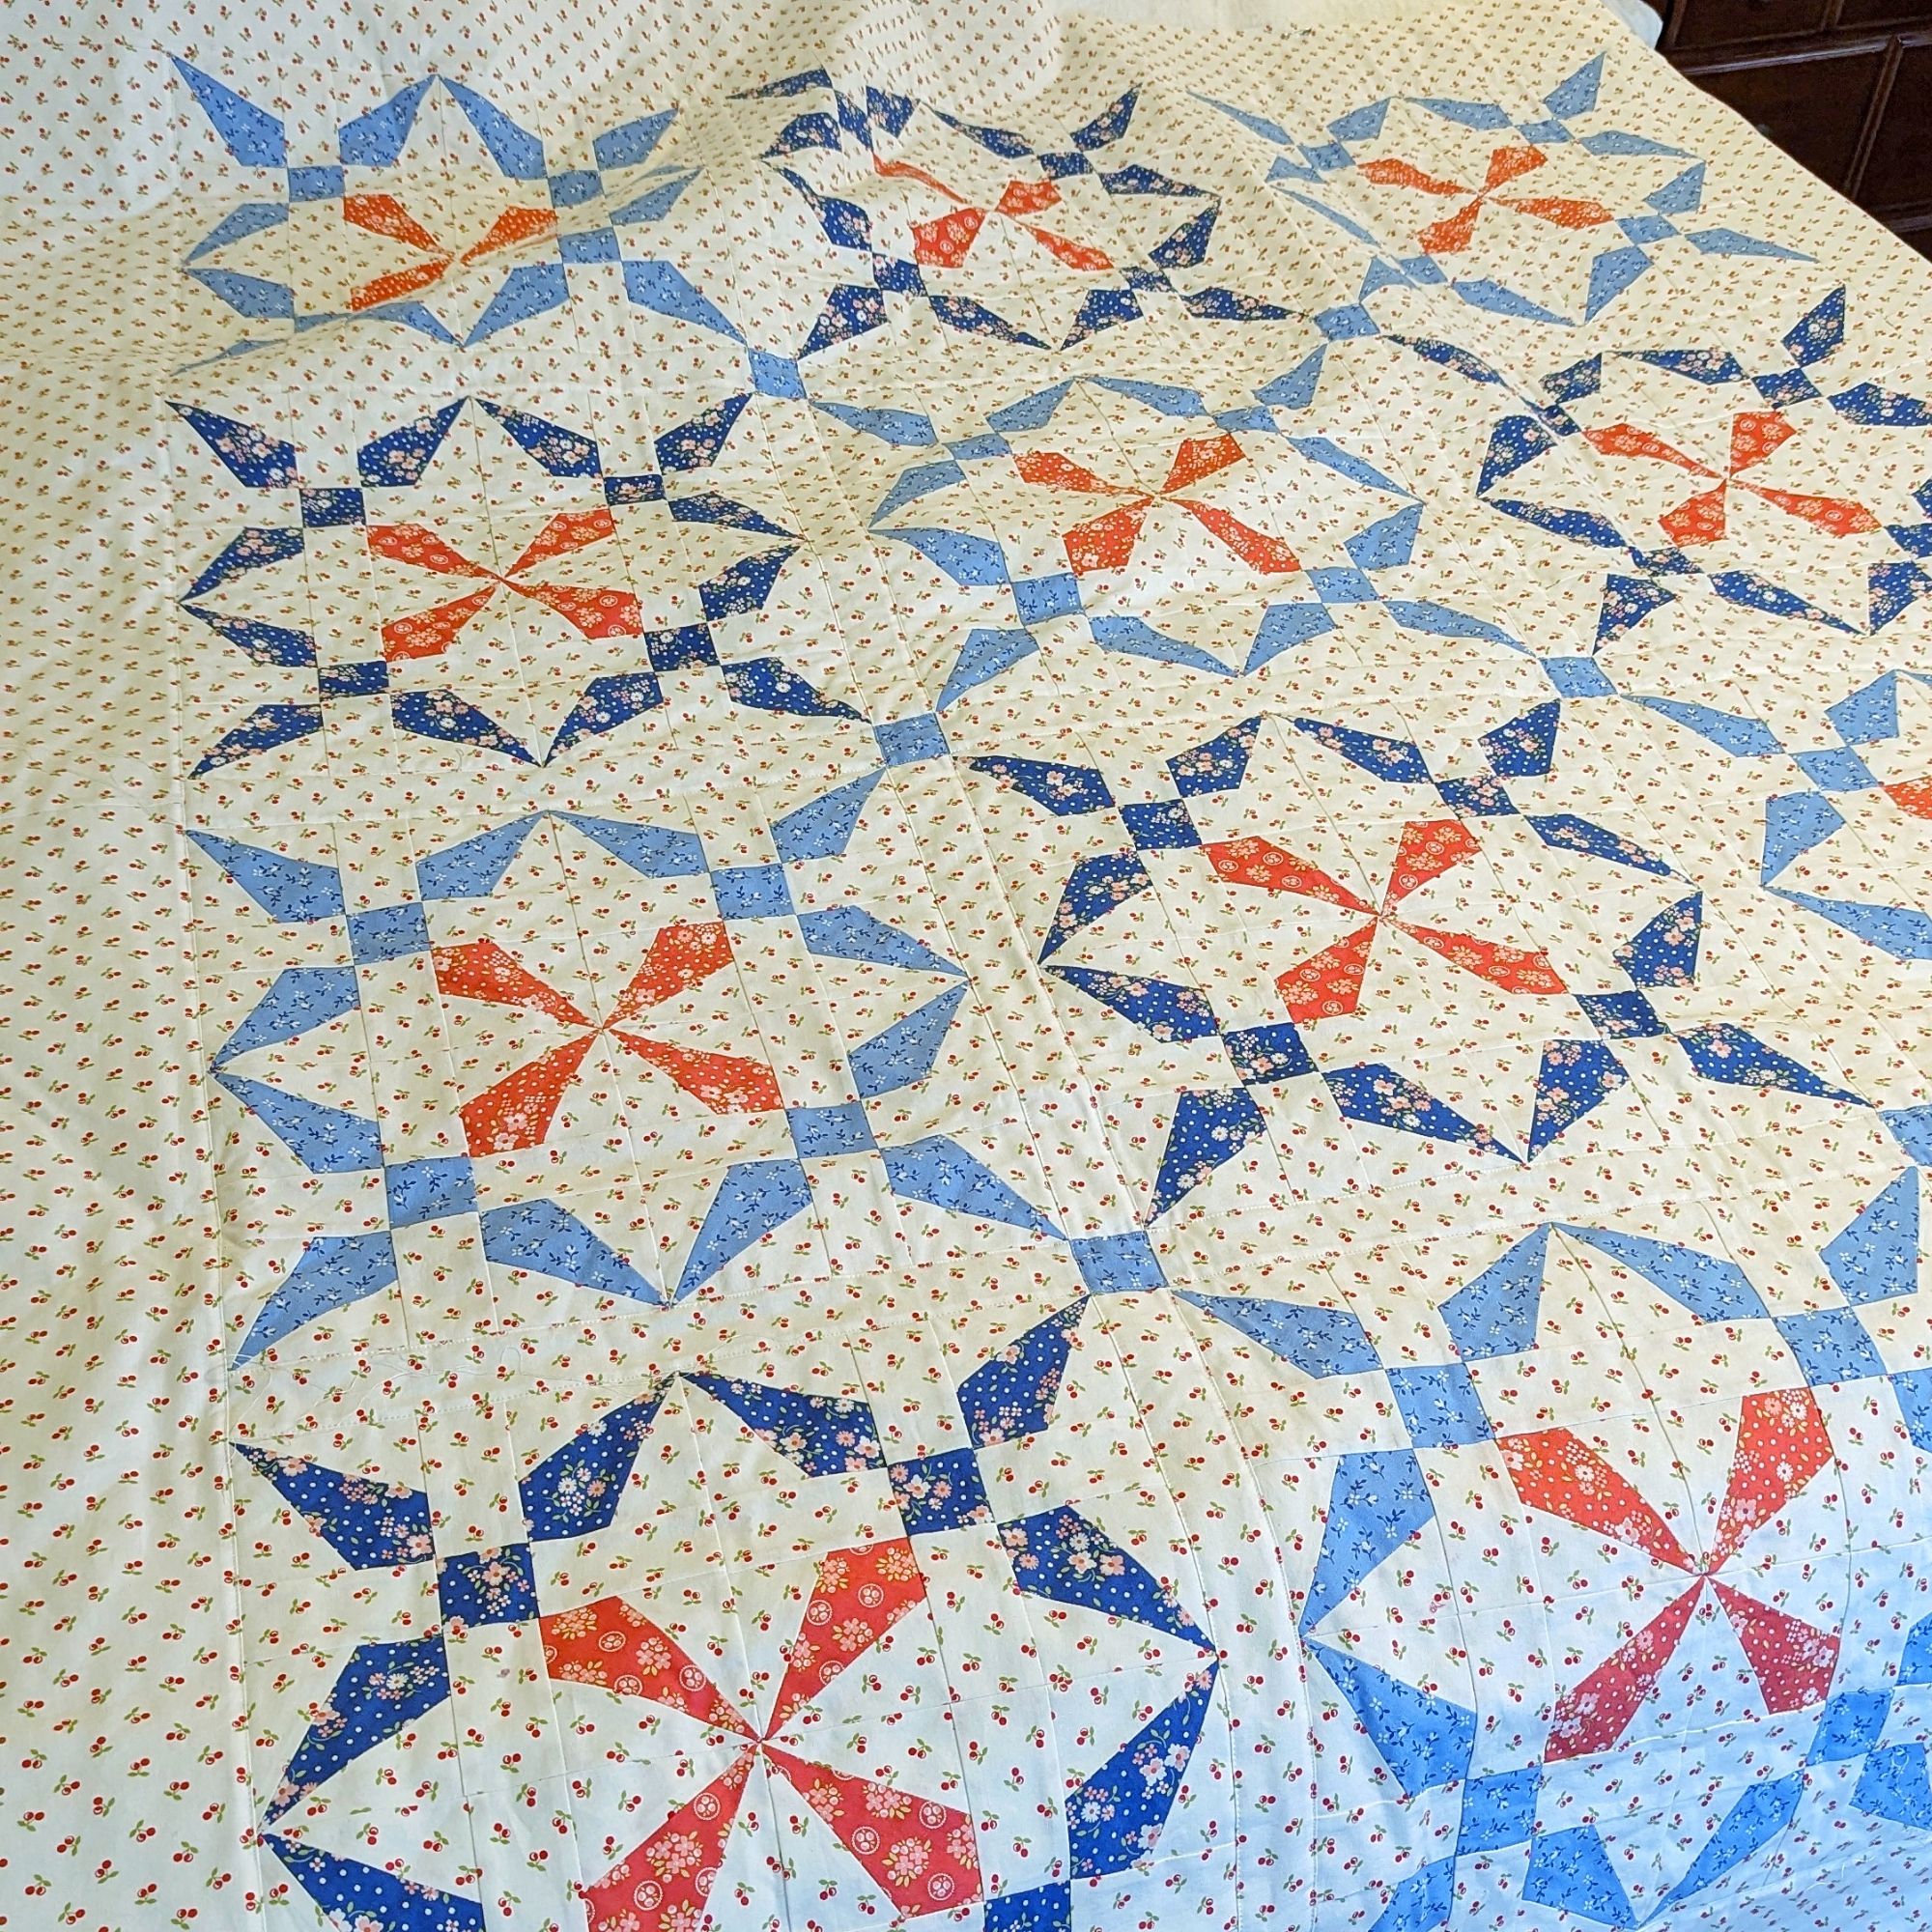
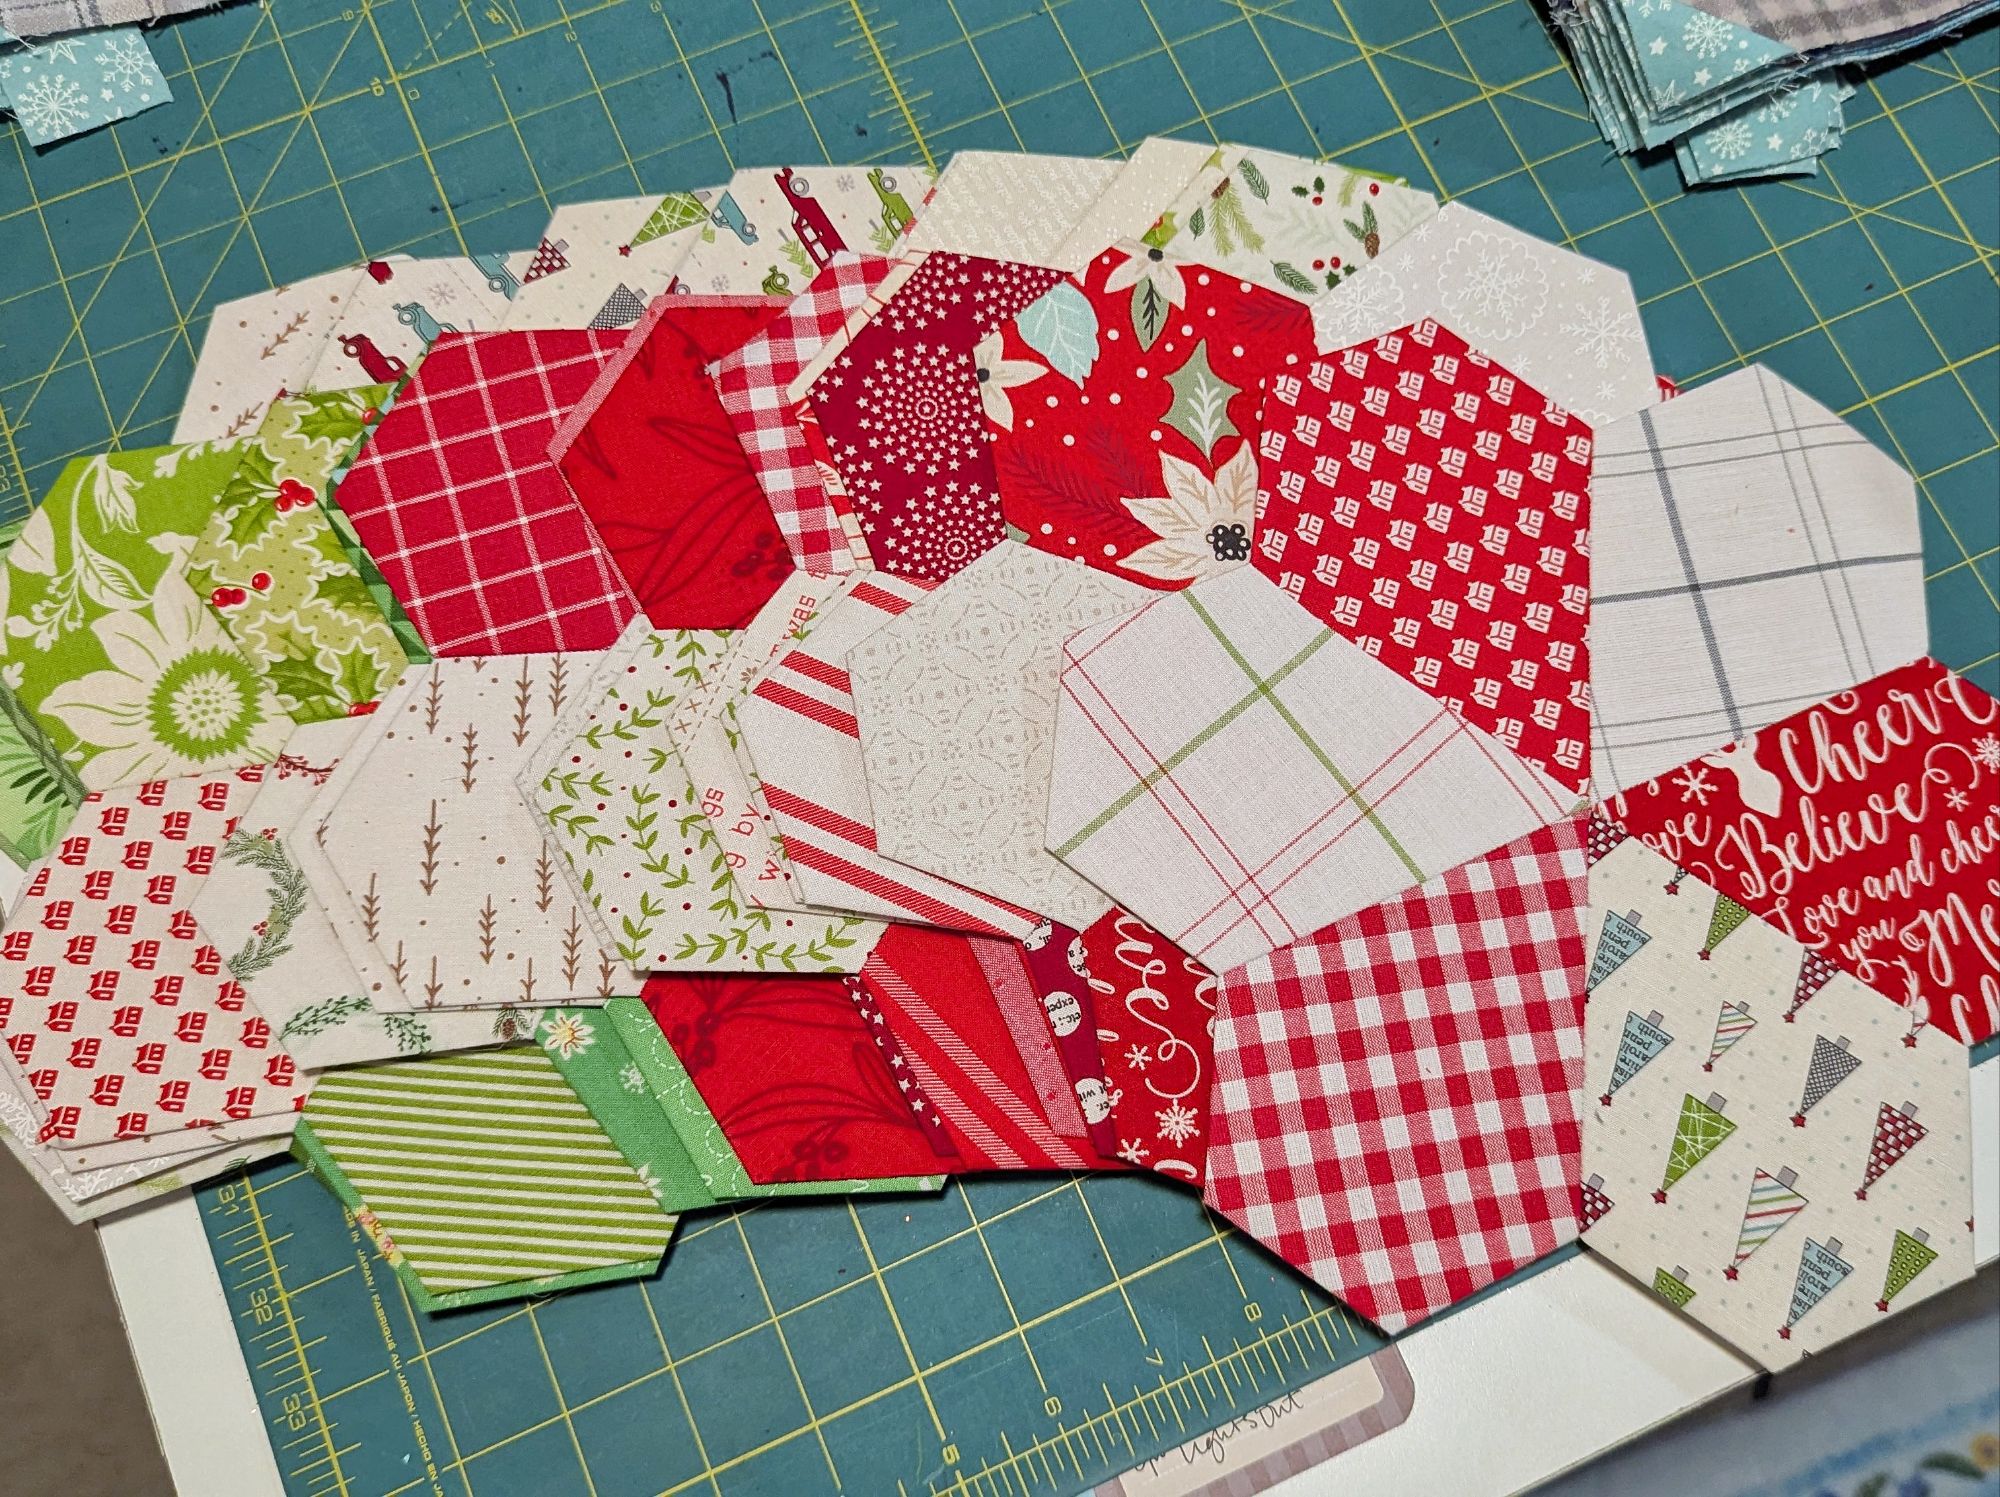
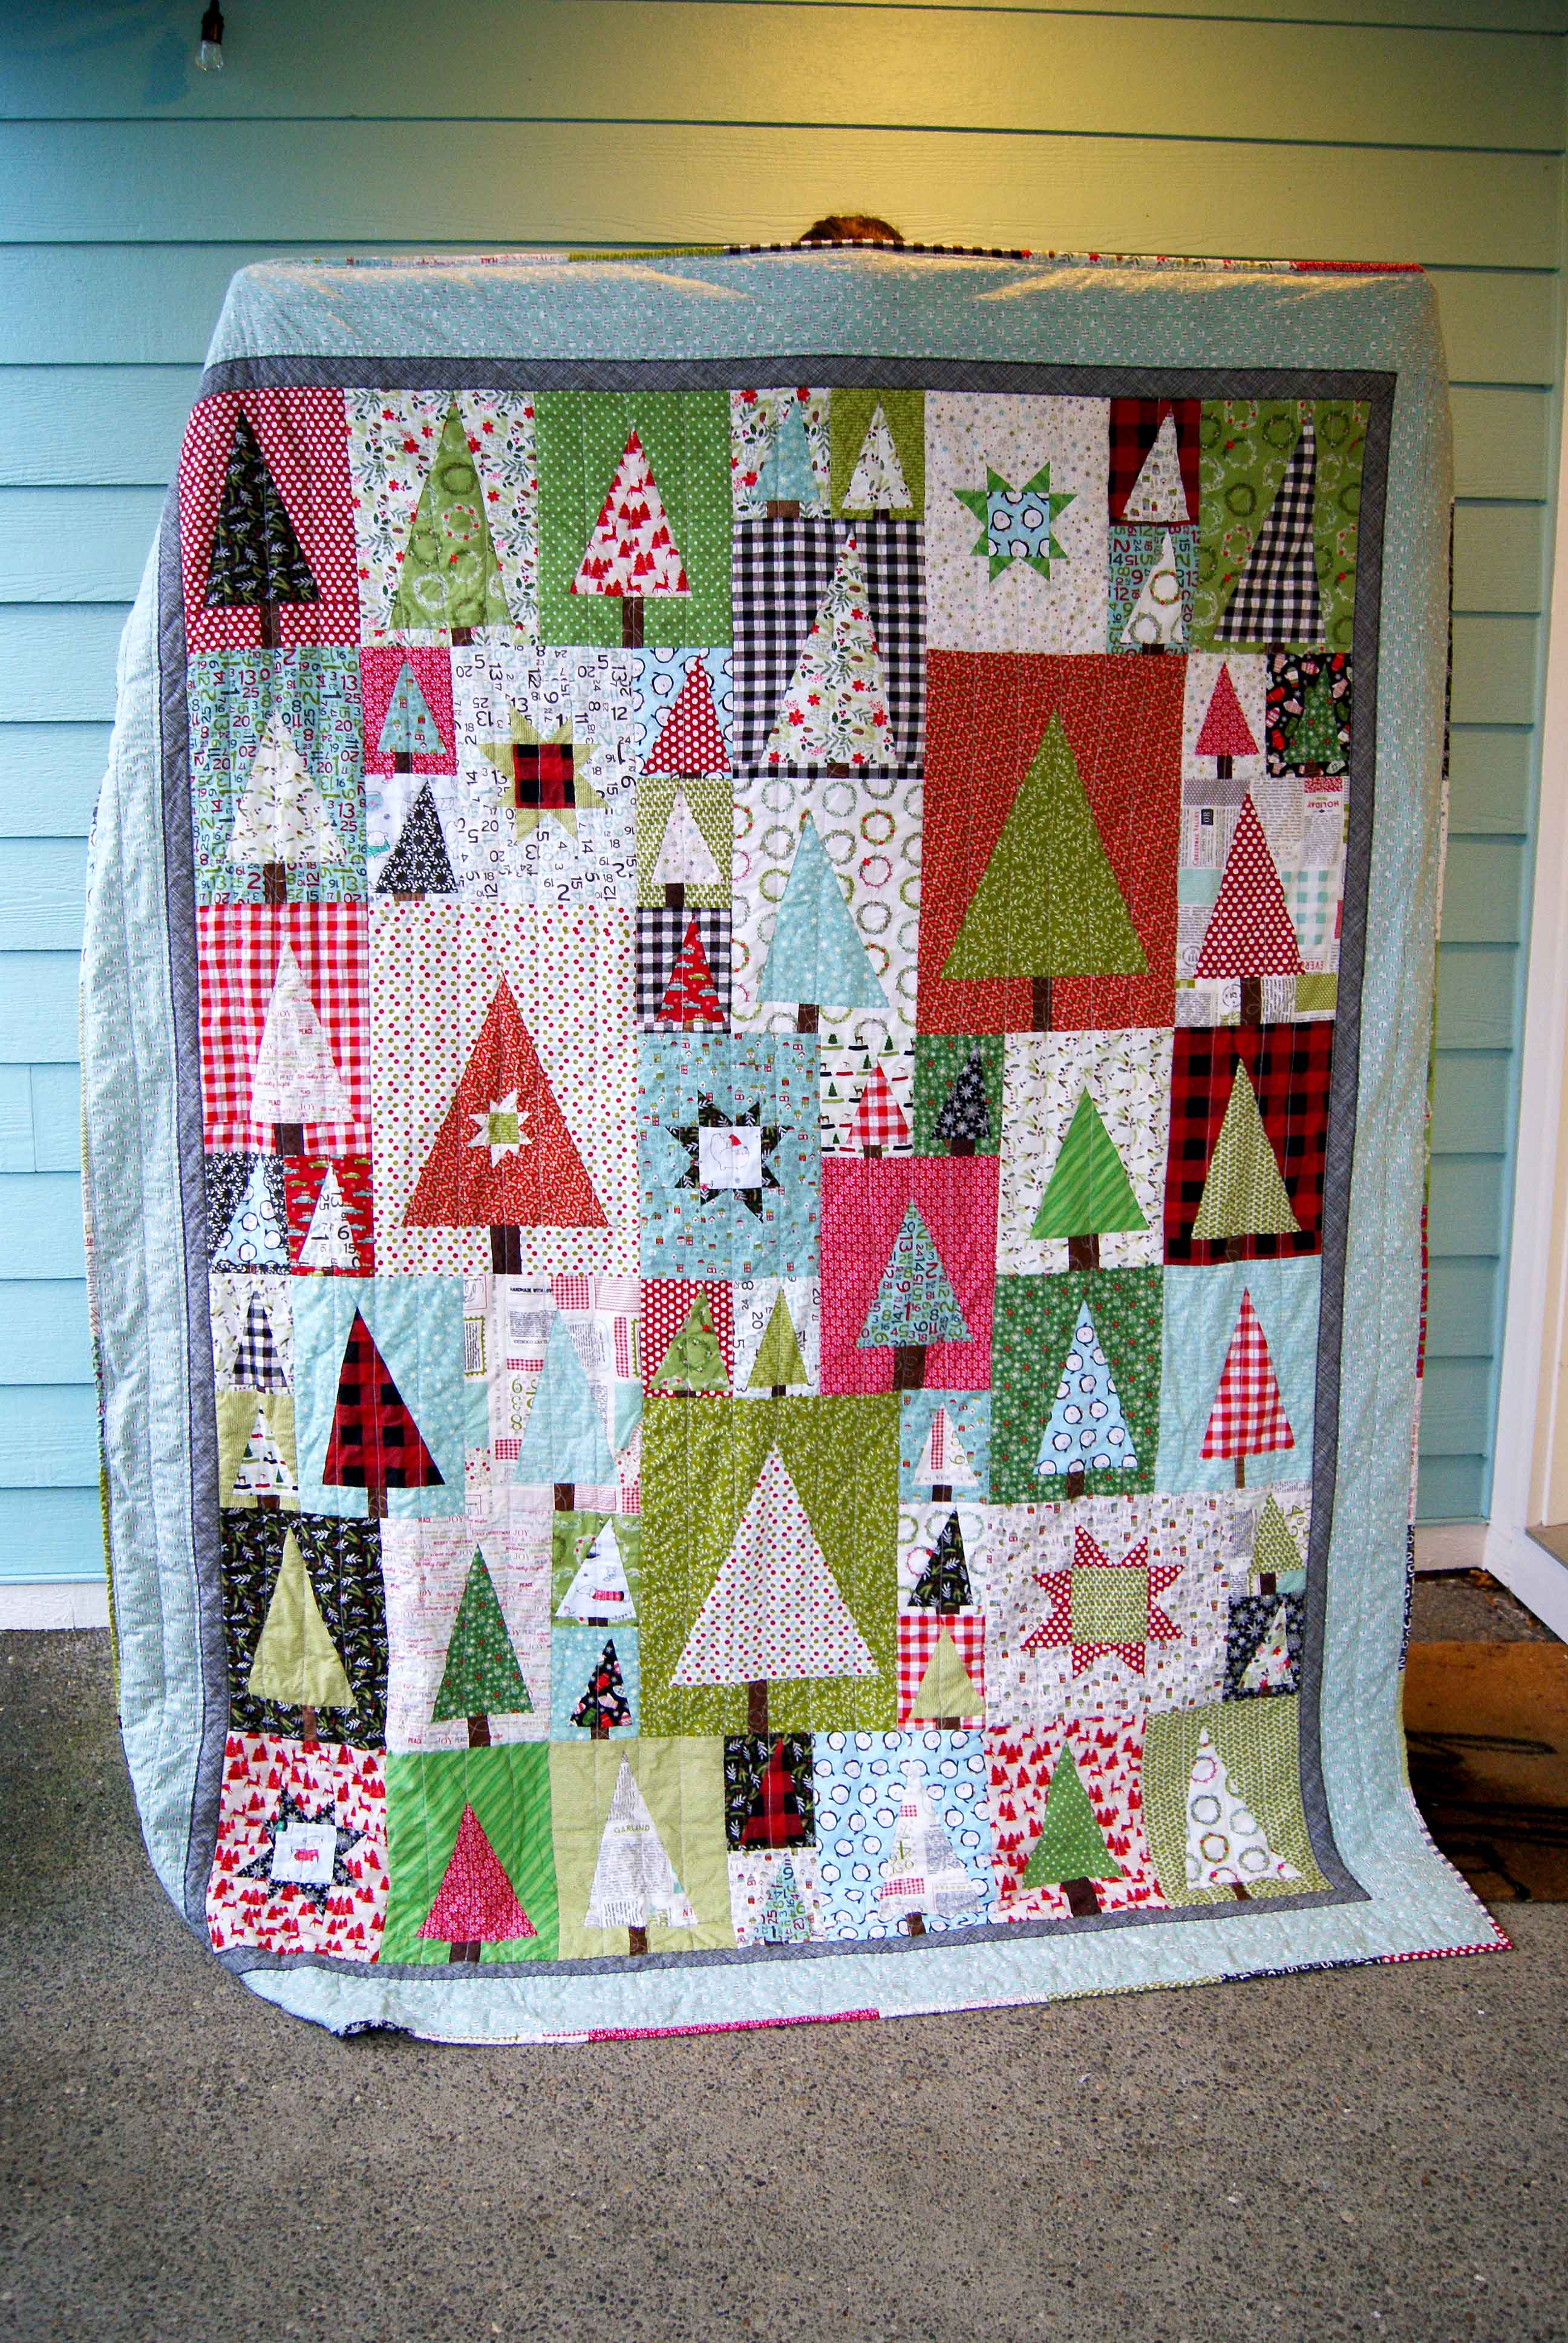
Star Climber Scrap Quilt
This is still a project-in-progress, but I’m loving it. Star Climber is another free pattern from Fat Quarter Shop, created especially for scrap-busting.
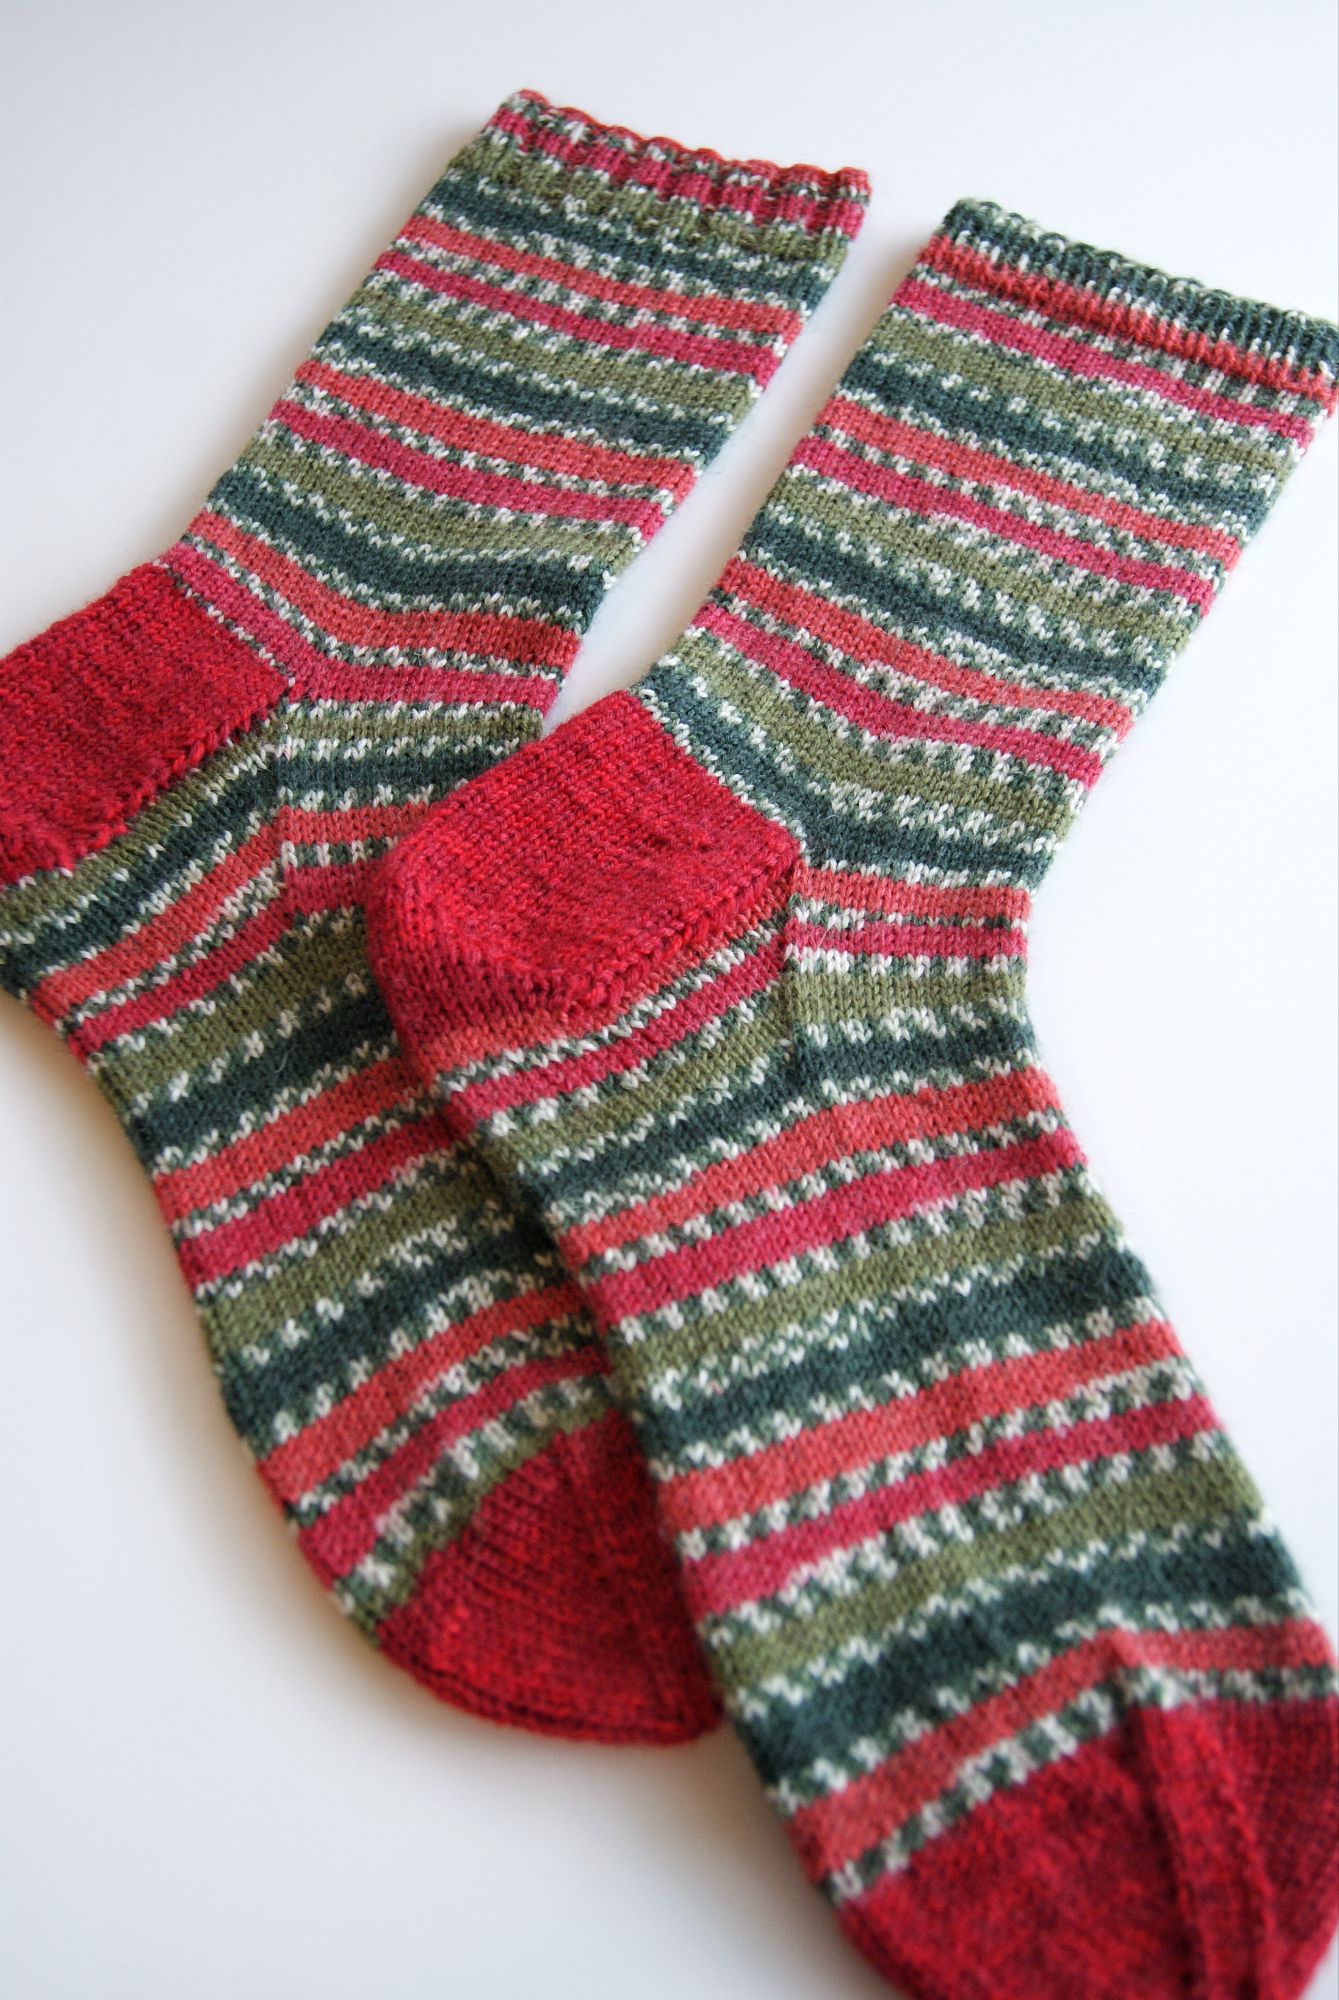
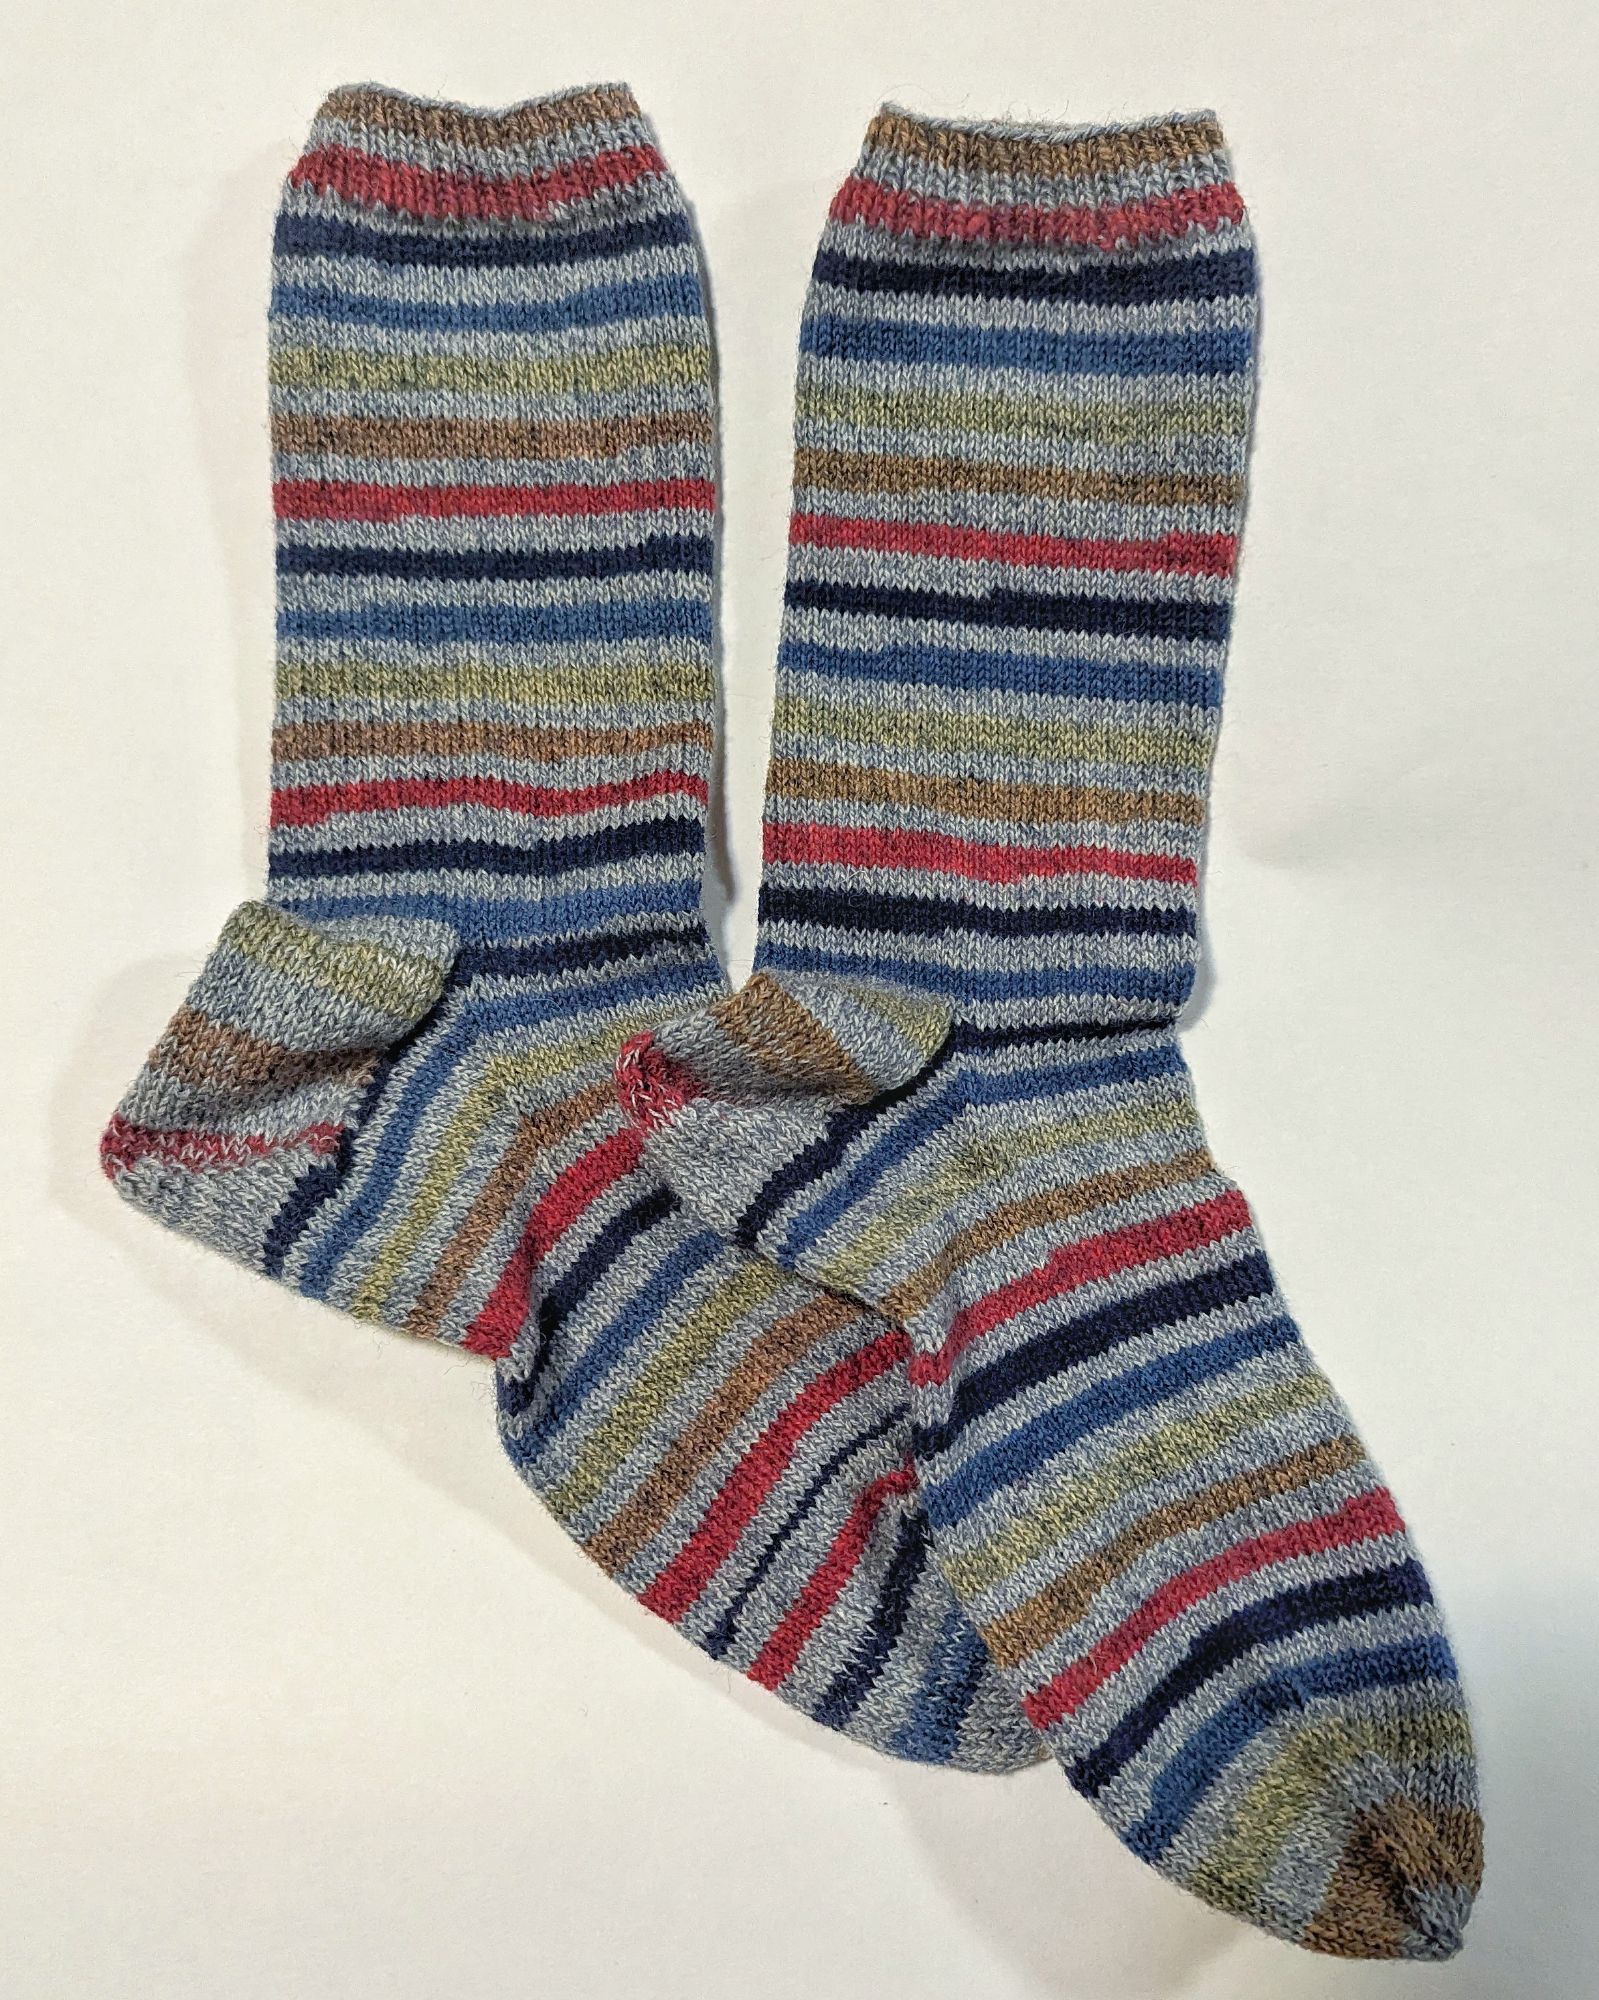
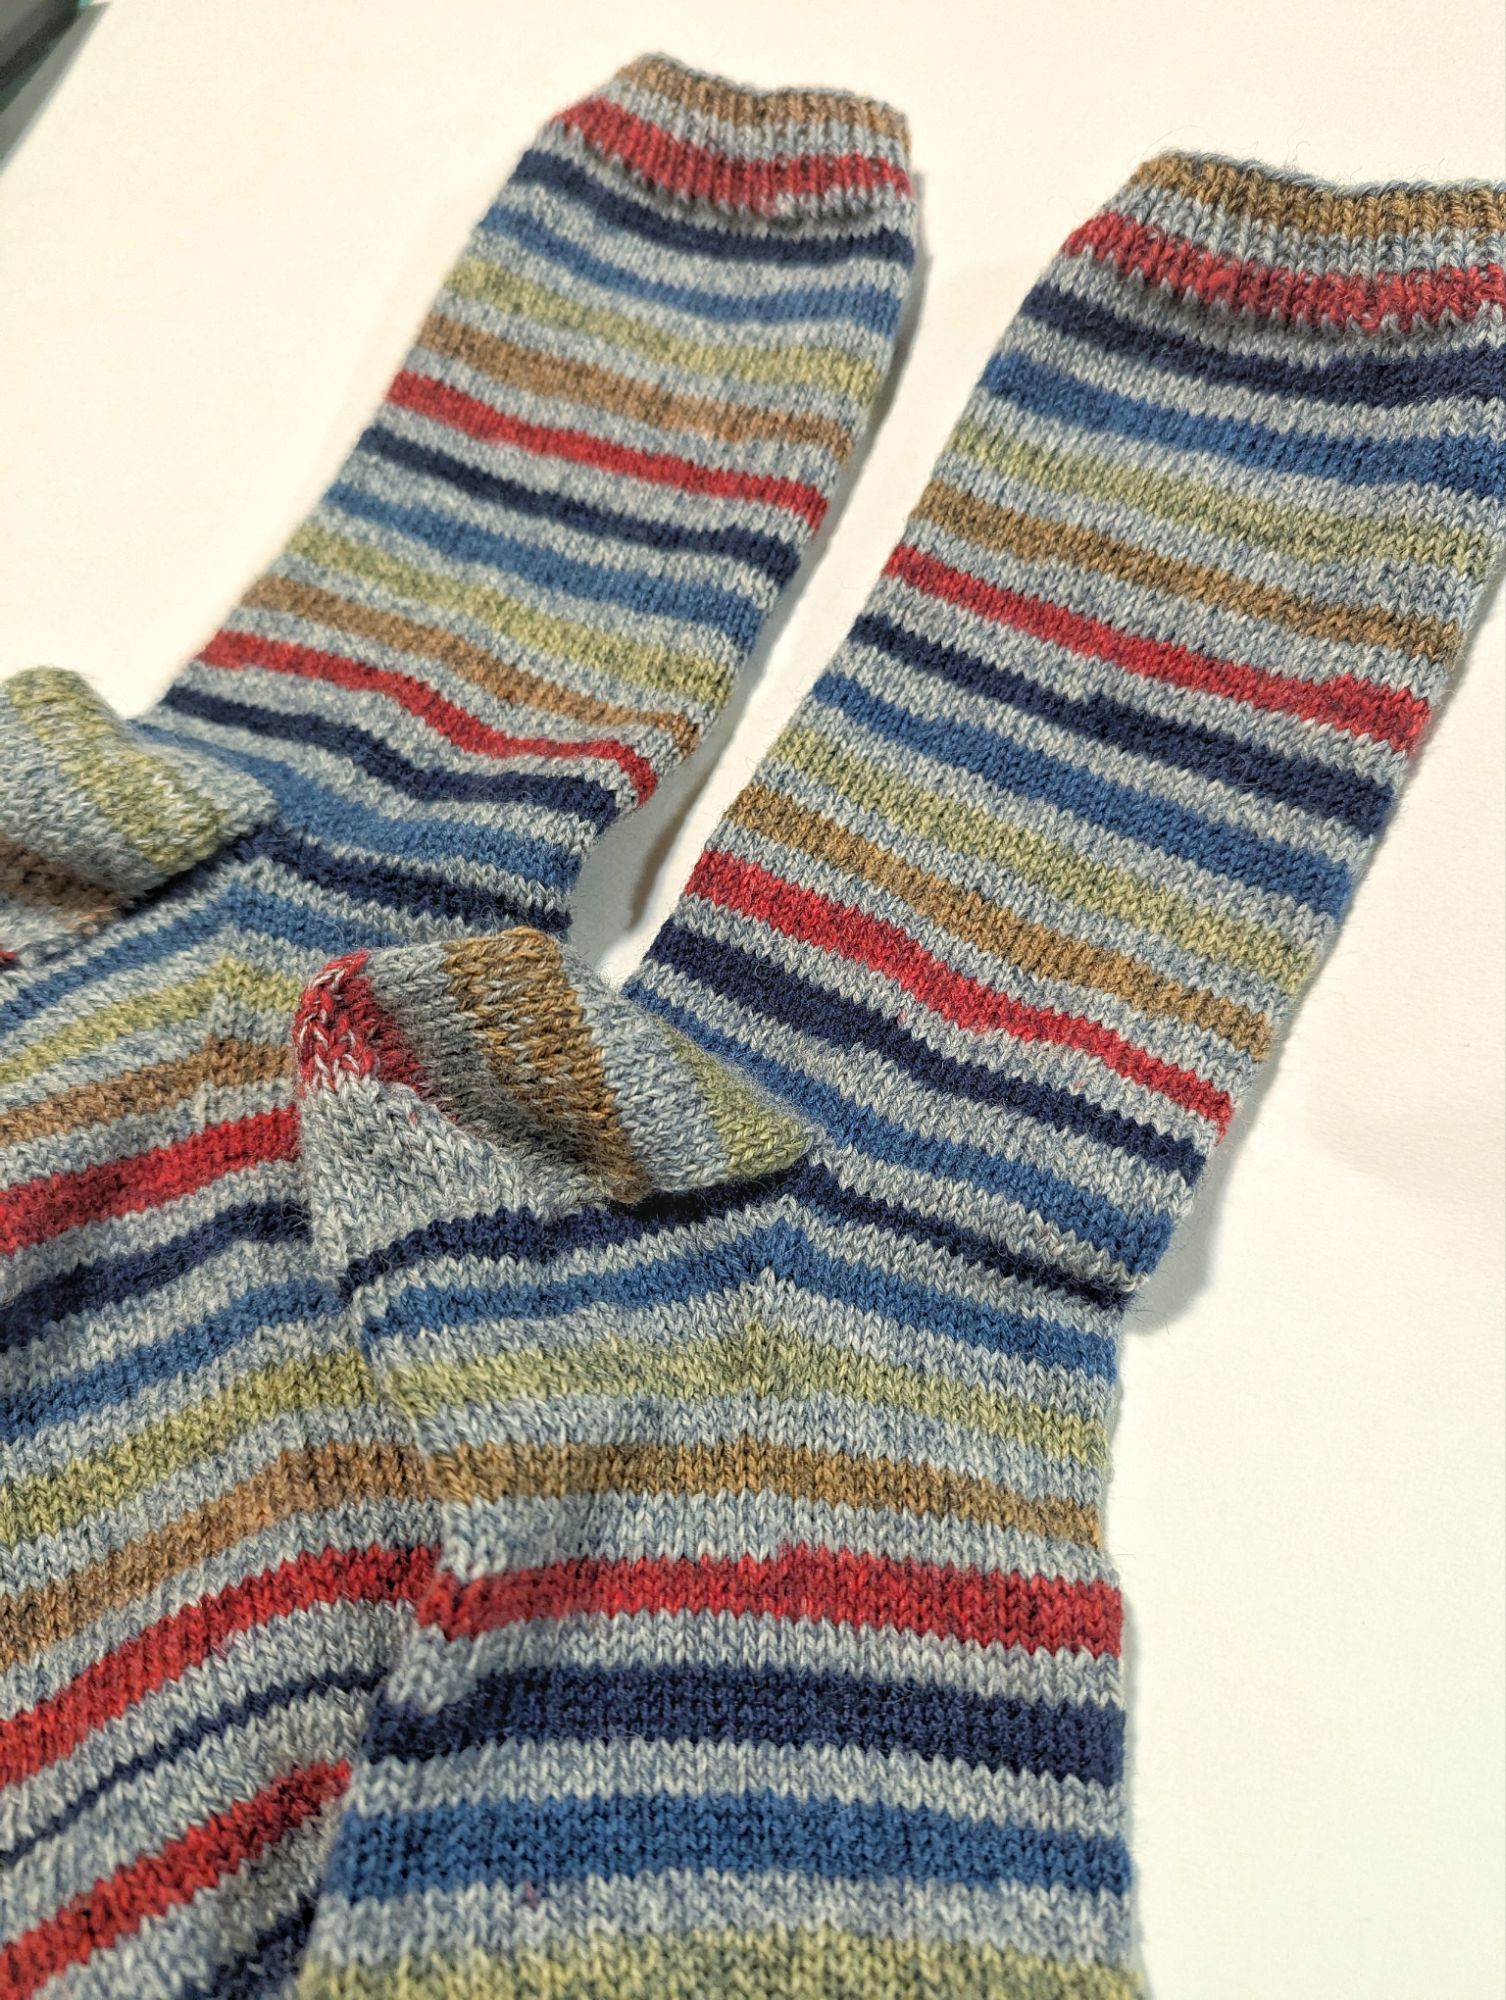
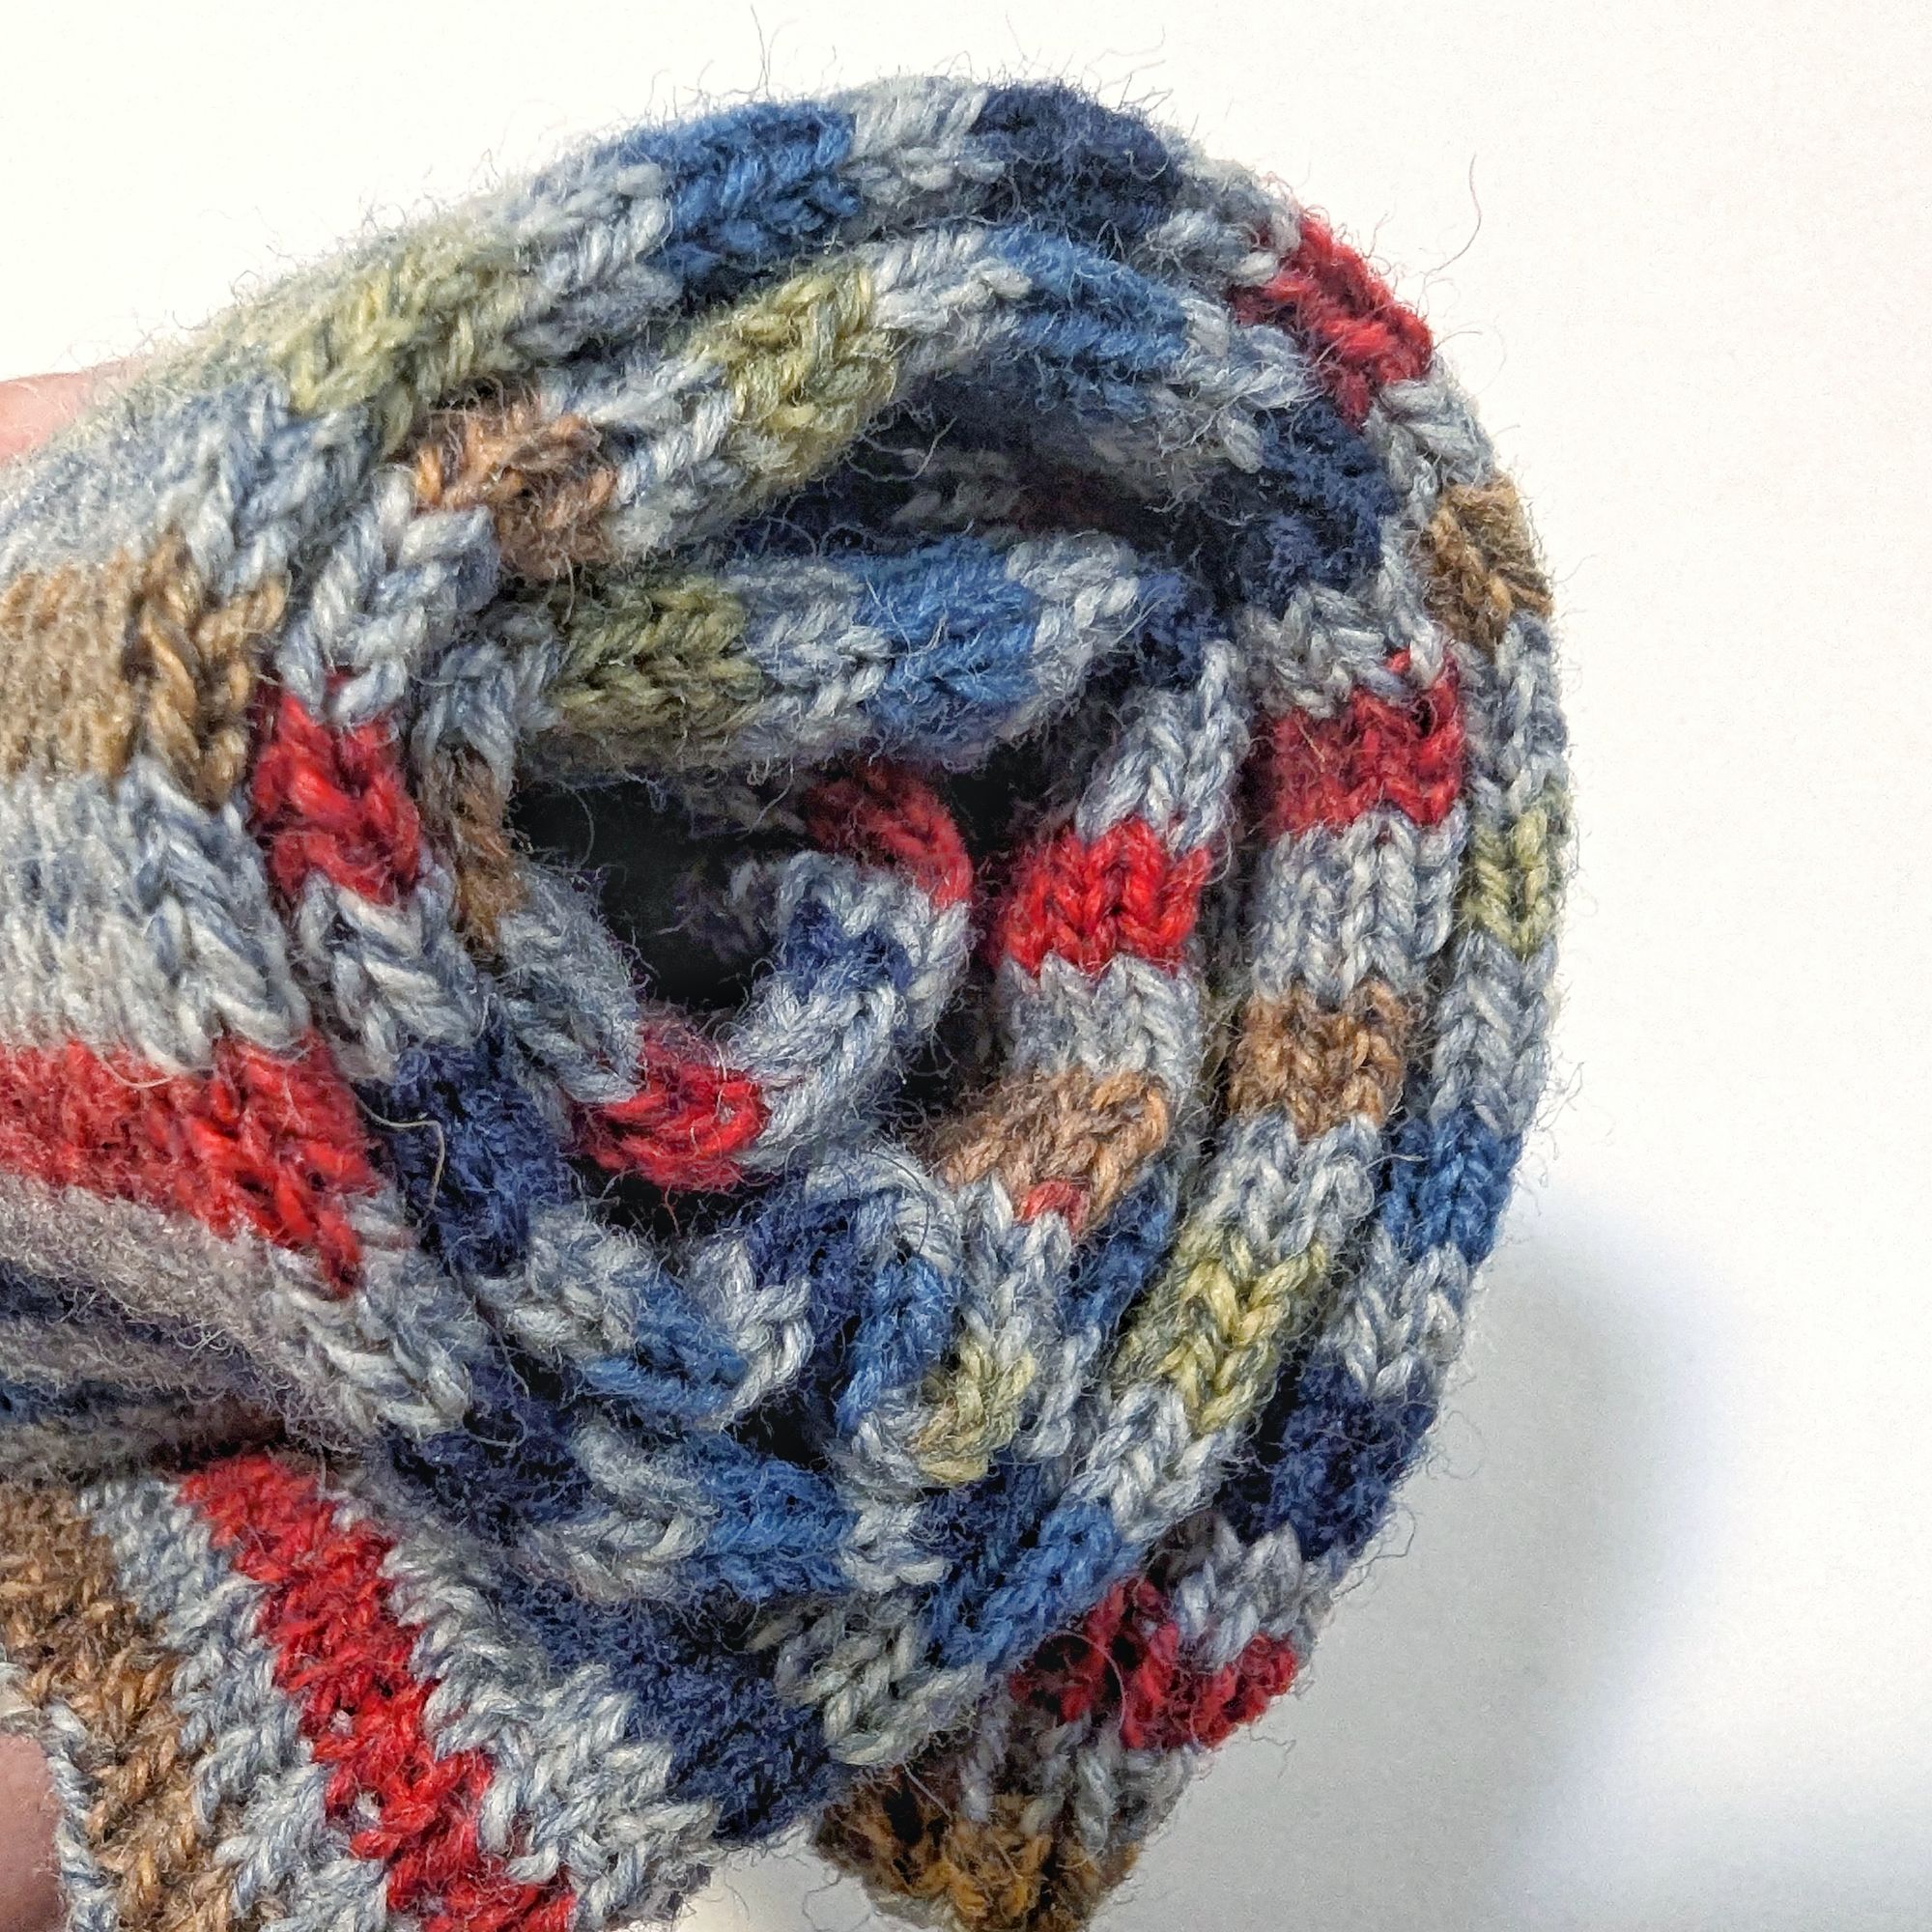
Stripey Christmas Socks
Started in 2024, but not finished in time for last year’s Christmas, so I got them done in February. I loved wearing these fabulous Christmas socks this Christmas season! I’m on the hunt for all the different Christmas colorways of this West Yorkshire Spinners’ Signature 4-ply yarn so I can own the entire holiday rainbow!
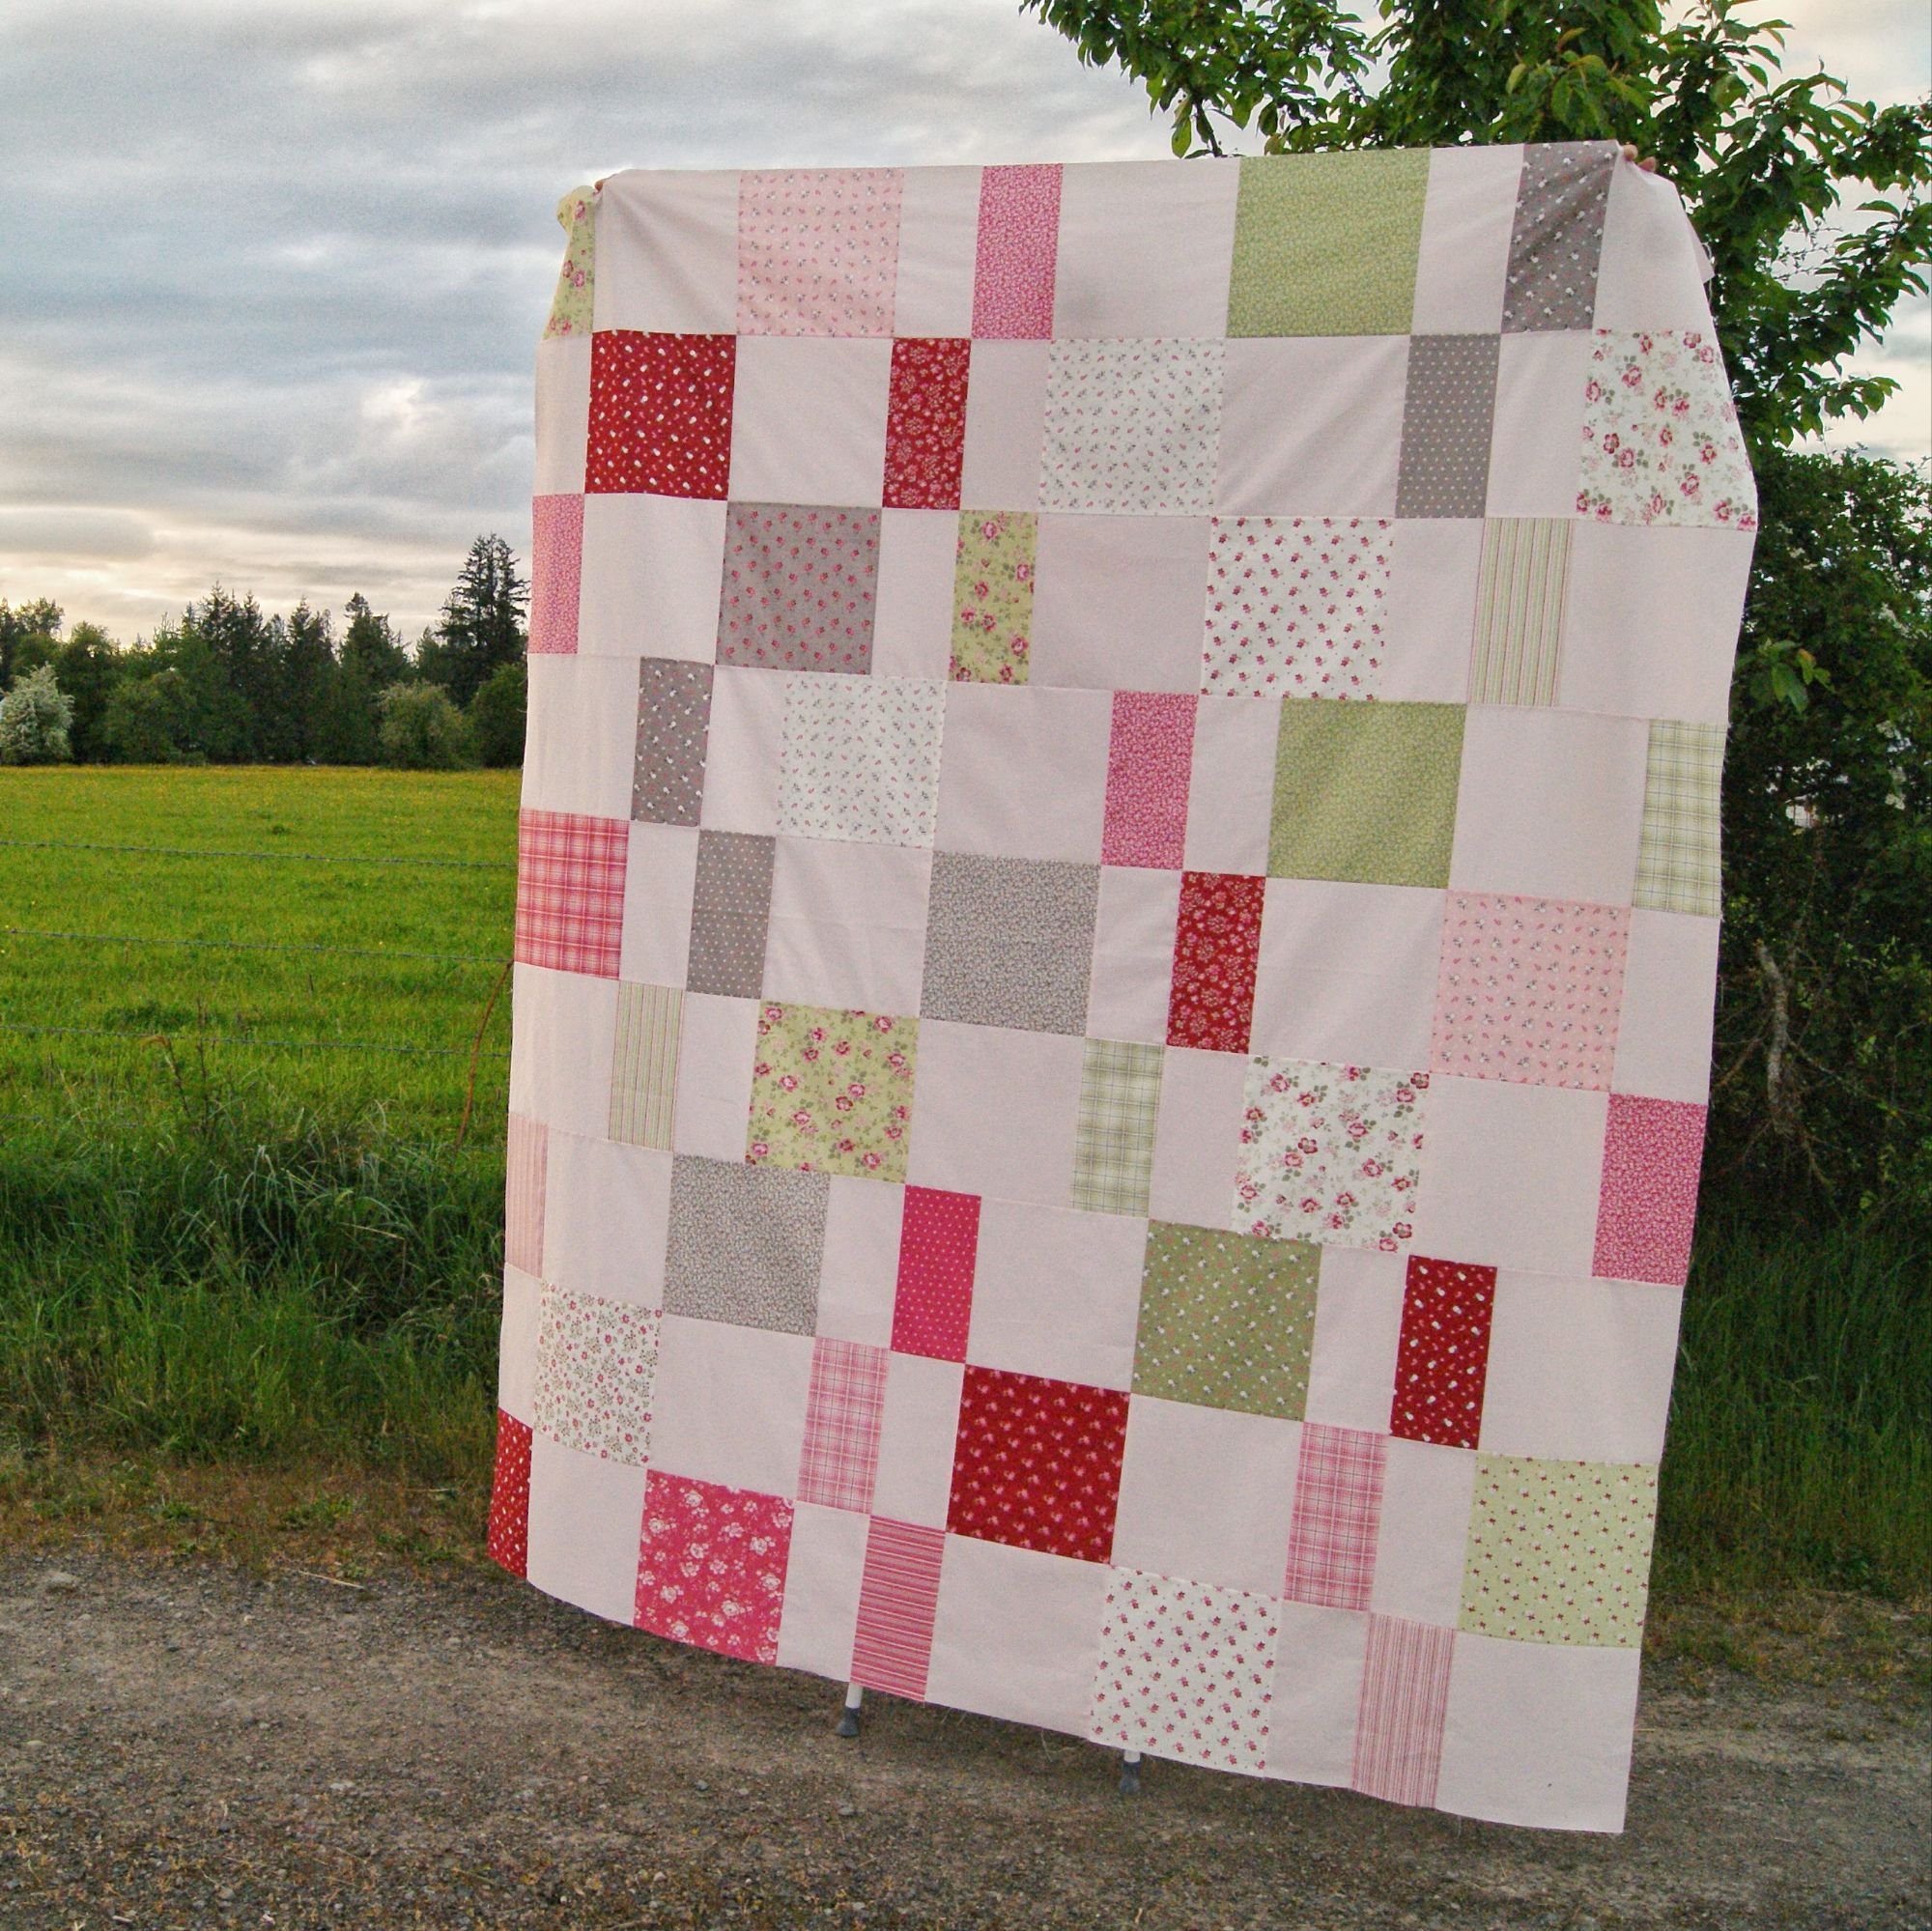
Layer Cake Crêpe Quilt for Fat Quarter Shop
You never saw this, and neither did the rest of the quilting world because I shut down my blog in from May through September of this year, with the full intention of never coming back. I had a stalker in the last part of 2024 and was granted a restraining order that forbade him from making any contact with me for an entire year. However, in the spring I started seeing some activity in my analytics that suggested he might be checking up on me via the blog and it spooked me, so I made the decision to stop feeding the monster and walk away.
But it turns out that I really love blogging and sharing my creative endeavors on social media, and I resented that I had been forced out of the things I loved by that dude. After some serious therapeutic work, I made the decision to come back online in September because I don’t think it’s fair that I be expected to abandon what I love because of someone else’s poor behavior. It’s definitely a personal, multi-faceted choice, and I do worry that it might be a foolish one, but I don’t want to spend my life hiding my talents under a bush just because someone got weird about it all. How do you continue going on if, every time you get good at something, someone behaves dumb about it and you’re expected to quit your hobby because of their choices? It’s crazy. Nope, no thanks.
I used the “A Very Sweet Christmas” collection by Bunny Hill Designs, along with Moda Bella Solids in Baby Pink (#9900-30). It’s a super fast pattern to put together because the blocks are HUGE. It’s available for free over on Fat Quarter Shop’s website. Thank you, Fat Quarter Shop, for our ten years (!) of working together on projects like this. I’ve really enjoyed it all.
Hemming Rachel’s Prom Dress
I know that hemming isn’t an interesting “project,” but I have to include it on my list of projects because SO MUCH OF MY CRAFTING TIME is taken up with hemming formal dresses for Rachel, and I forget that I did the hemming and then wonder what was up with my time management skills because I don’t seem to get any projects done these days. Except I do; it’s just that it’s tailoring and hemming ballgowns for my daughter.
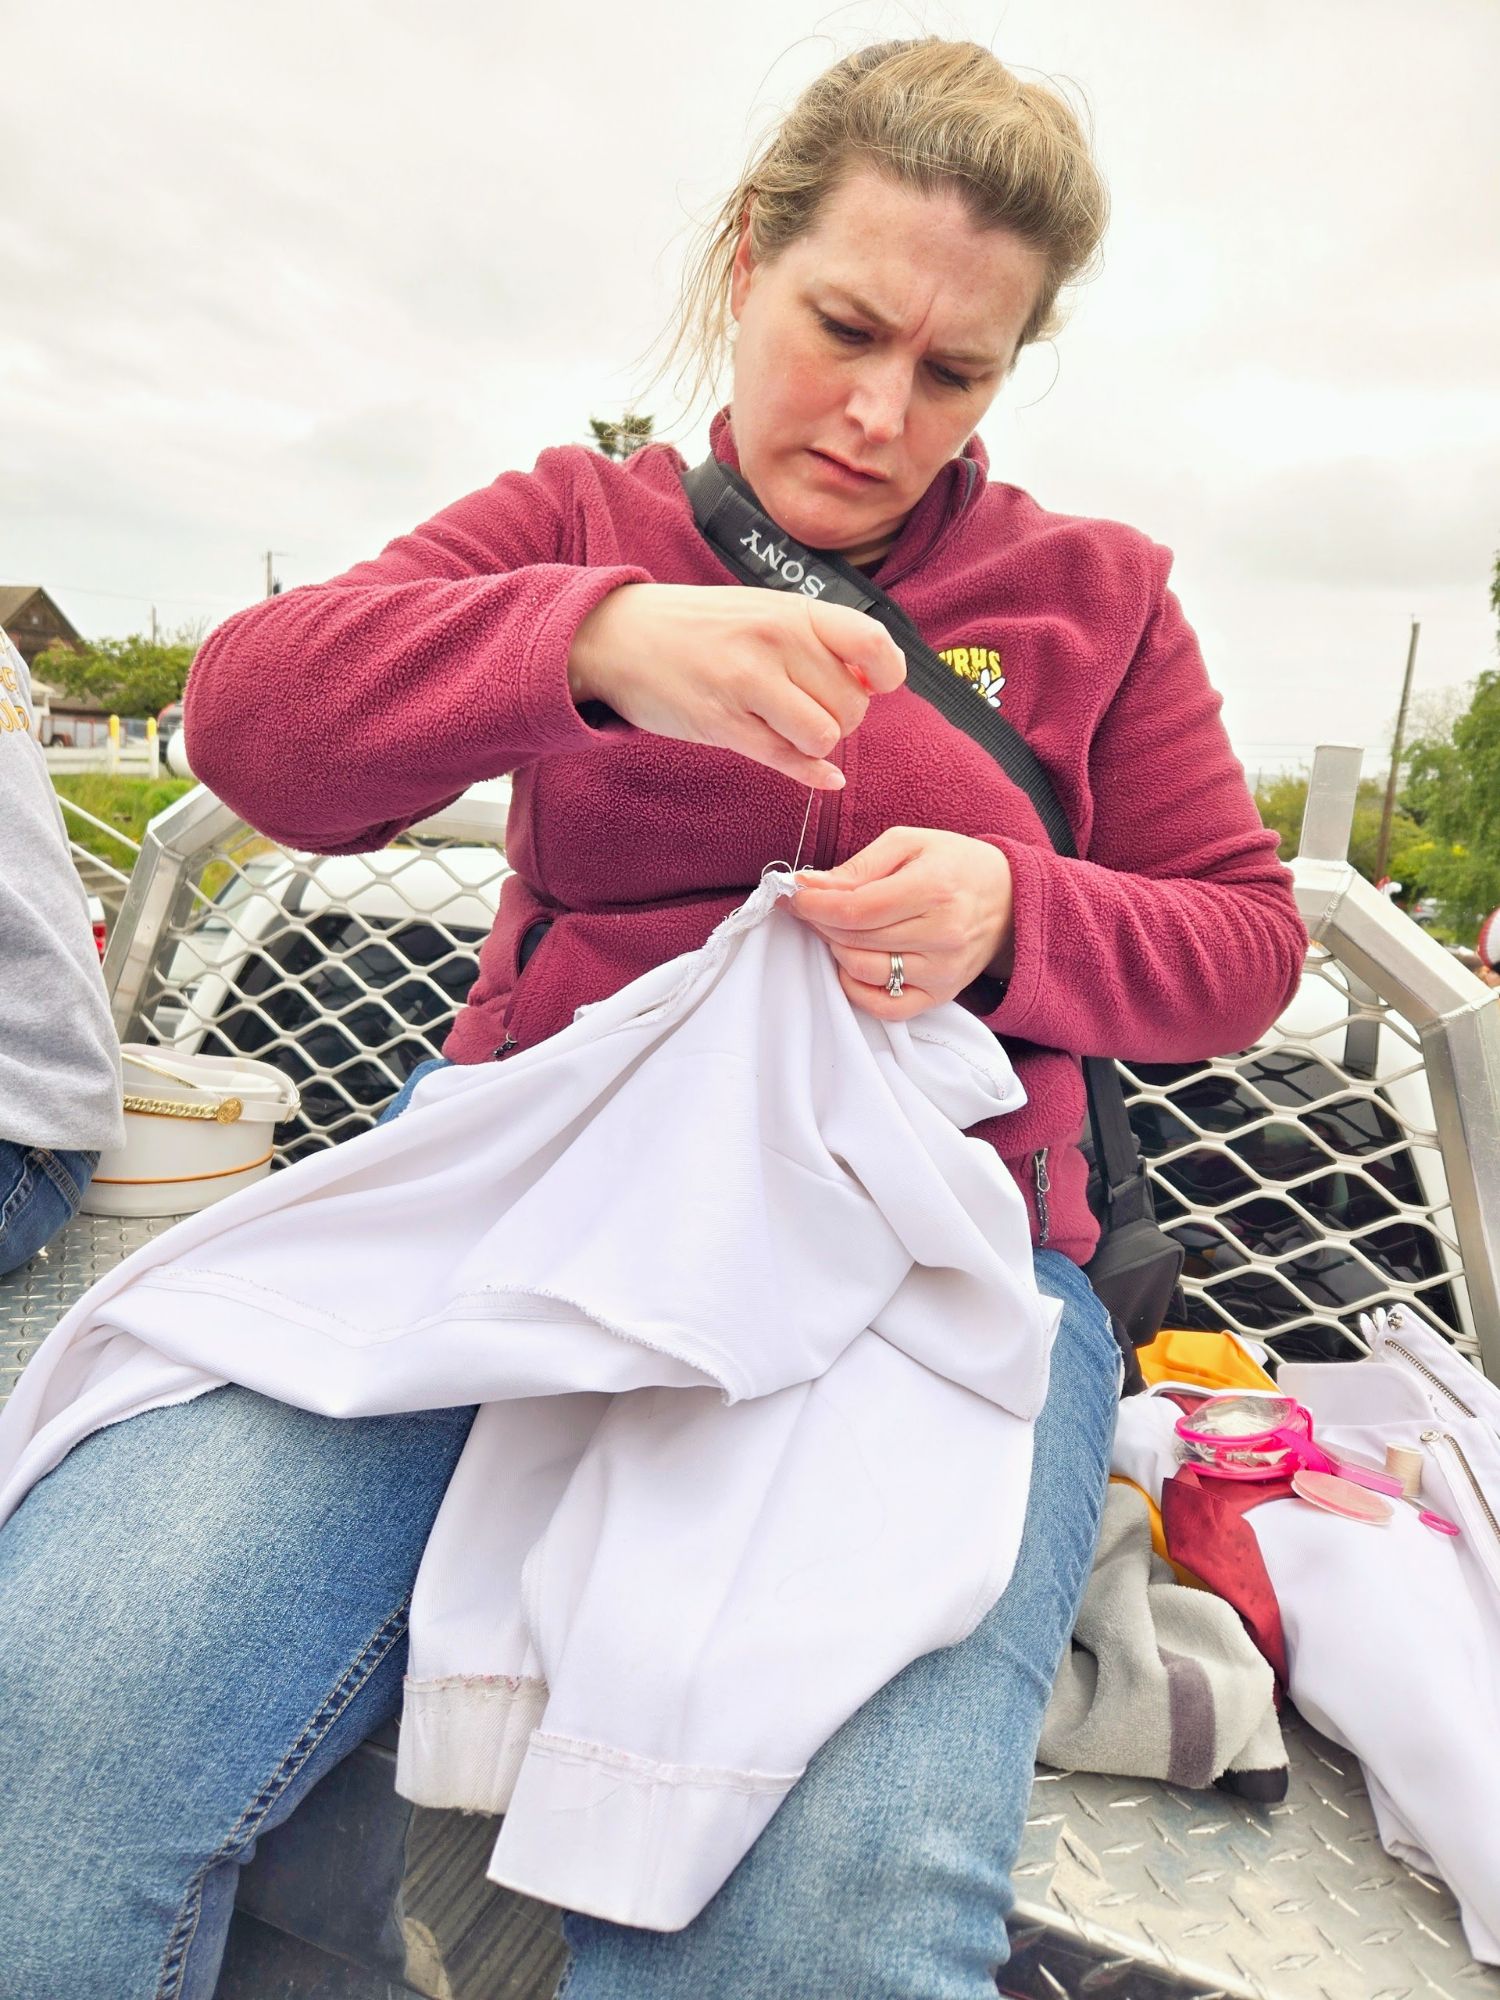
Marching Band Uniform Repair
I just want an excuse to share this picture with you because I absolutely love it:
One of the drum majors’ pants split right before a parade, so they were tossed to me in the back of the band trailer truck bed and I sewed as fast as I could as we travelled down the back streets of whatever town we were in to get to our starting location for the parade. Ha ha ha, another mom snapped this photo and I was very quick to ask them to share it with me because I knew I’d love it. (Pants were completed just in-time!)
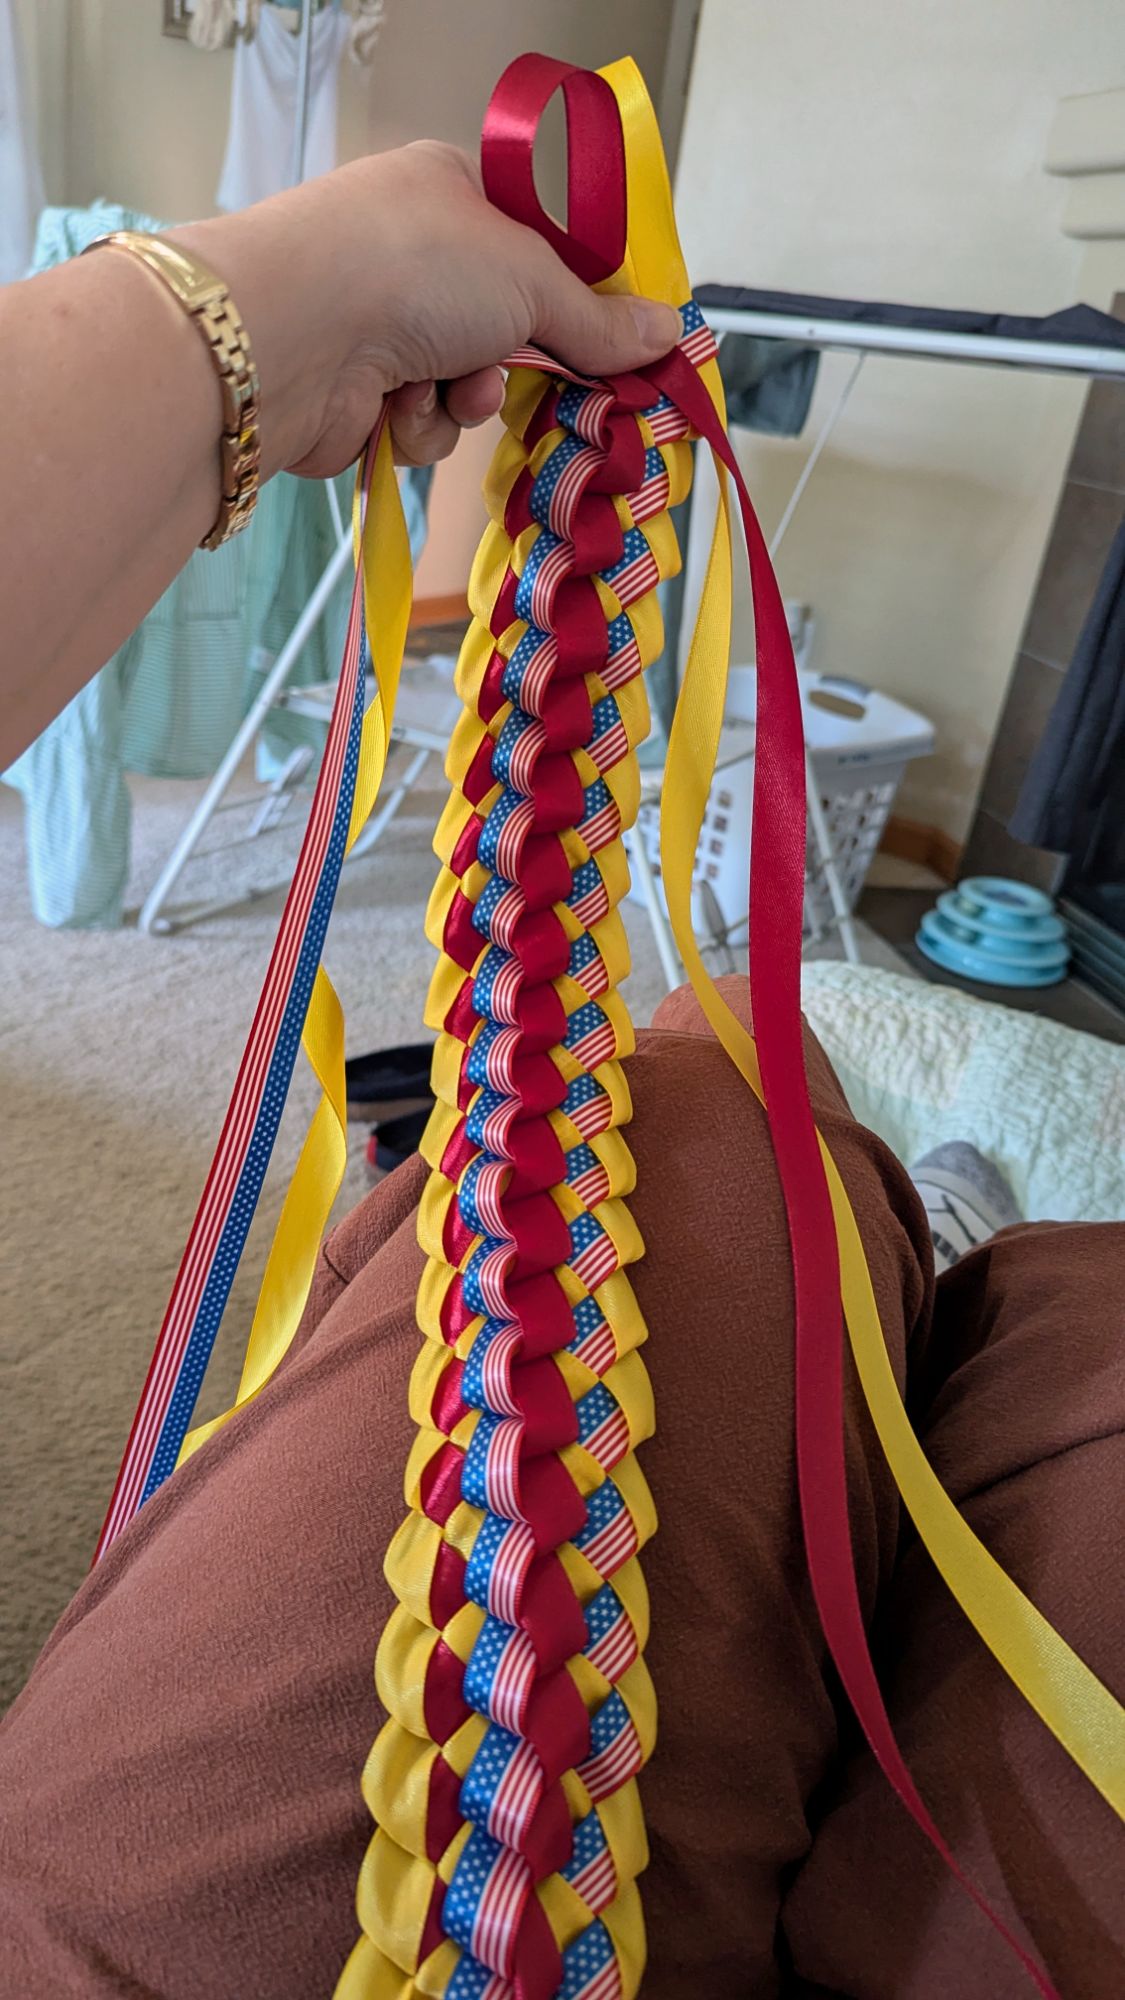
Patriotic Graduation Lei
I made a bunch of music-themed graduation leis in 2024 for my daughter and her band friends, and one of the parents reached out to me this year and asked if I could make one for her graduating daughter, but with American Flag ribbon. I was pleased with how it turned out.
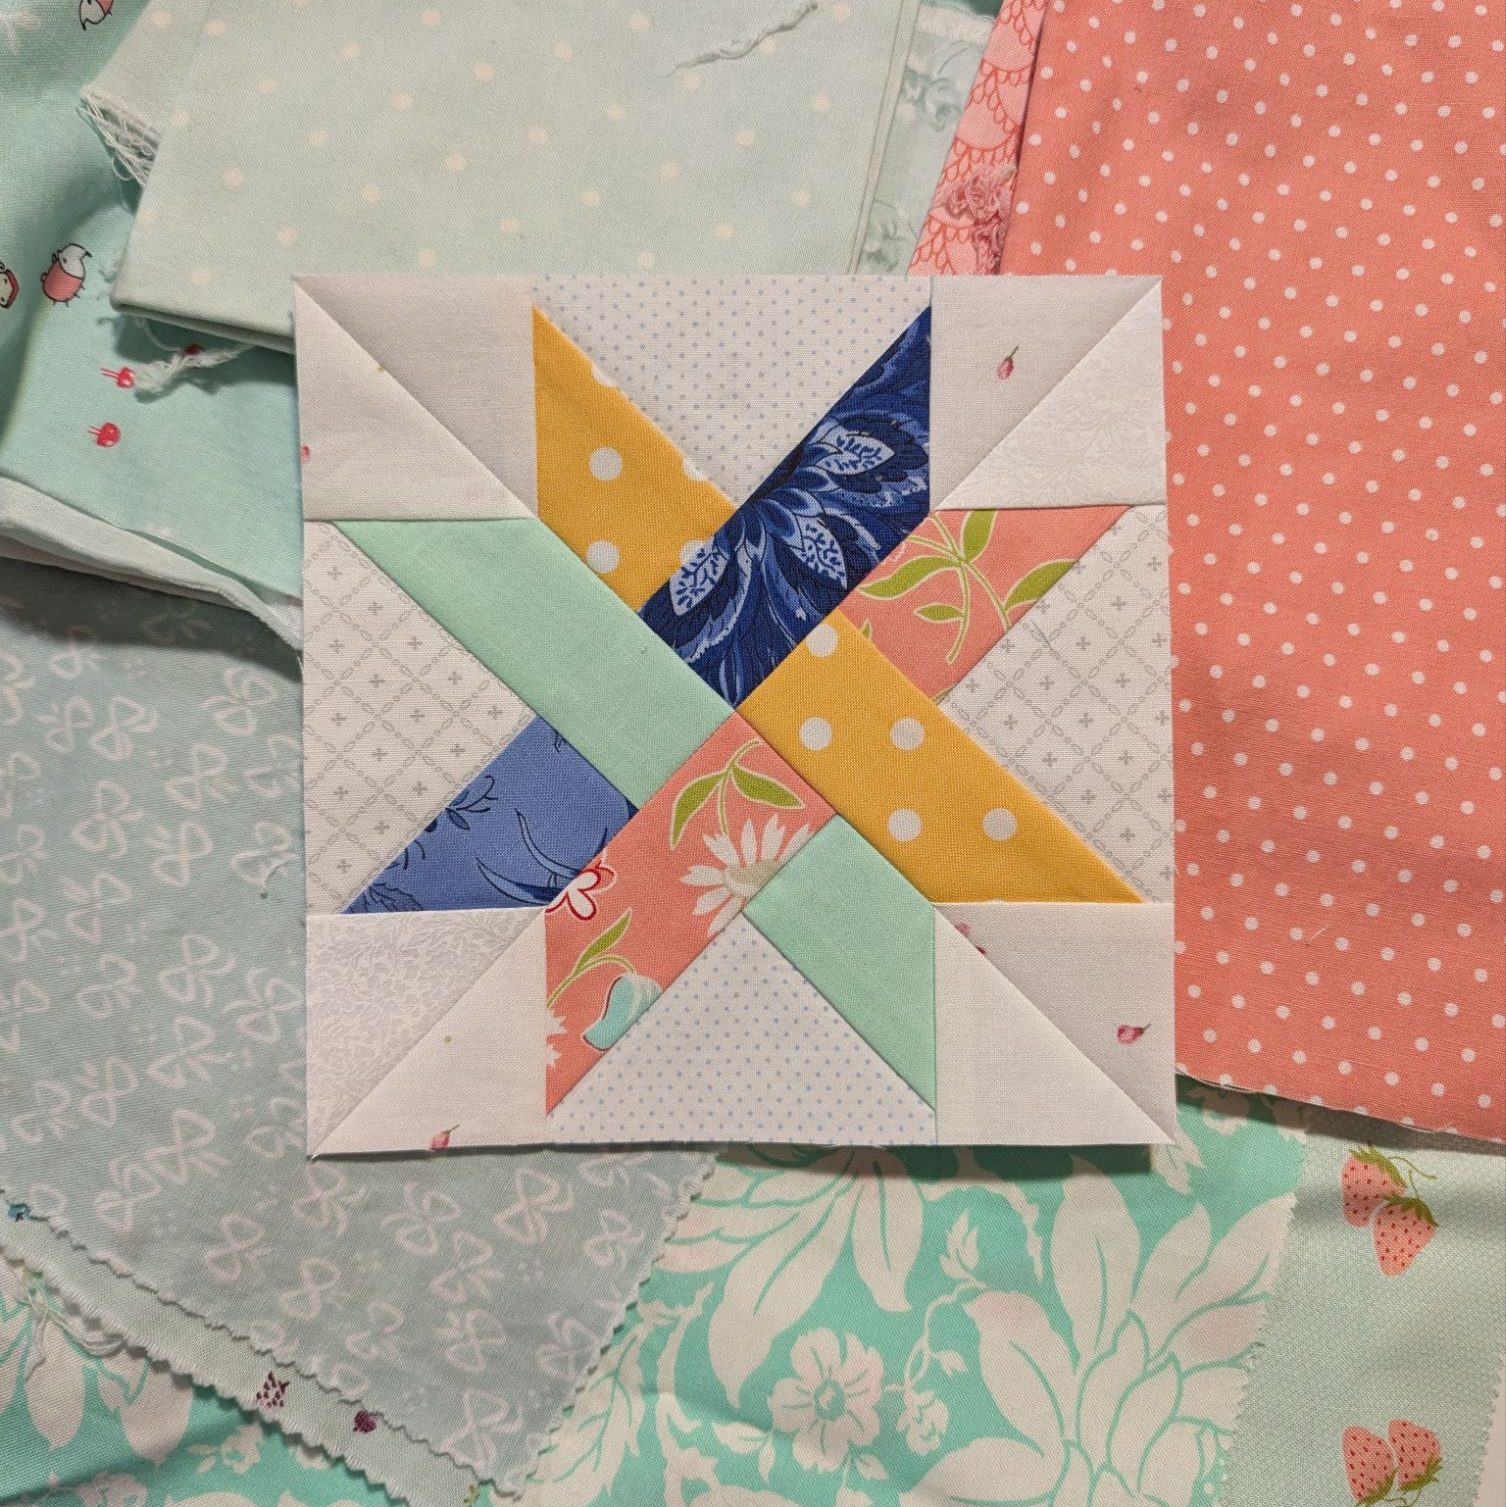
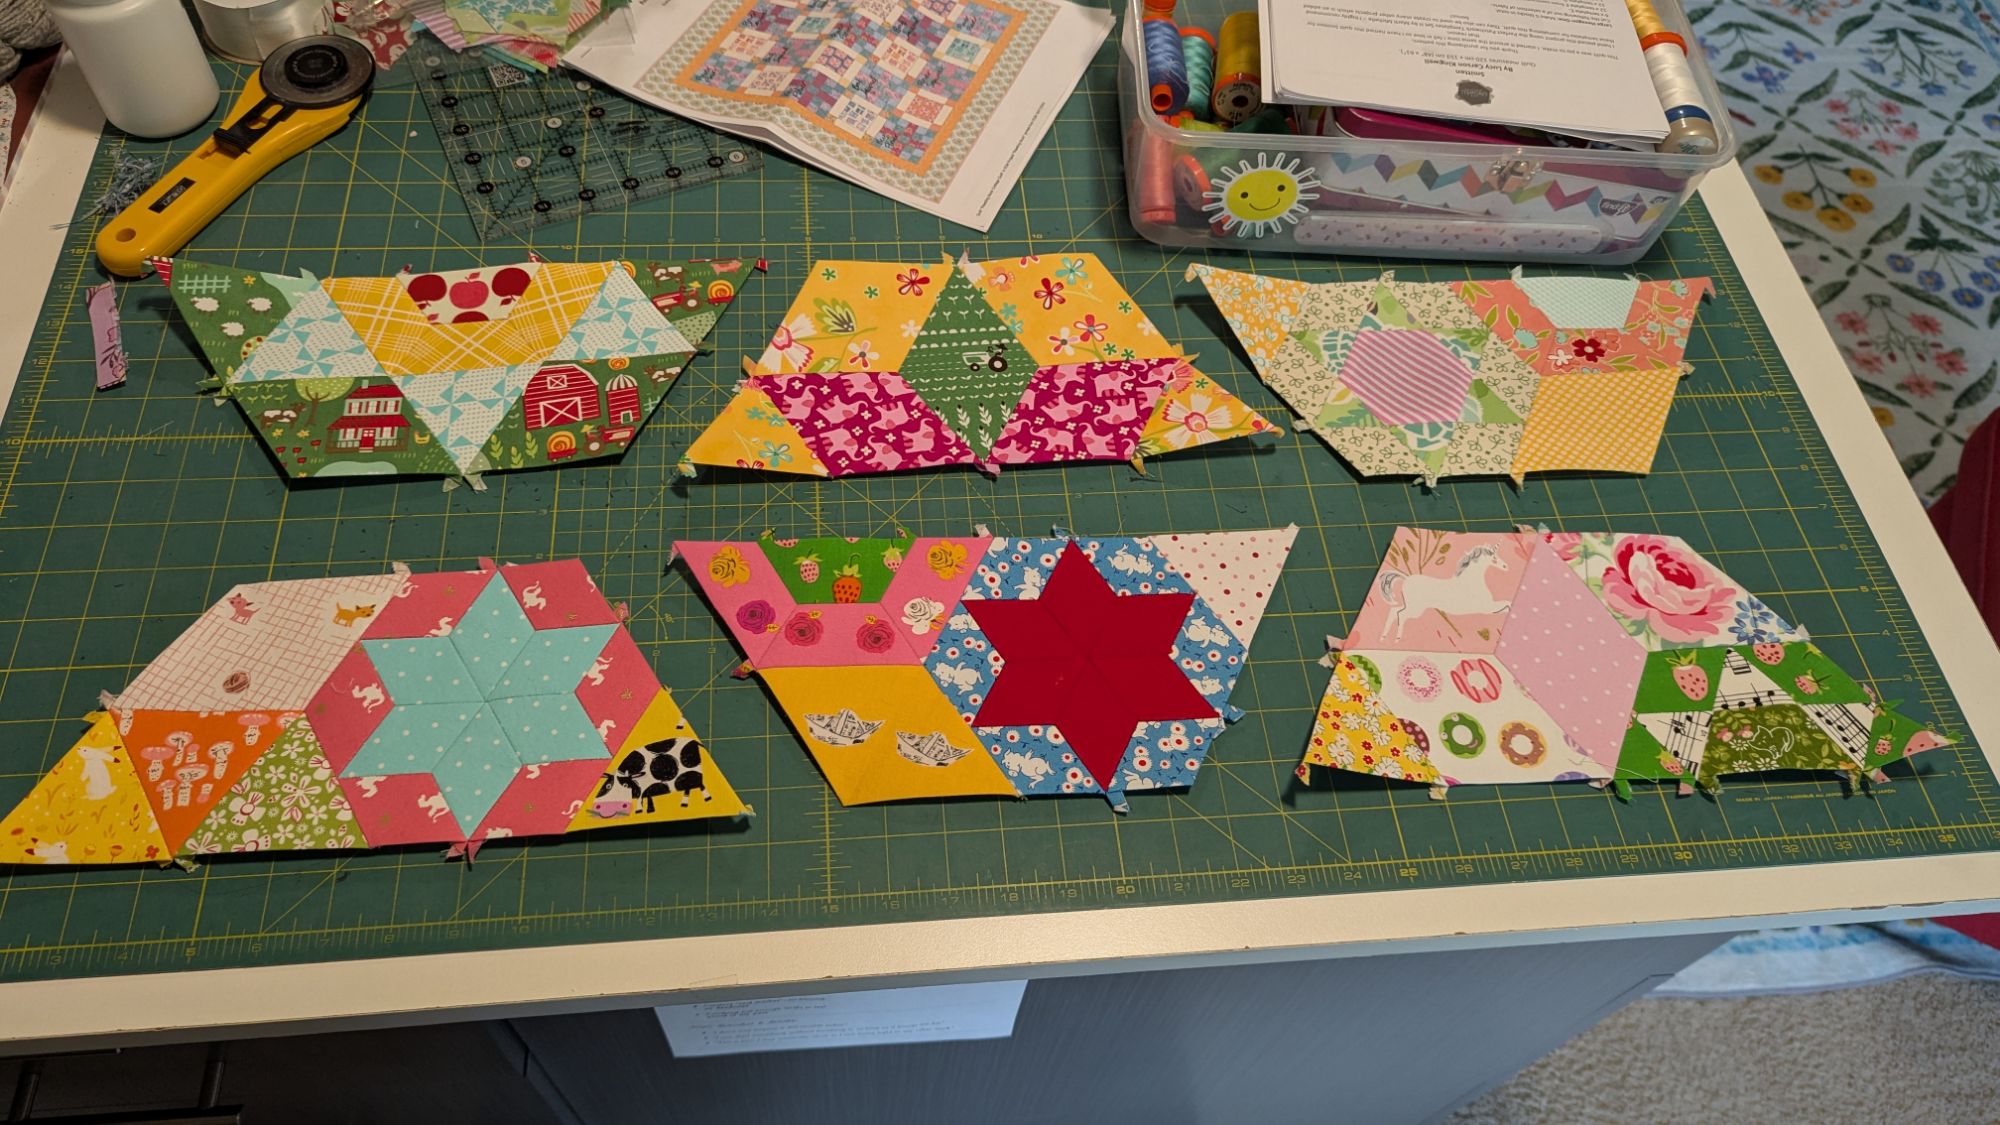
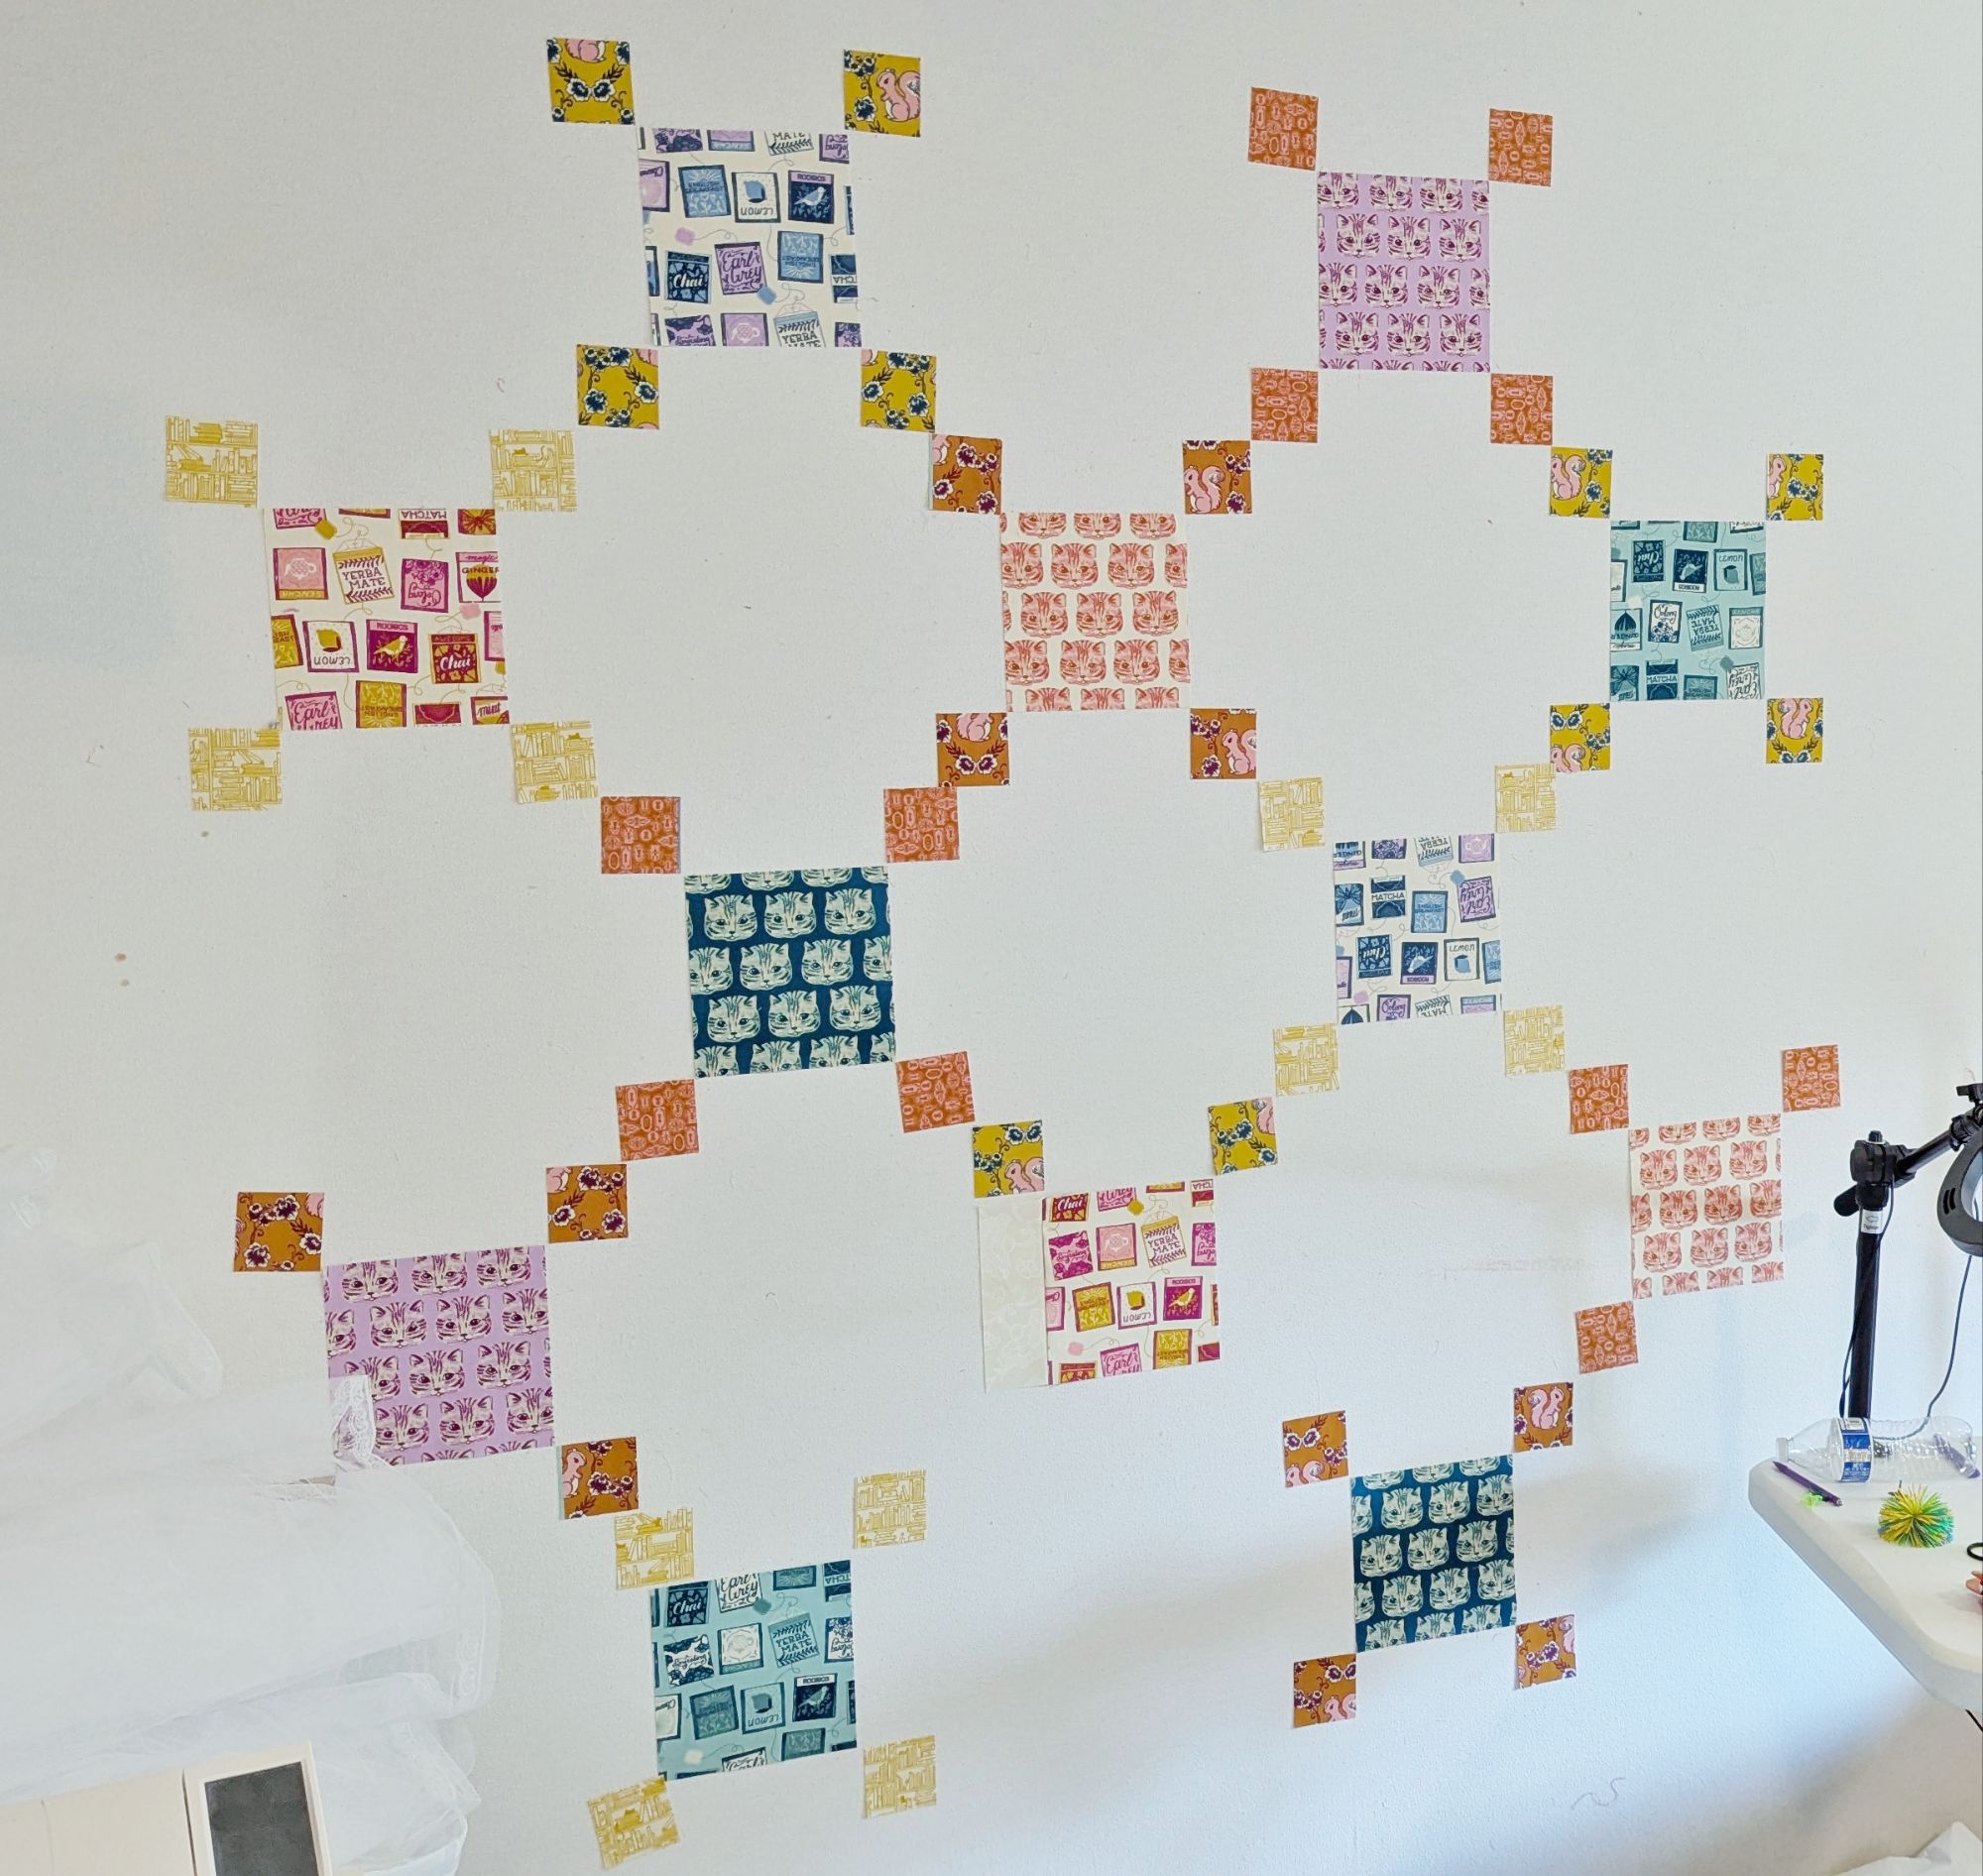
Smitten Quilt
All the individual blocks are pieced! I think I started this during 2020 Lockdown, so it’s been a slow and steady work. I started attaching the blocks into rows this summer, but it will probably take a long while before this quilt is actually done. I tend to only work on it in the summer.
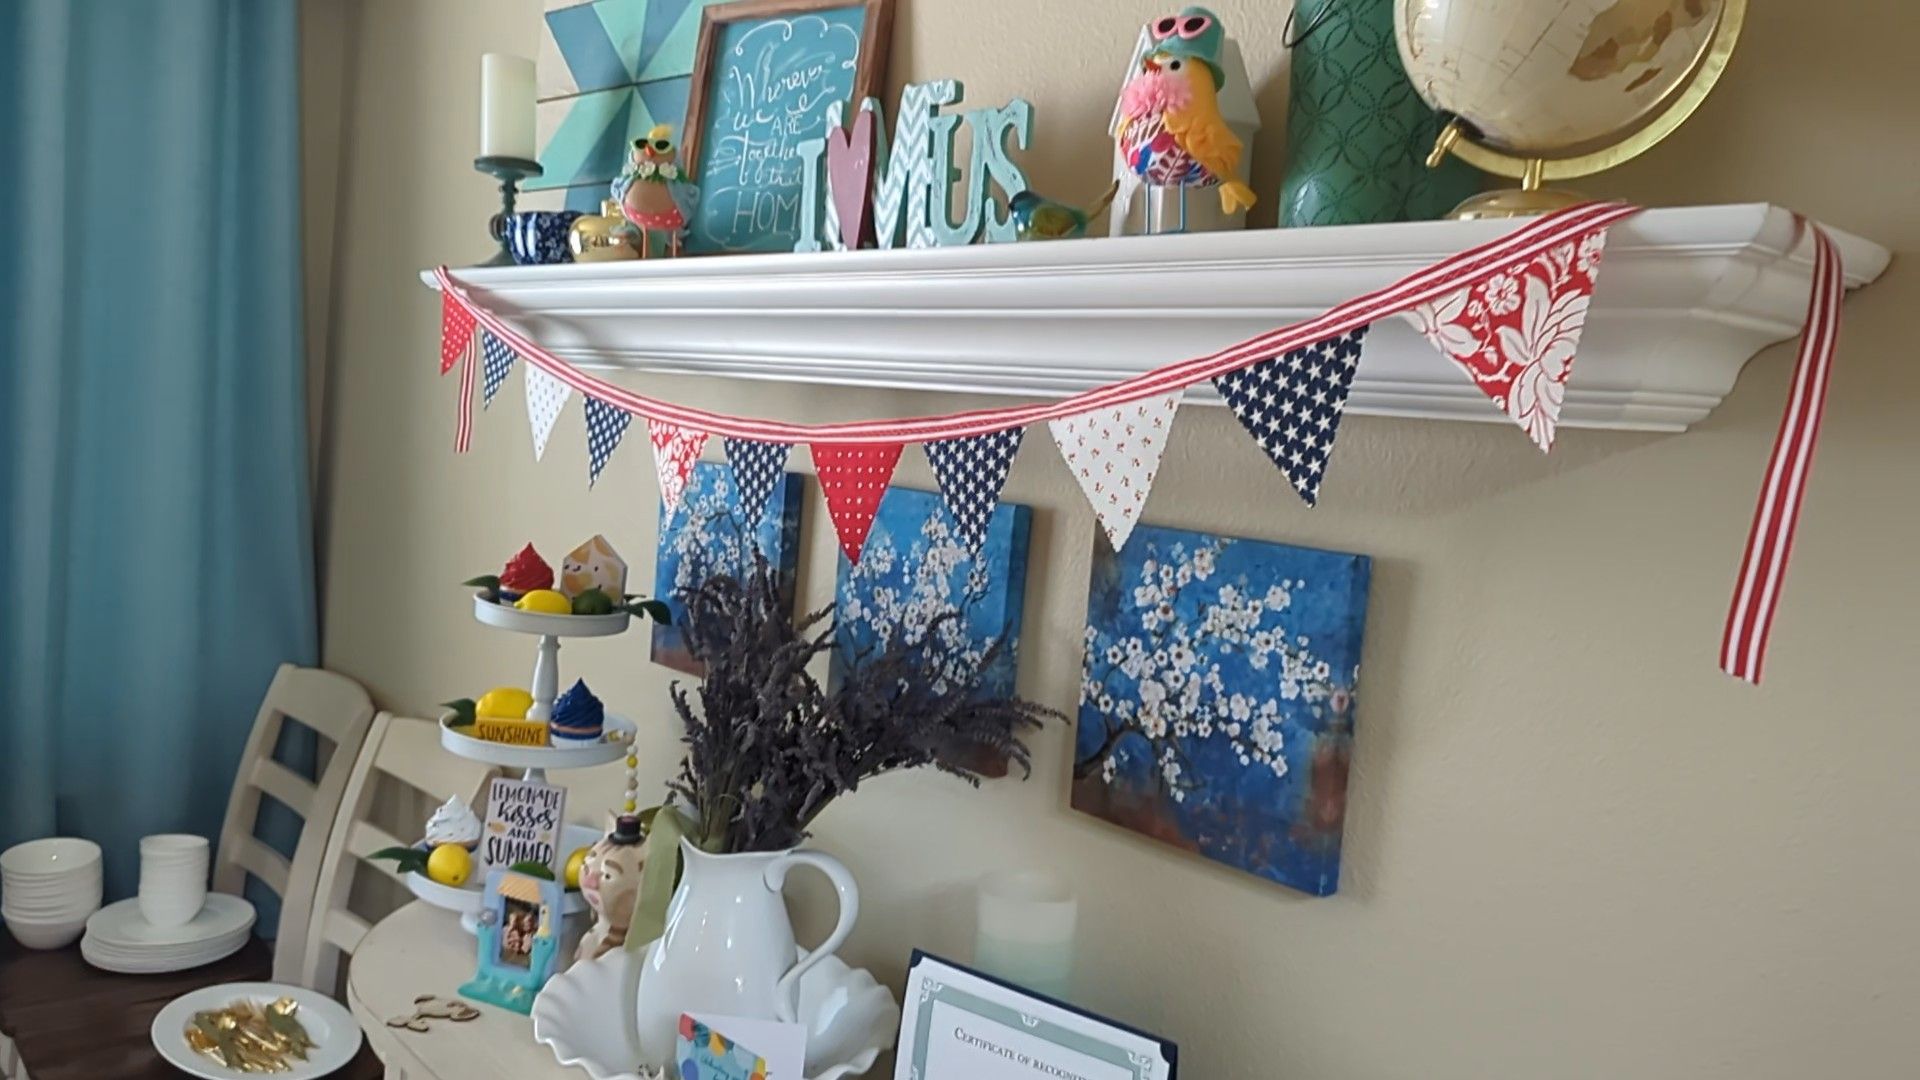
Fourth of July Pennant Banner
I’m realizing, between the patriotic graduation lei, my husband’s Christmas socks, and now this little banner, that I’ve done a lot of Americana-themed stuff this year. I threw this together one day in June because I was decorating for the upcoming holiday and wanted my mantel to be a little cuter, so it happened.
Reading Nook Cottage Quilt
I briefly mentioned this as a possible crafty goal in 2024. I ordered the fabric while I was completing my Master’s degree back in…2023(?), promising myself that I’d make something nice for myself with it once I graduated. Well, I was busy when I graduated and then everything went crazy, so I didn’t get to actually working on it until the summer of 2025. It’s a pattern of my own design, but nothing special; anyone could reverse-engineer it pretty fast. It’s still a work-in-progress; I decided to set it aside so I could resume working on Ren’s Penguin quilt.
Penguin Parade Quilt
This is the quilt that never ends. I really thought 2025 was going to be the year, but alas, it was not. Fingers crossed for 2026!
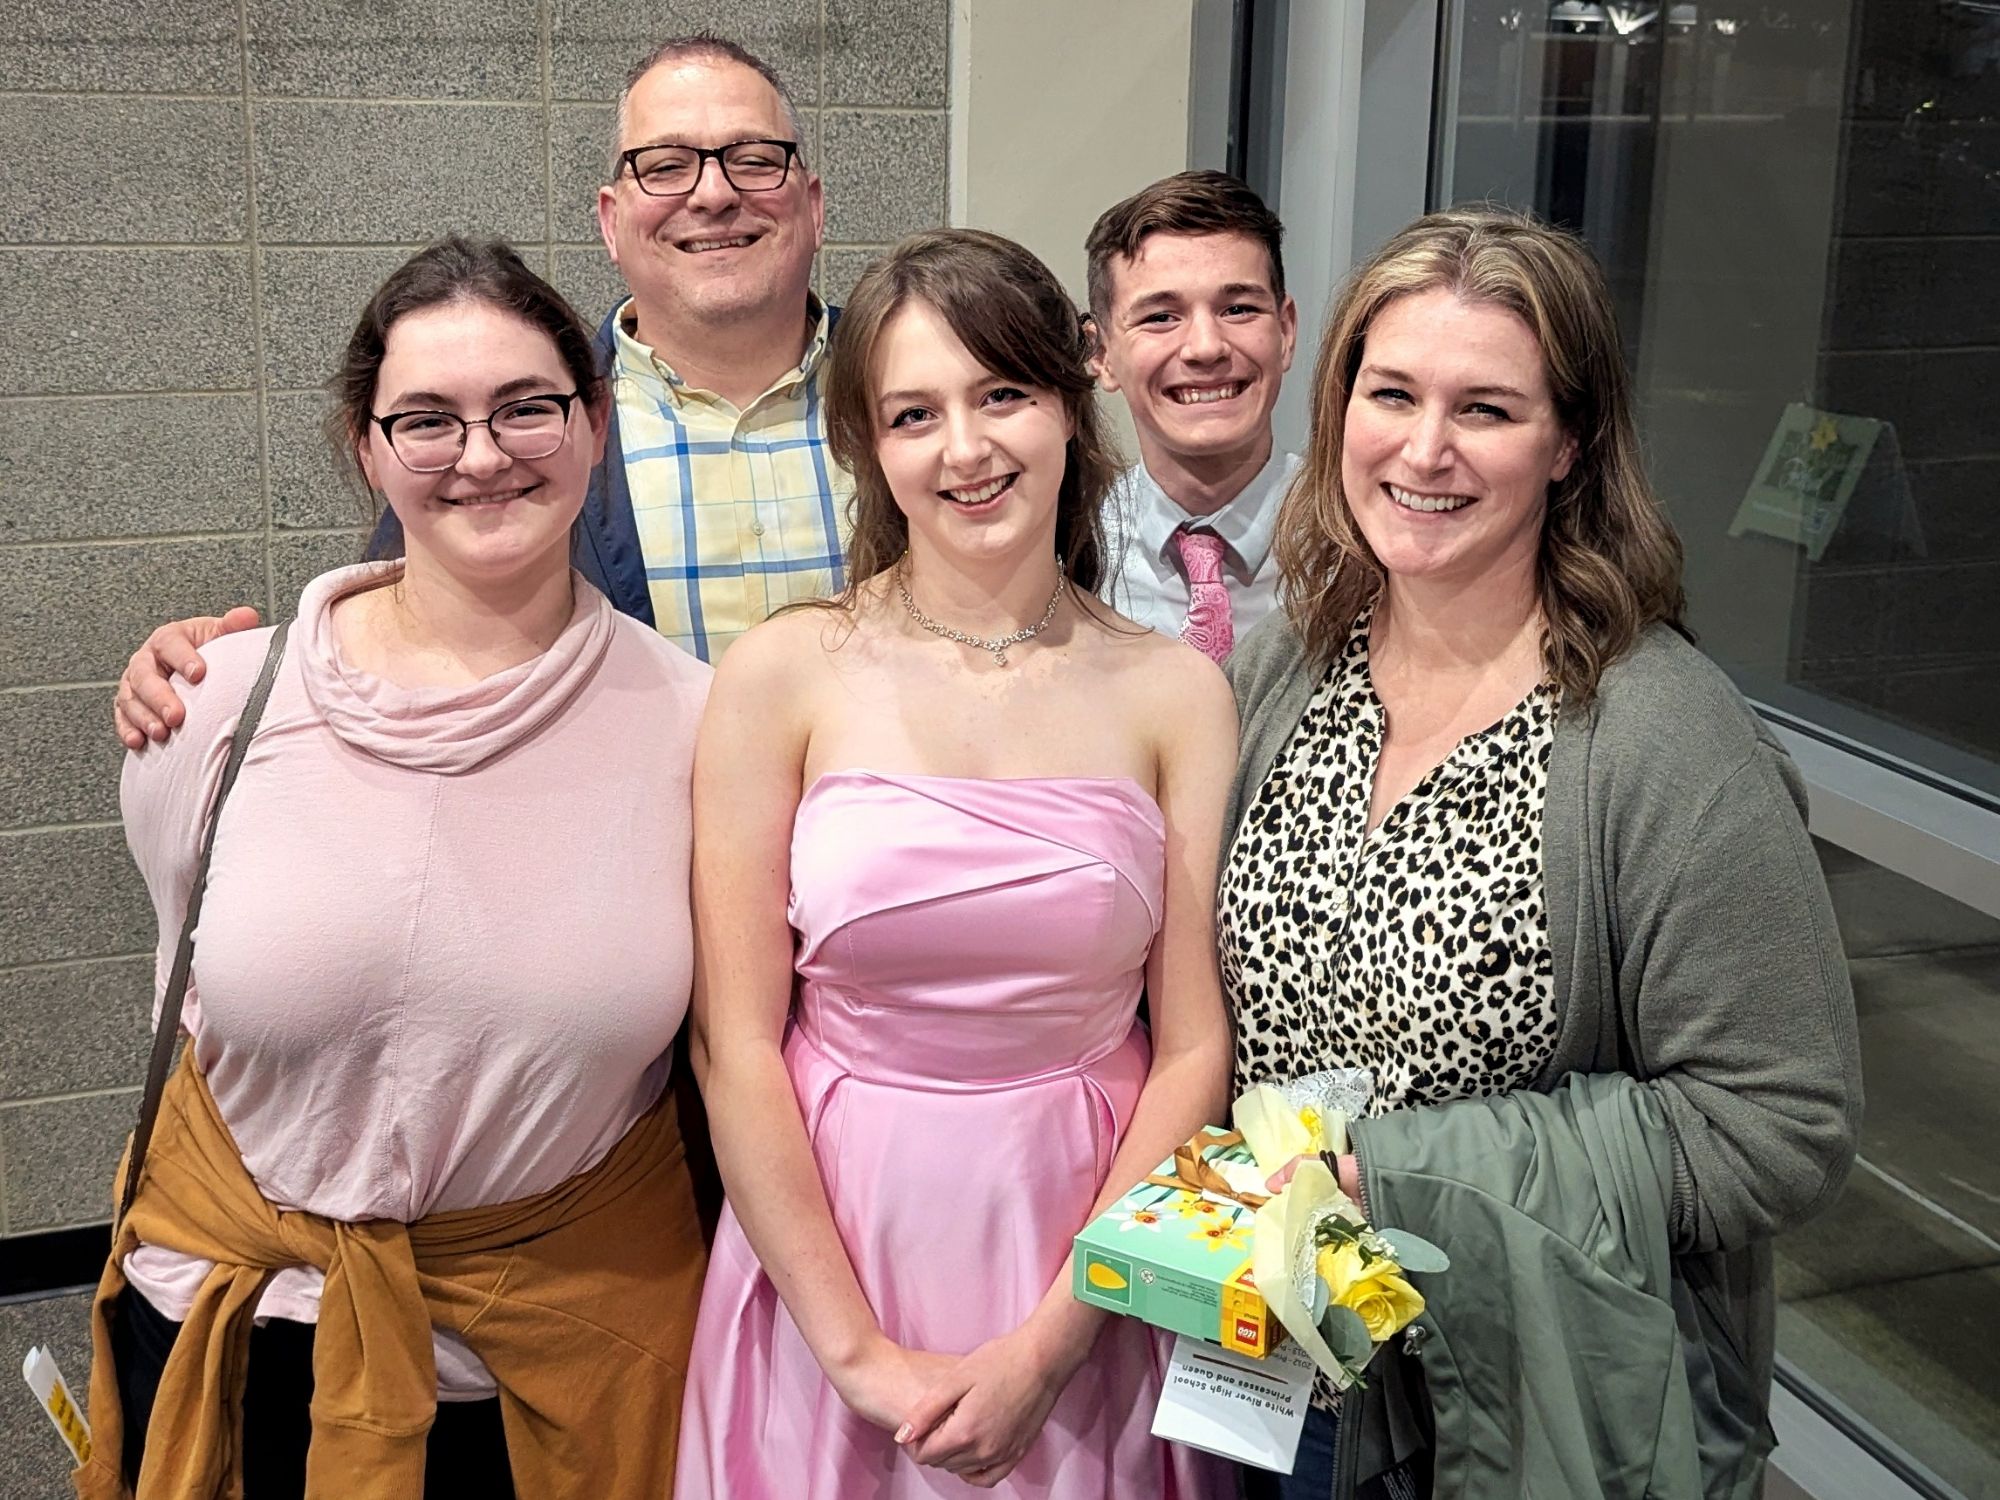
Hemming Rachel’s Homecoming Dress
Such a pretty dress, but I was sick while I hemmed it and when she went off to the dance, so I don’t really have any photos of it.
Oh my gosh, I am sick of hemming formal dresses. I would so much rather make the entire dress than hem a store-bought one. Hemming the dress is the worst part, and Rachel does not enjoy the process of being fitted for a handmade dress, so I no longer get to experience the exciting parts of dressmaking, just the worst parts. Boo. (She did look so pretty in this dress at the Daffodil Princess Selection Ceremony, though! Still proud of her!)
Christmas Alphabet Embroidery Sampler
I really enjoyed working on this. It is FINISHED, but awaiting framing. The frame has even been purchased, but between the Thanksgiving bout of COVID, the Montana funeral chaos and all the schedule upsets that accompanied the Epic Washington State Flooding in December, I haven’t yet gotten to framing it.
Peppermint Blossoms EPP
I think I’m going to scale down this project. I’m tired of it. It’s cute-ish, but I’m just not seeing a vision for it anymore.
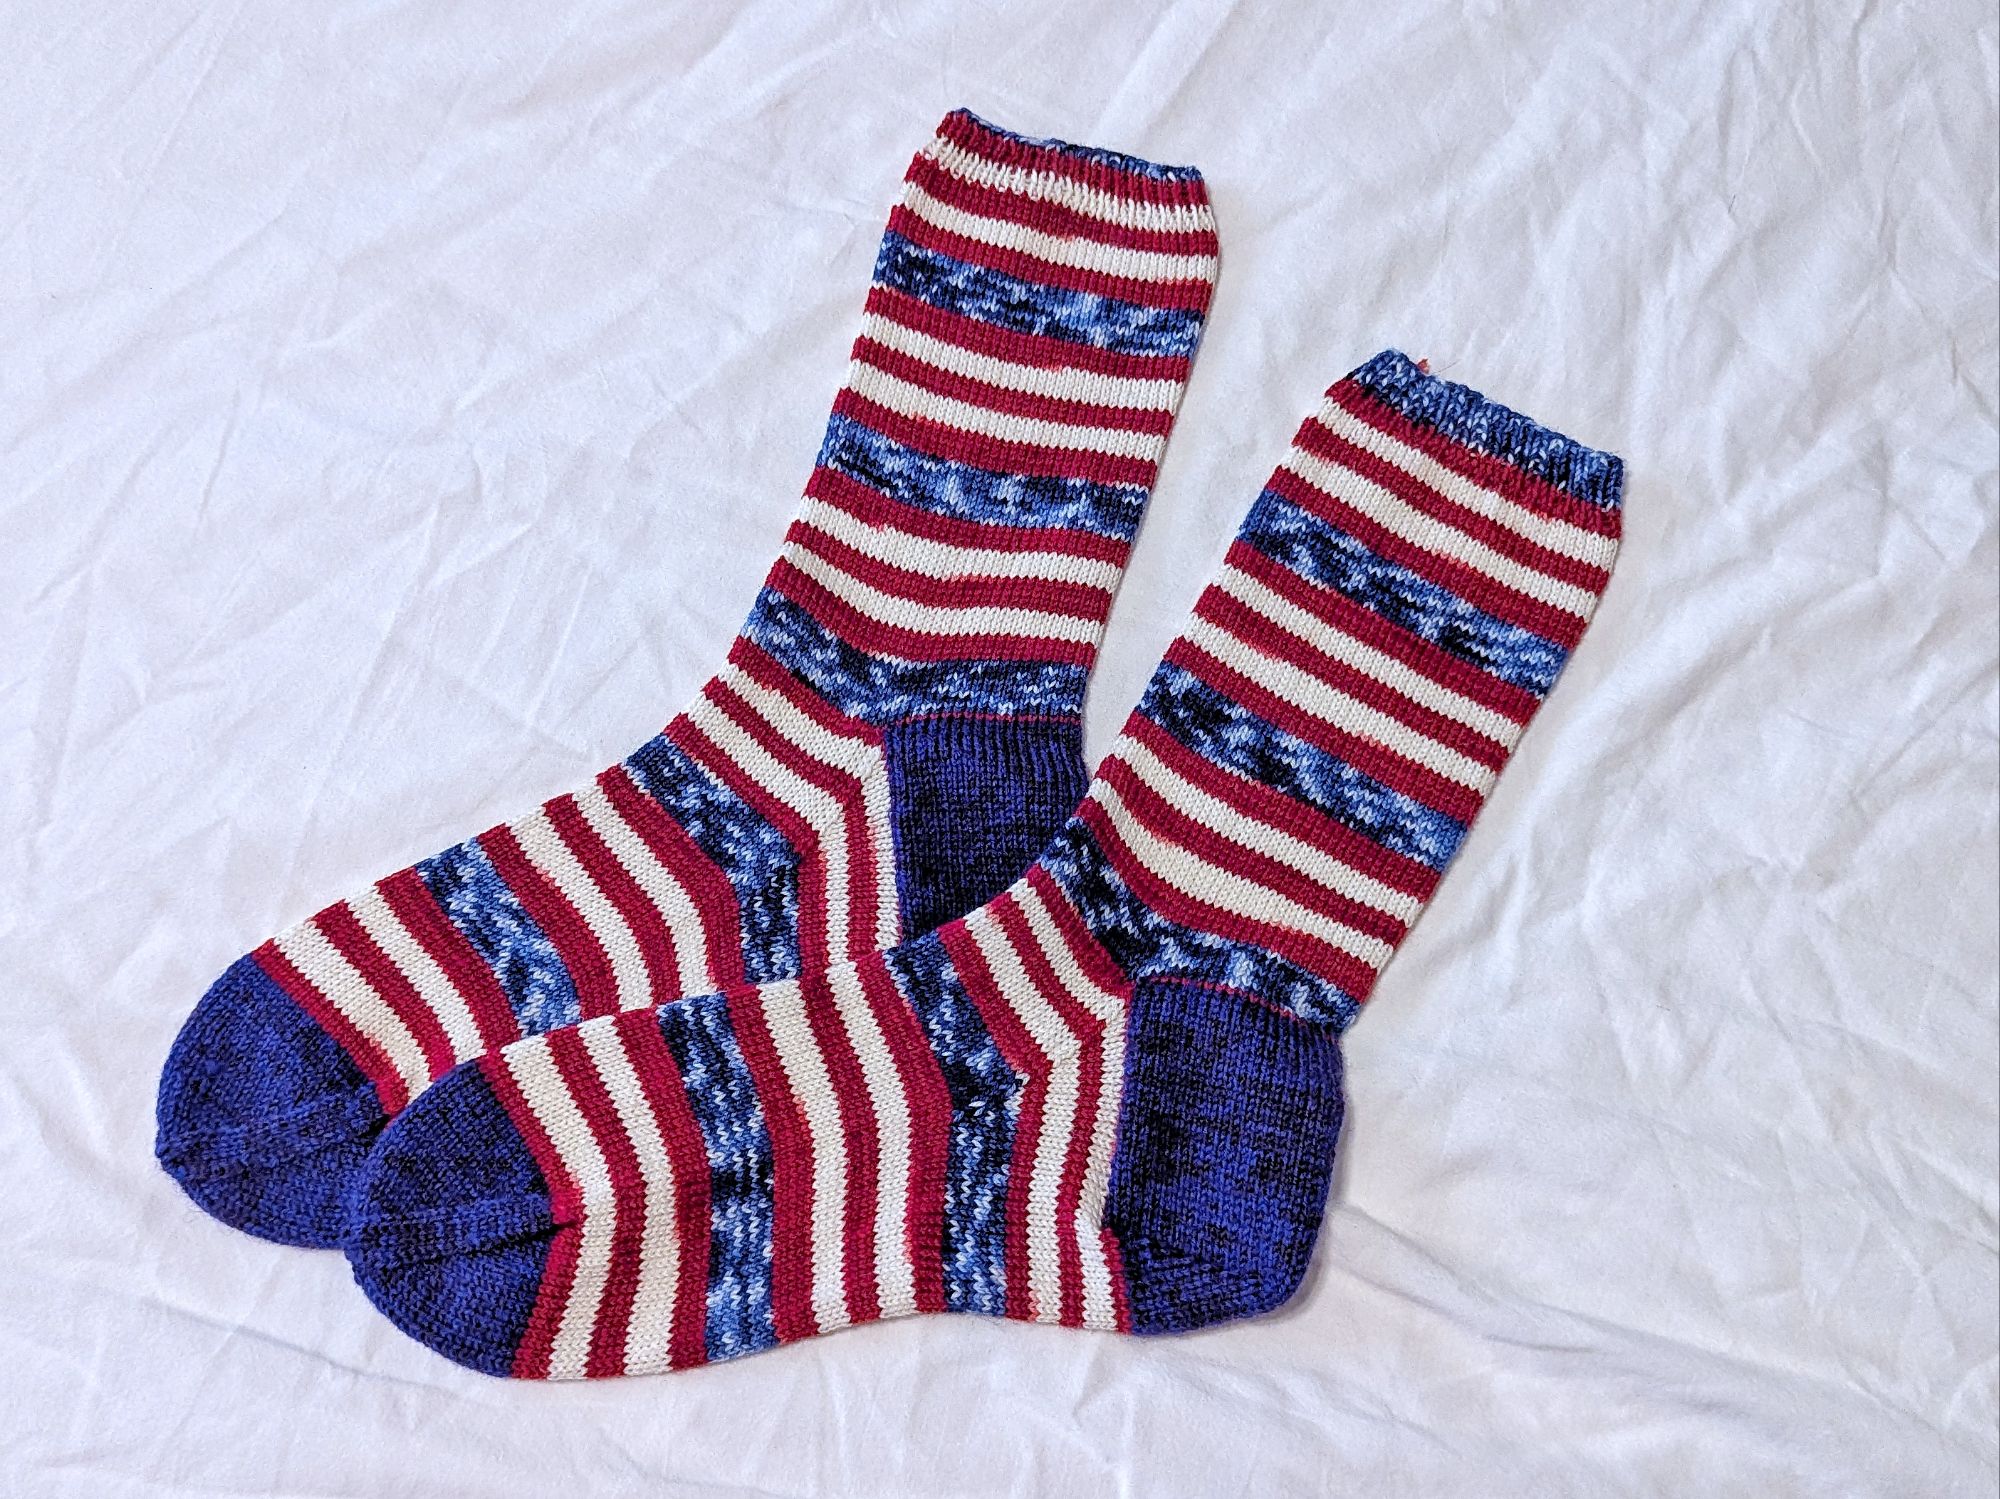
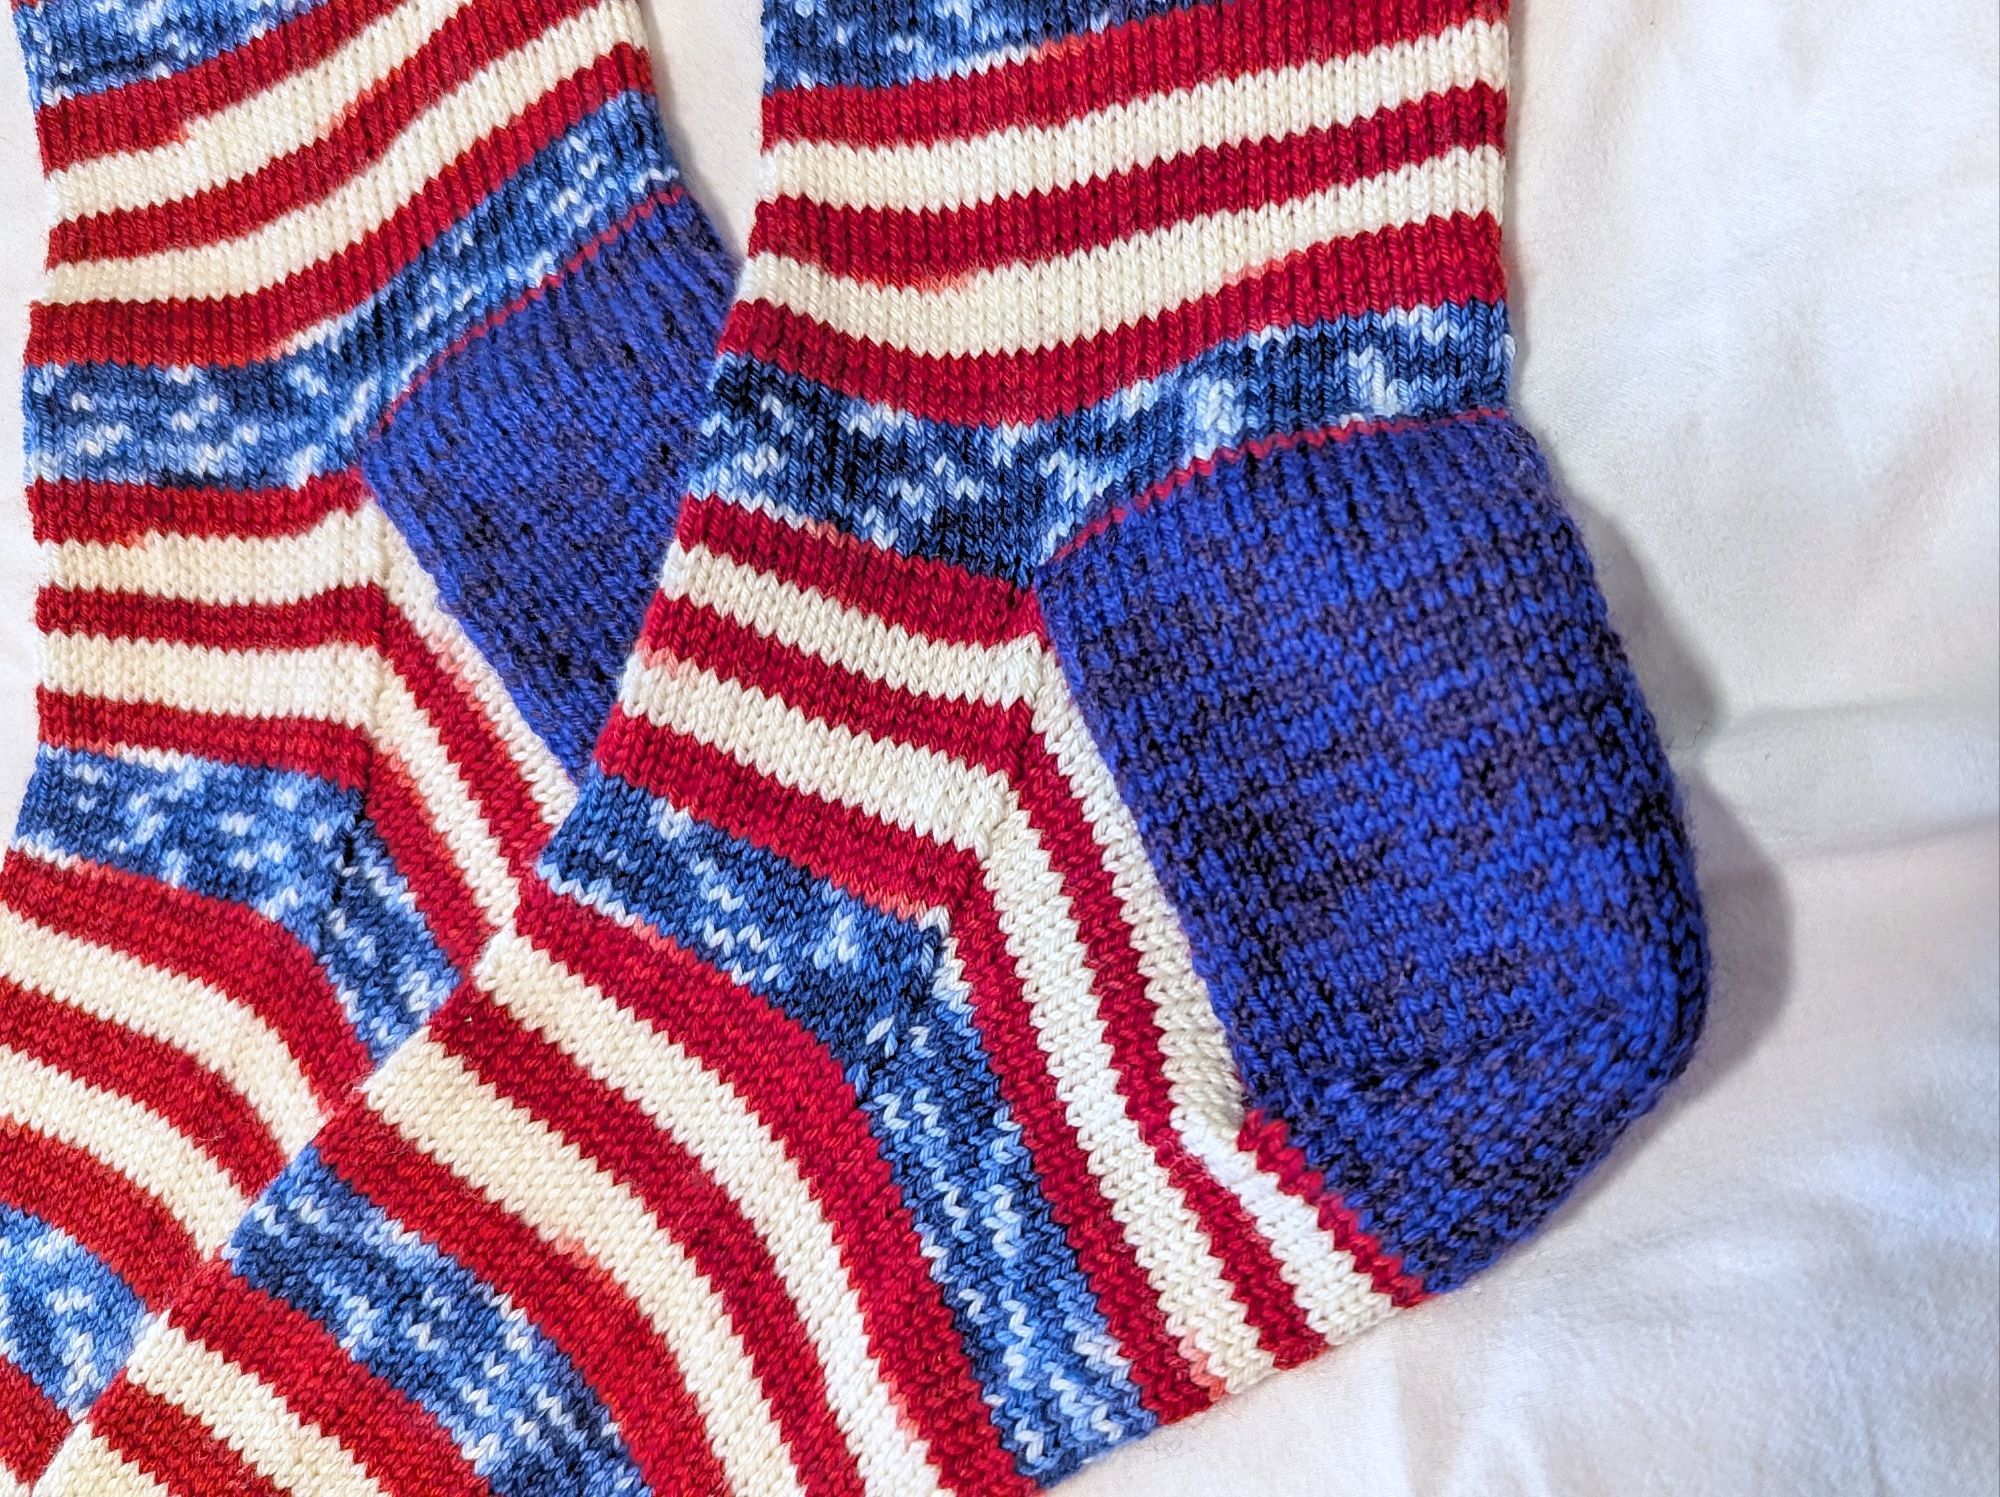
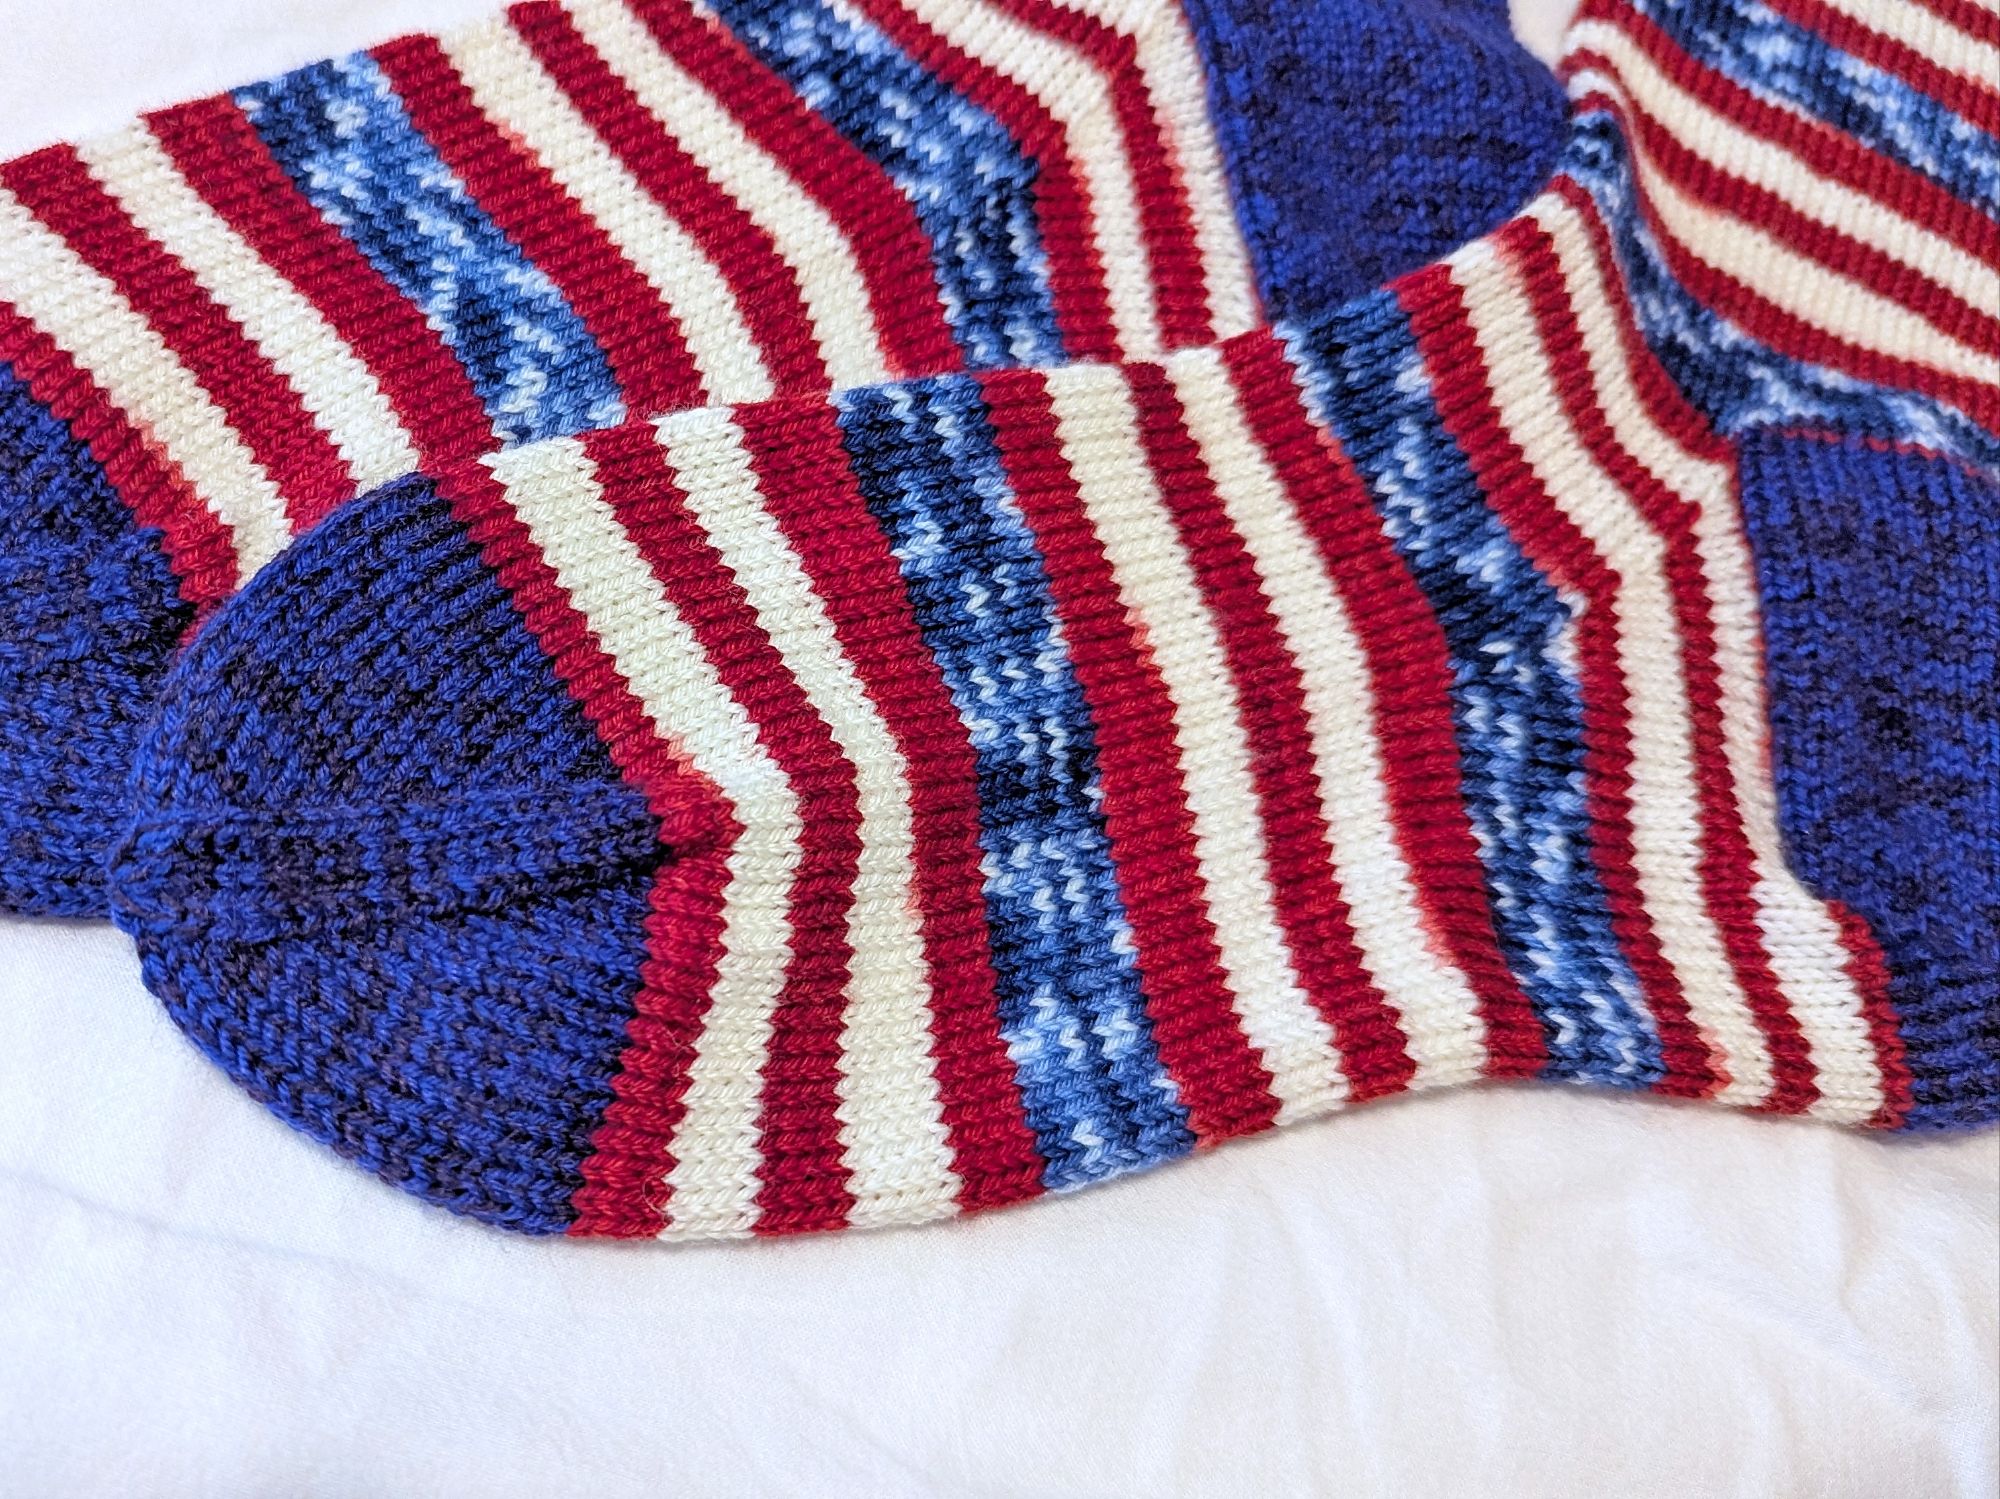
Hubby’s Christmas Gift Socks: American Flag Socks
They turned out pretty amazing. He loves them! Such a fun yarn colorway, and I’m really enjoying throwing contrasting heels and toes onto self-striping yarn socks. If only I could remember to also do the cuff/ribbing in the contrasting color as well! It makes my heart happy to see another set of socks in his growing pile of gifted Christmas socks.
I am really hoping to do more creating in 2026. 2025 was a tough year that was spent in a quasi-paralysis as I recovered from the complications of my 2024 surgery, the trauma of the stalker, and adjusting to some big life changes. I have high hopes for 2026 because, really, things should definitely trend upwards after all the weird upsets we’ve experienced recently. The law of averages works that way, right?
So, hopefully, part of the reason that 2026 will be better than 2025 is that I’ll do more creating in the craft room. Fingers crossed!
It’s the first Sunday after Christmas, which means Michael’s wearing his brand new pair of socks to church for the first time. I made him a really great pair this year! He was completely surprised by them and has dubbed them his most favorite handknit socks EVER.
Modifications: None beyond the contrasting heel and toe.
We were discussing his growing collection of handknit socks last year after he opened his 2024 pair, and he mentioned that it would be really cool to have some striped USA socks, but it would probably be really difficult to start and stop with the red and white yarns and how that was too much to ask of me. I tucked that little quip away in my note-keeping app and when it came time to decide what to make him for this year’s socks, I decided to take a quick look on the internet to see if some self-striping Americana yarn already existed out there. I happened upon The Painted Tiger’s version and bought it as fast as I could. So exciting!
You know you’ve done a good job when you’ve been knitting for over twenty years and your husband opens his present, after squeezing it and saying, “This feels like socks,” and exclaims, “WHOA! Did you make these?!?!” He was so pleased with the colorway! I’m really happy with his enjoyment of how they look already!
I don’t know if I can top these ever. I’m not too worried about it at the moment; it’s just been great to listen to him fawn over this pair. Merry Christmas, my love.
Note: These socks were originally given the code name of “Cherry Twilight Socks” as I worked on them earlier in the year so I didn’t give away their very distinctive design feature. All posts tagged as “Cherry Twilight Socks” have been updated with the “American Flag Socks” tag.
Another Spring Break done and dusted. We had a great week of not having to be anywhere and having the freedom to explore and do what we felt like doing on our own schedule. Reminded me of our homeschooling days. Gosh, I miss those.
Top priorities this past week:
HAVE A GREAT SPRING BREAK
Perhaps get some work done in the garden
Hem Rachel’s prom dress
Caring
.
It matters a lot to me that I do some fun things with the kids during their Spring Breaks. I spent some time researching interesting places to go on our side of the state and asked Rachel and Nathaniel if any of them sounded interesting. Nathaniel chose The Flying Heritage & Combat Armor Museum, which I had never heard of, and Rachel wanted to do a good old-fashioned trip to the zoo. So, we packed up one morning and did a “Seattle Day Trip,” which also included a trip to the Dick Blick store in Seattle, which Rachel’s wanted to visit since we moved here. (I generally avoid Seattle like the plague these days because it is no longer the beautiful place that it was in my youth—makes me too sad to spend much time there anymore.)
.
I also wanted to work on hemming Rachel’s prom dress, but never got around to it. Ugh. She ordered a dress that ended up being too long for her, and it has like five skirts, so I’m getting to experience all the worst parts of dressmaking (hemming) without any of the fun parts whatsoever (basically every other part of sewing a dress). Super jazzed. Next week is crazy busy with Easter prep, so I probably won’t get to it until the week after that. It’s a little too close to the deadline for my liking, but it is what it is at this point.
Gardening
Nope. I’m thinking this year is going to be a lean garden year. I just can’t/won’t find the time to get out there and work on it. Which is fine; I just need to wrap my head around the idea of quite possibly letting that slide this year.
Creativity
.
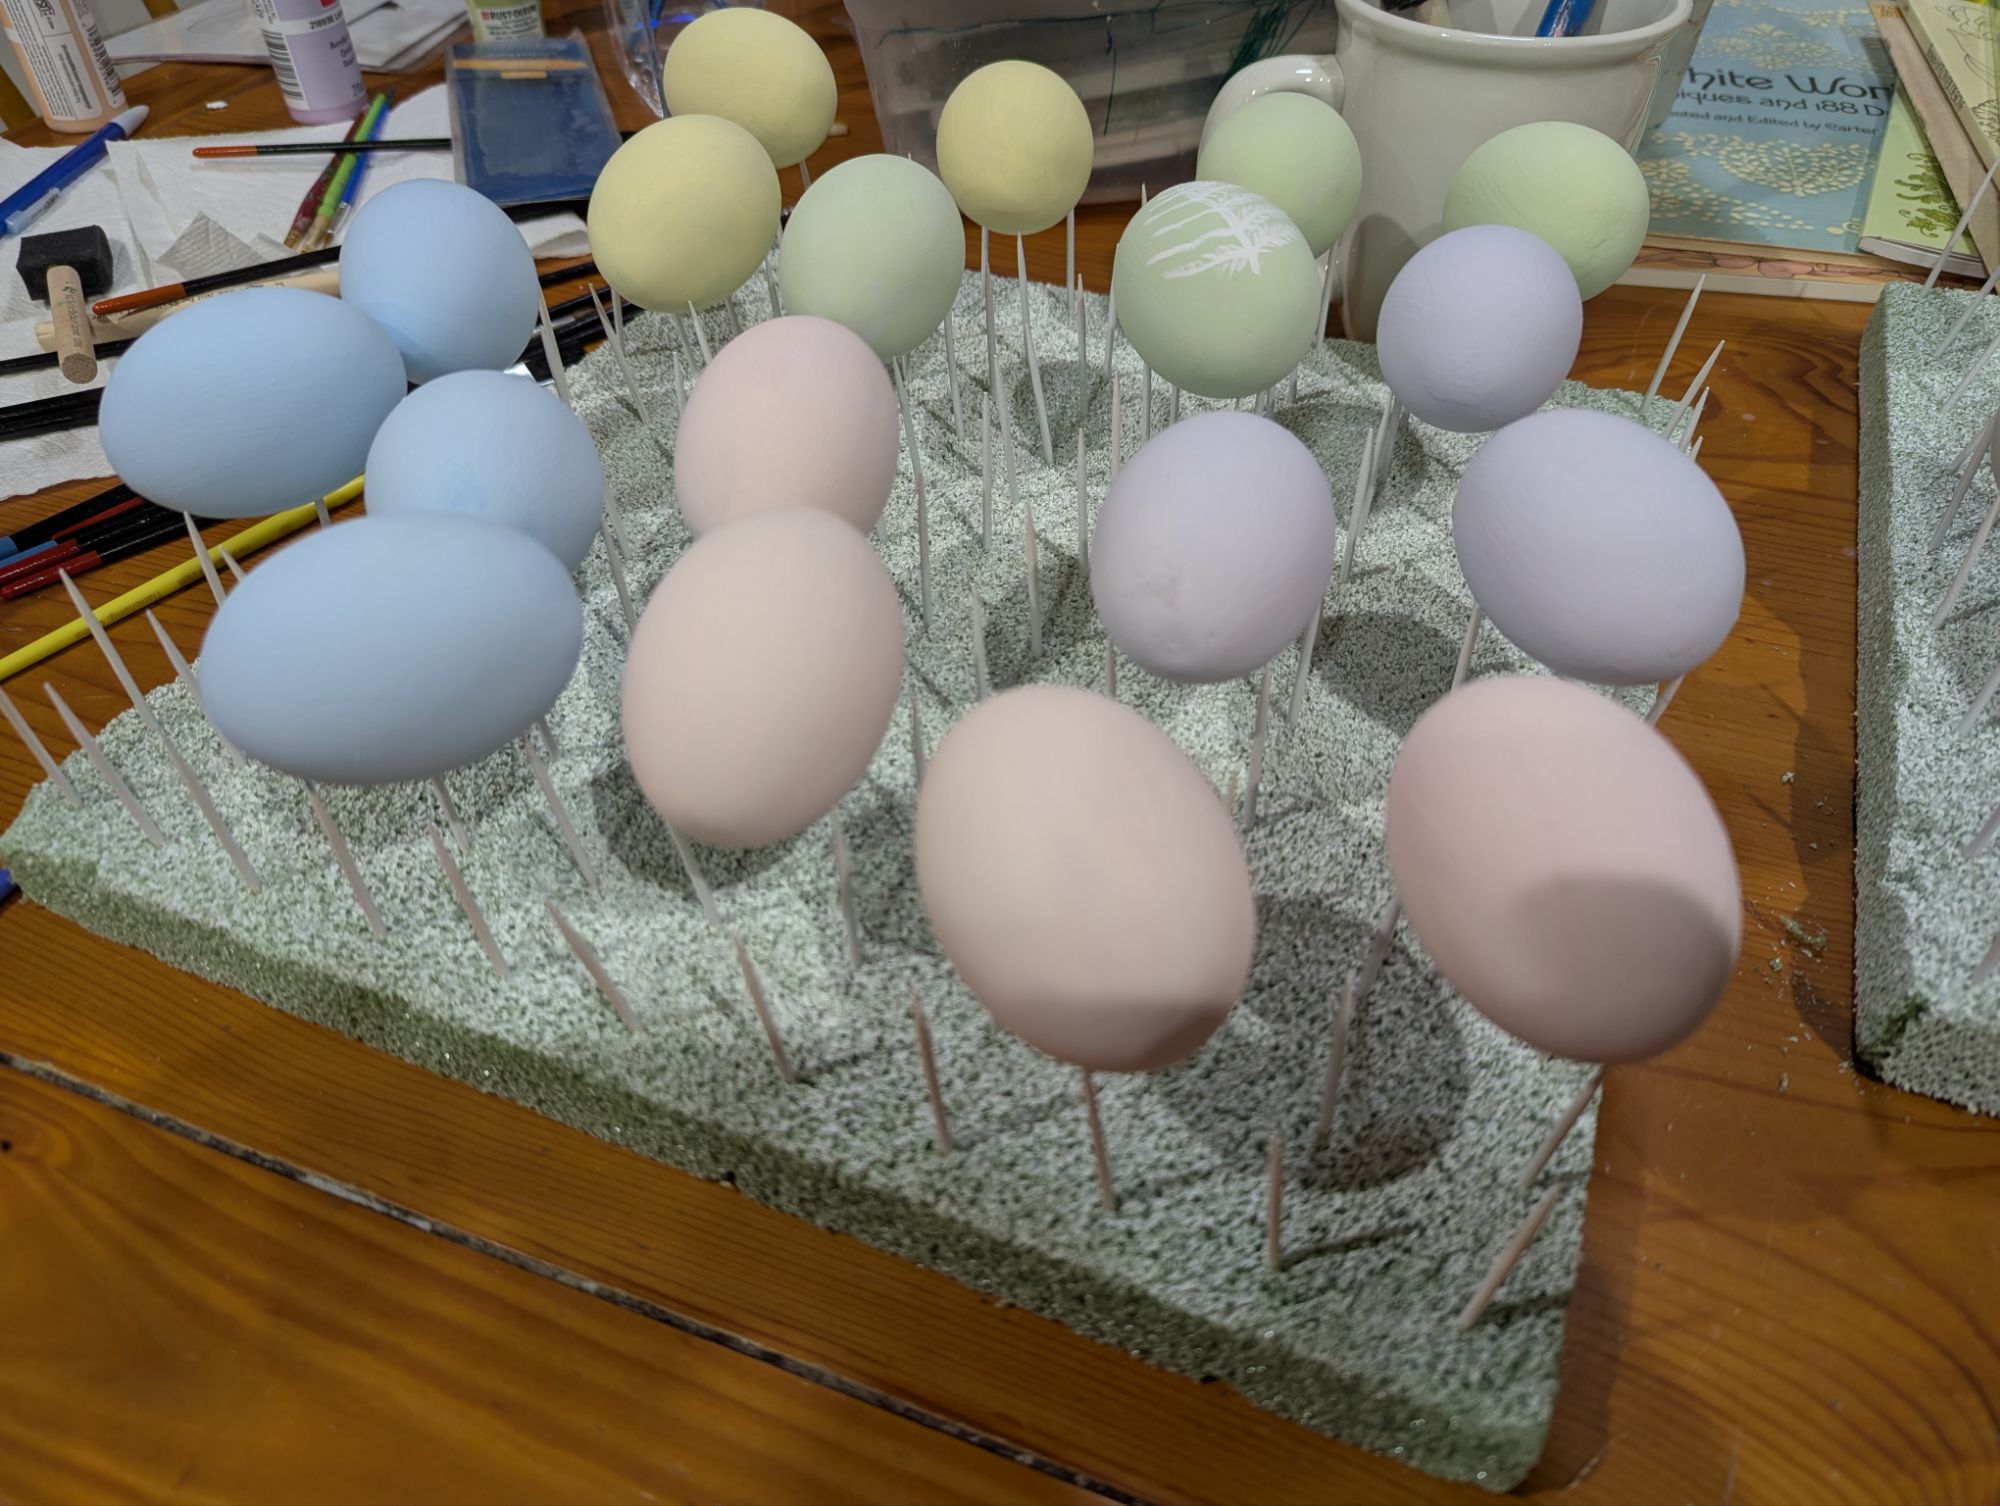
We’re in the process of painting some wooden Easter eggs for our Easter table centerpiece. We’ve done pysanky and regular egg dyeing in the past and we’re kind of over putting all that effort into making eggs each year only to eat them or have them break later on. Very few of us like hardboiled eggs, so dyeing up a bunch means a lot of them will go bad over the next weeks. I’d rather make our decorating efforts last, hence the experiment with wooden eggs this year.
.
It’s been fun exploring new ways of expressing my creativity lately. Something I’ve noticed over the last few years is that I tend to rotate through my hobbies, and once spring hits I’m not looking forward to more time in the craft room. As of right now, I’m looking forward to pursuing more painting projects and dedicating my focus where I feel it’s needed most, like in the garden or in physical activity.
Final Thoughts
I took the week off from quilting so I could focus on the kids and spring break activities—something I’ve finally felt strong enough to enjoy again, and that in itself has felt like a quiet victory. But as I’ve stepped back to breathe a little, it’s becoming clearer that I can’t keep juggling everything I love with the same intensity. Life is gently nudging me to shift focus for a season, and that might mean sharing less online.
.
That said, this moment of pause also reminded me just how much joy and beauty this space has held over the years. I’ve spent some time revisiting old posts and projects that still make my heart sing, and I’d love to share a few of those with you, too:
FACE MASKS. (We’ve been through so much together, friends…)
.
I wish a you a lovely upcoming week of spring! Isn’t it just the best season ever?!?! Loving this year’s spring. Thank you so much for being a part of my world.
It’s pattern release day for the King David’s Crown quilt, so I can finally show you this beautiful project in its entirety!
.
The Pattern
Since this pattern is part of Fat Quarter Shop’s “Classic and Vintage” series, the requirement was to make just one of the blocks, but when I saw this pattern I really liked how unique it was compared to the quilt blocks that I normally make, so I decided to make the entire quilt.
.
TIP: Not gonna lie, I had a hard time with not cutting off my points on this quilt. I realized after a few blocks that you want to prioritize getting the skinny tips to match up and not worry about the wider ends of the tips because those will get trimmed and won’t matter. Prioritze the skinnier tips of the wedges when you’re doing your cutting and piecing on this pattern; it makes a huge difference.
The Fabric
.
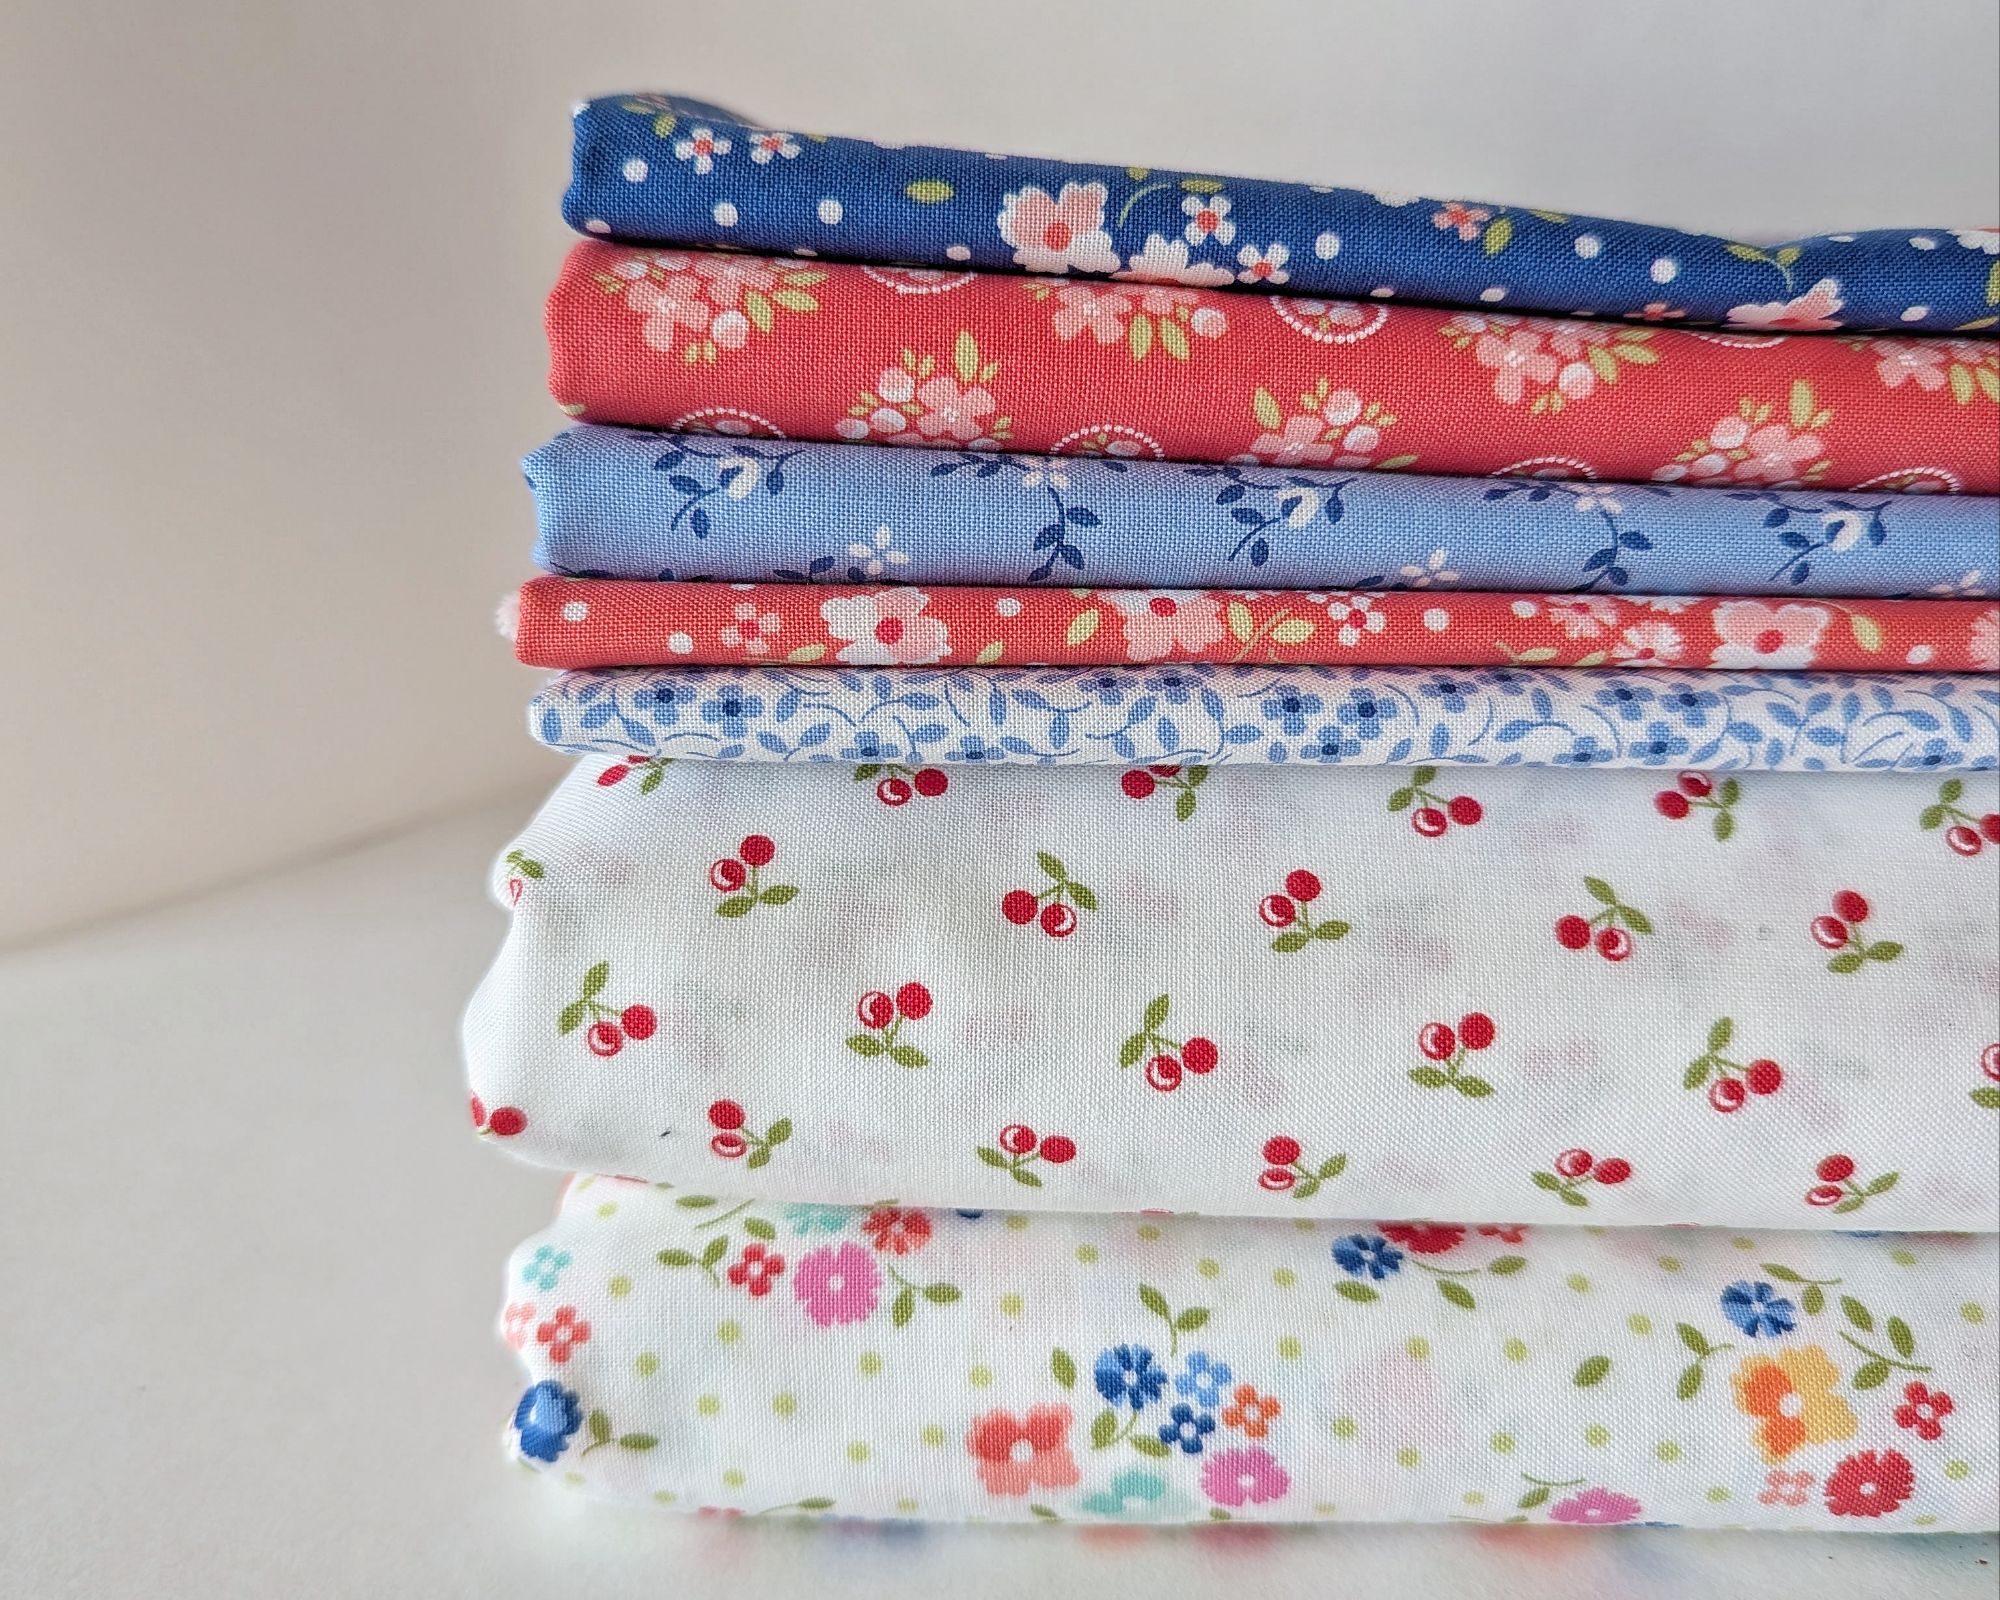
Corey Yoder’s fabric “Cali & Co.” had just come out and I decided to use this quilt as an opportunity to indulge my desire to make something with the beautiful multicolored flower print (SKU# 29190-11) in that collection. Unfortunately, when I tried mocking up the pattern with the multicolored flower print, I just couldn’t come up with a fabric combination that worked for me, so I pivoted to using the cherries print (SKU# 29194-11) as my main background and went with the blues and flamingo “reds” in the hopes for a subtly patriotic color scheme that I could display in the summer months.
.
ANOTHER TIP: I did figure out a way to sneak in as much of that multicolored flower print as I could, though—I opted to use it as the backing of the quilt. I realized, years ago, that if you use your most favorite print of a fabric collection for a quilt’s backing, you’ll end up with a ton of it leftover for your scrap bins (to then use in future scrap quilts) because you’ll have to trim off the requisite additional four inches on each side that you need to include for quilting. No more ugly fabrics for quilt backings here! I’m looking forward to sneaking in more of this beautiful print into future quilts! It’s just so pretty.
.
My plan is to use one of the darker blue fabrics in the Cali & Co. collection for the binding. I just love the light and airy feel of the fabrics in this quilt!
.
The Quilting
.
So, um, the quilting…isn’t finished. I have quilted in my foundational lines and I really thought about doing fast stipple quilting to just get this done on time, but I happened to see a really perfect quilting stencil design and fell in love with the idea of using it for quilting this up. Problem was, it took forever for the stencil to arrive in the mail and then it became apparent, very quickly, that I was going to have to practice a bit before executing my plan.
.
I don’t quilt as confidently as I piece, so there’s been a noticeable gap in my skills, and I’ve avoided quilting for a while. Nevertheless, I think it’s time to address this disparity and start legitimately working on upping my quilting skills, so I’m planning to take my time with quilting this beautiful quilt so that I can be proud of it when it’s done.
Final Thoughts
I really, really like this pattern and have already started mocking it up in other color palettes in the hopes that I can make another one. I think it’d look really great in a red-and-green color palette, don’t you?
Thank you to all the new readers who are popping through to read this post! If you’d like to automatically receive more of my posts about quilty goodness, please subscribe to my blog on WordPress by clicking here, or sign up for my mailing list by clicking on the “Subscribe” button in the sidebar!
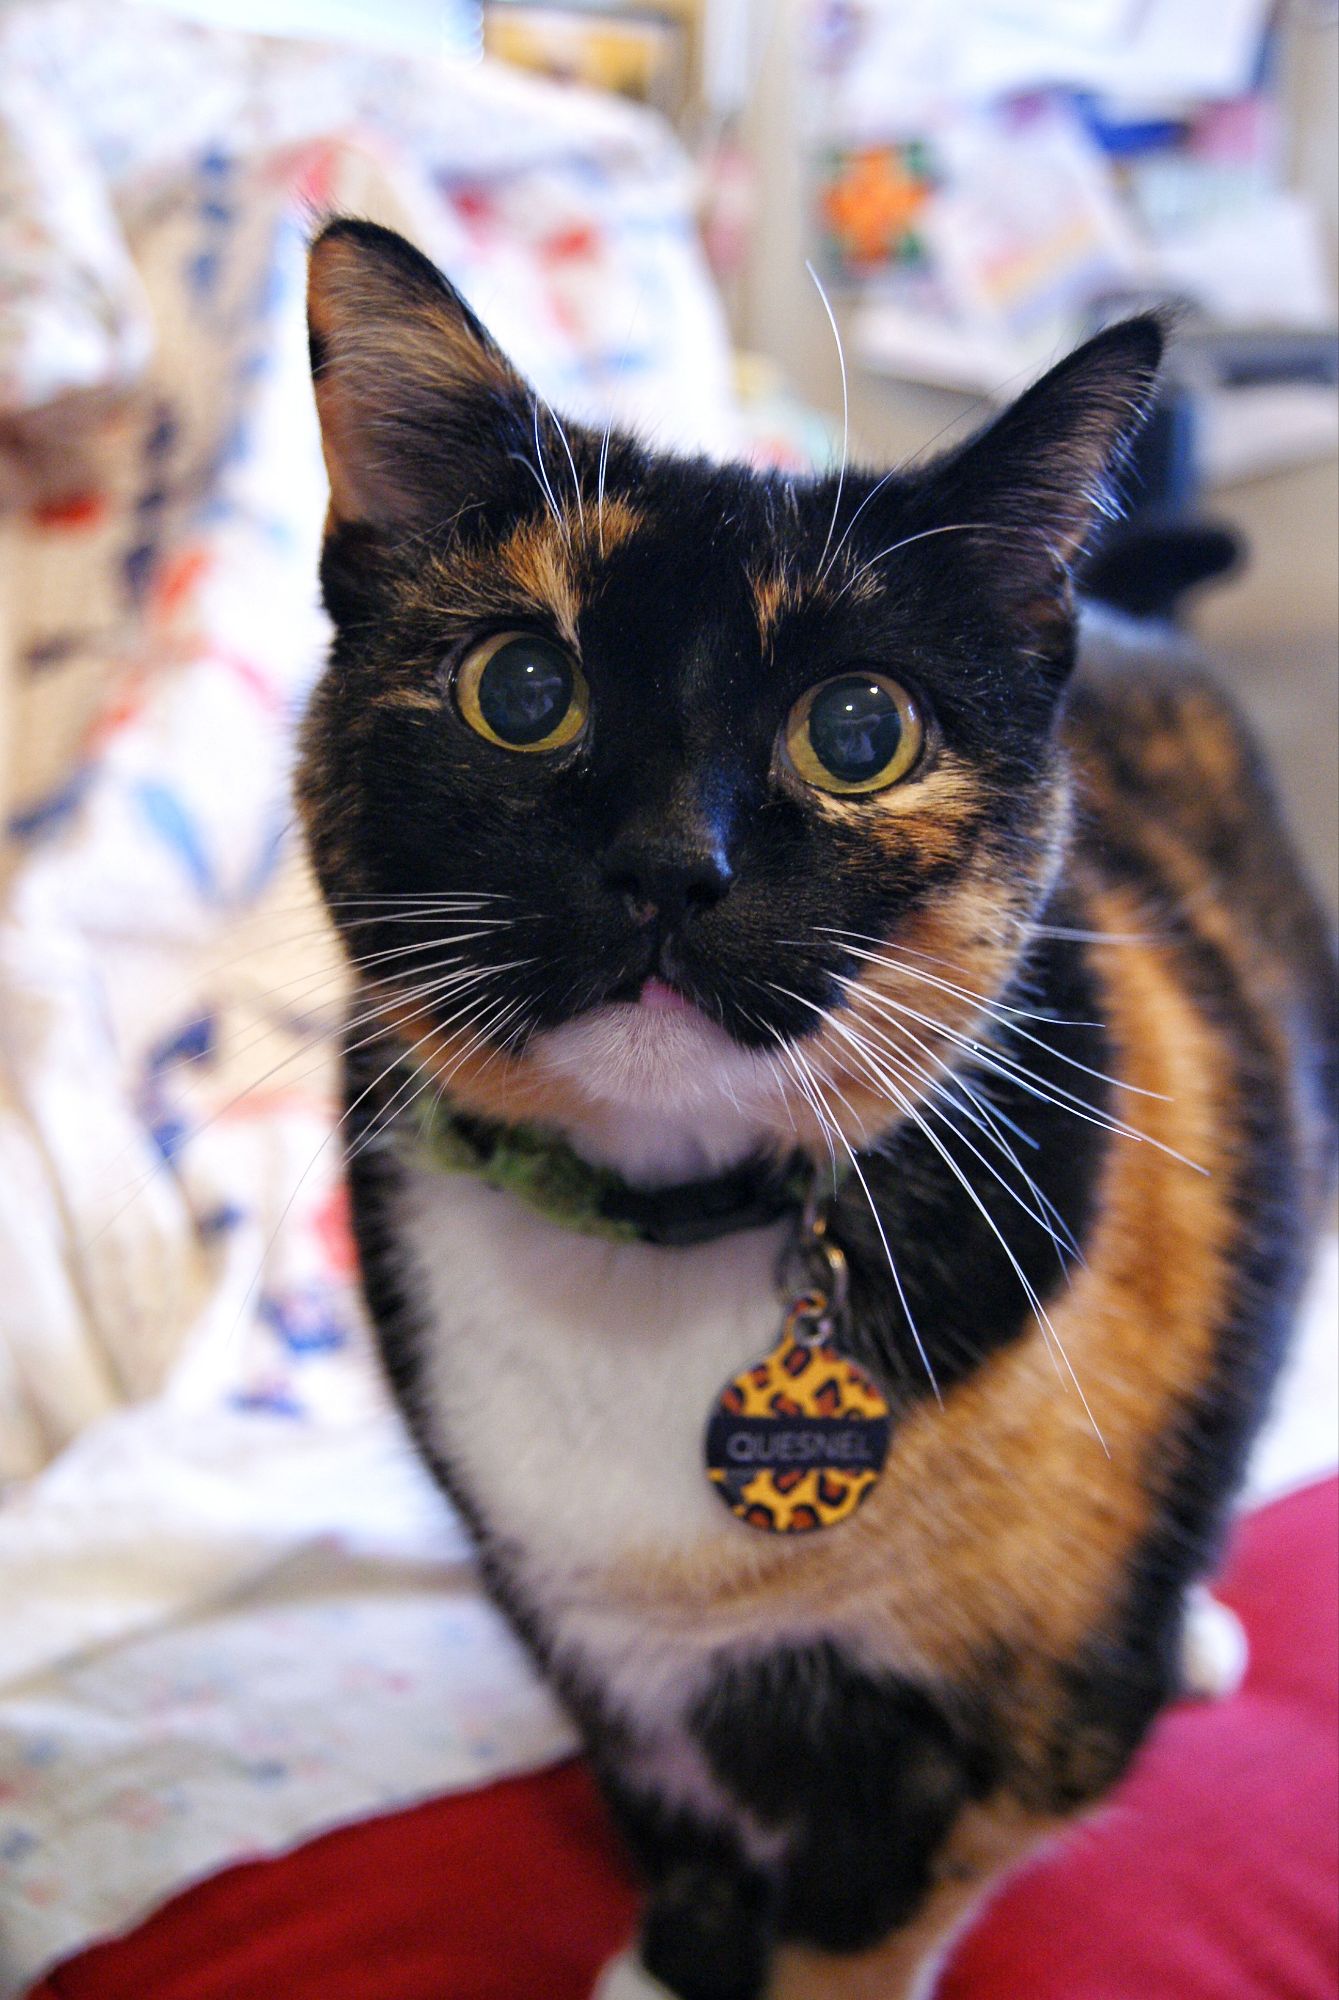
Thank you, Fat Quarter Shop, for inviting me to sew along with you on the King David’s Crown quilt! This quilt is going to be a lovely addition to my summer quilt collection! (Quesnel thinks it’s great, too!)
.
Read More Posts about the King David’s Crown Quilt:
This post contains affiliate links. Fat Quarter Shop also provided me with some of the fabrics and the Creative Grids Starburst ruler in exchange for me sewing up the pattern.
Hurray! A beautiful finish that will now go live in a trunk for eight months. *groan* I’m really looking forward to debuting these on November 1st while decorating for Christmas while wearing my Hermey the Elf shirt. *happy smile*
Modifications: I saw a sock knit up with this colorway and did not like it, so I added the solid red heels and toes. Now that they’re done I realize that I probably would have liked it if I had also knit the ribbing in solid red as well. (I also would have preferred if I had done a 2×2 ribbing on BOTH socks, and not just one…whoops. Doesn’t the 2×2 ribbing look SO GOOD?!?! I’ve been a 1×1 forever, but I will be changing my ways from here on out.)
It’s a late finish, but I didn’t want to rush ’em. This is such a great colorway and I enjoyed knitting these so much! I’m very tempted to commit to the idea of new Christmas socks each year, but even I can recognize the insanity of such a pledge, so these may remain my only handknit Christmas socks (for a while…it’s loads of fun to knit Christmas socks!).
Read more posts about the Stripey Christmas Socks:
Merry Christmas and a Happy New Year to each of you, dear readers! December 2024 was a whirlwind of activity, mostly revolving around the constant of music in our family, so I wasn’t able to do a whole lot in the craft room throughout the month, but I DID finish up a pair of handknit socks for my sweet hubby to open on Christmas Day!
Modifications: The yarn skeins don’t stop and end in the same place, stripe-wise, so I did my best to match up the stripes, but had to split my second skein to start in the same place as the first skein, which meant I had to join in the last bit of yarn near the toe so it stripes a little weird in the second sock. Fortunately, no one will see it because it’ll be hidden by his shoes when he’s wearing them.
This is the first time I’ve pulled off making a pair of socks for Michael for Christmas two years in a row! Woot, woot! And I barely pulled it off—I finished these during the afternoon on Christmas Eve and got them wrapped and under the tree with only minutes to spare before Michael walked in the door from work.
I love the idea of a tradition of making Michael a pair of socks each Christmas. Back when I started knitting, I eagerly looked forward to the Yarn Harlot’s frantic pre-Christmas circus posts where she’d get through insane lists and spreadsheets of handknits to complete during the holidays, and I loved reading through the posts that featured her handknits in the hands of smiling recipients, Christmas tree lights twinkling in the background. I enjoy going to other people’s circuses from time to time, and her Christmas circus was such a delight to behold in all its urgency and anticipation that would then yield beautiful photos of a happy family and beautifully-knitted gifts and lovely words of love, joy and gratitude. (I miss the old days of blogging, they were really wonderful. Instagram is, really…was, great and all, but I miss the writing that we used to treat each other to back in the day.)
I envisioned the same future for myself, which has basically come true (except for the handknits part), and here we are today with us going through a Christmas circus every year that can only be managed with spreadsheets and to-do lists. It’s mostly all music-related for us Brookes, but I still endeavor to throw some handmades into the mix. These socks were created in all sorts of stolen moments in between putting together the band fundraiser, the Ward Christmas Sacrament Program, and our family’s own holiday celebrations and traditions. I like a little crazy.
Each stitch in these socks is a little bit of crazy, a little bit of peace stolen amidst chaos, a little bit of tradition. A little bit of the holiday experience over and over again. I love having these reminders throughout the year of another Christmas that has come and gone. Each Sunday, when Michael is putting on his church shoes and I see which handknit socks he’s chosen to wear that week, I’m inundated with memories from whichever Christmas and year that particular pair was created. It’s a lot of a memories, over and over again. We’ve been blessed to have so many Christmases together. I hope, twenty years from now, that I’m still making socks for him each year, and that I’m darning the older socks and reliving the glory days of Christmases past—days of our children in footed pajamas, mornings when they were teenagers in flannel pants and messy buns, to eventual days of their own children in footed pajamas and maple syrup-stickied fingers. I learned to knit when I was just starting out as a wife and mother, and I hope I’m still knitting and making memories that include handknit gifts with happy faces and twinkling lights for many, many years to come.
When Rachel picked the Vogue 2001 pattern for her prom dress, I was elated! I love me a vintage pattern, and thankfully, so does she. I wasn’t sure she’d actually go through with the idea when push came to shove, so I was incredibly pleased that she was committed to some vintage glamour for her first prom.
Pattern
Vogue #2001, only released from the archives this spring. It’s a reprint of a 1941 pattern, and the first time she pointed it out to me I squinted at it because it really looked like a 1930s top smashed up with a 1950s skirt. I actually said, “That top and that skirt don’t go together, what is going on here?!” And then I saw the 1941 publication date and immediately thought about World War 2 fabric rationing and how this pattern did not fit into that idea whatsoever. But then my husband and I figured out that Pearl Harbor happened in December 1941, so American patterns were not adopting a “war rationing” mindset until 1942, probably. I wonder how many women purchased the pattern with the intent to make it and then couldn’t make it because of rationing?
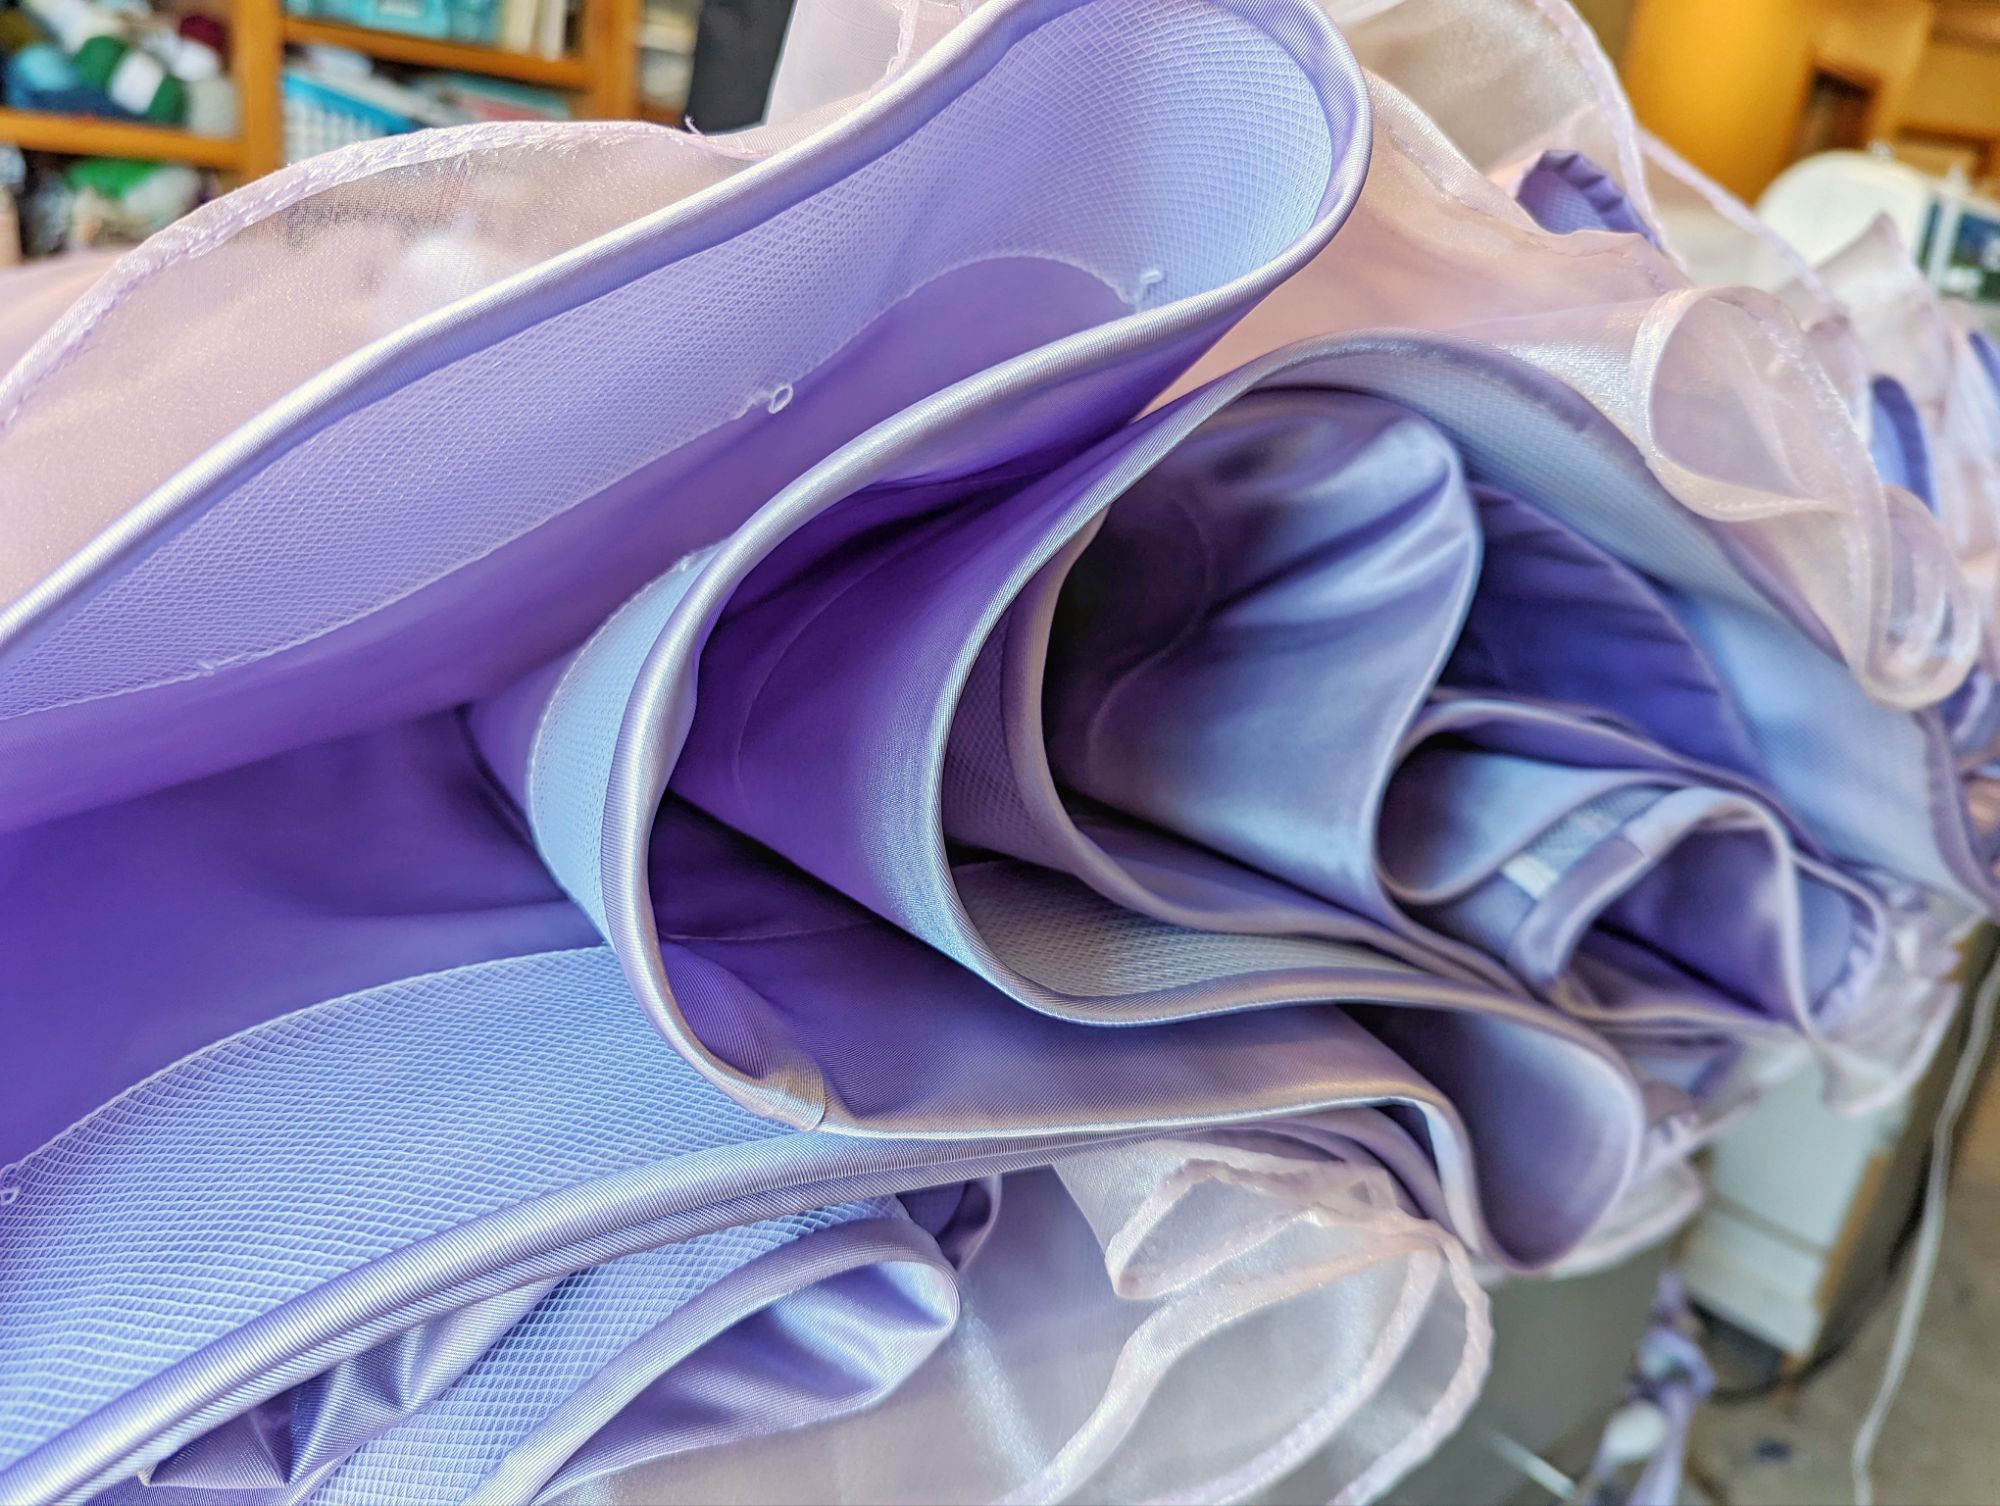
Fabric
Rachel picked out a lavender satin taffeta and a lilac organza from JoAnn Fabric. We needed 11 yards of both because the main eater of yardage in this pattern is the skirt, which is ginormous AND cut double. The pattern doesn’t have instructions for two layers of skirt, but it’s what we wanted to do, so I overcast the waistline of them together and then treated it as one skirt.
Notions
Thread: Good ol’ Coats & Clark Dual Duty All Purpose #3440. I bought two out of caution, even though I never use the second spool, but I did actually need the second spool on this dress.
Zipper: The last lilac-colored invisible zipper in my weird assortment of cast-offs that I ordered from Amazon years ago.
Horsehair Braid: The solid main fabric skirt has a 3-inch horsehair braid in its hem. The circumference of each skirt is 528 inches, so I used almost fifteen yards of horsehair braid. The pattern called for 4-inch horsehair braid, but I had purchased the 3-inch braid years ago on Amazon for a “just in case” moment, and decided to go with that.
Time Spent
I DID actually keep track of how much time I worked on this! I wasn’t able to get to working on this dress until a week before the dance, so I made the decision to “live update” my progress to my friends on Facebook—at the end of every hour of working on the dress I’d snap a picture and type out what I’d accomplished as a comment to that day’s Facebook post about the dress construction. I knew that the public accountability would help me stay focused and have a shot at sewing this up in a week. Little did I know, my Facebook friends started cheering me on and leaving me uplifting comments as well, which really buoyed my spirits as I toiled away in my craft room. I will absolutely use this method of social pressure to help me finish big projects in the future!
Muslin: I wasn’t tracking hours while working on the muslin, so I estimate it took about five hours.
Sewing: 39 hours, according to my Facebook posts.
Total: ~44 hours
Highlights
The fact that Rachel picked out a vintage pattern just made me so happy!
The Facebook live updates and the cheering from friends made this so much more enjoyable to construct.
I did French seams on as much of this as I could and the seams are just so beautiful inside this dress.
I was able to do that whole dart rotation maneuver and transfer some annoying fullness in the upper arm and shoulder area into the bust gathers. I did a new thing and it totally worked!
The narrow hemming of the sheer layer is, by far, the best job I’ve ever done on narrow hemming. I enjoyed that step.
I did cheater gathering with a length of yarn for each quadrant of skirt and it worked beautifully. Highly recommended.
Lowlights
The side seams of the skirts are too short, despite having measured the skirt on her to the ground, so her petticoat showed a little bit. No idea how this happened. Very annoyed.
Kimono sleeves are stupid. That is all.
Holy skirts, Batman! Cutting out the skirt sections was a logistical concern. No matter where I went in my house there wasn’t enough room to lay it out in one run so I had to shift the fabric and pattern for each skirt to continue marking it. That brought some challenges, but I got through it.
I bought a hooped petticoat to go underneath this and even had Rachel try it all on with the hooped petticoat, but she hated how it felt to have the skirts held away from her legs and refused to wear it. Which was too bad because I think the skirt was more impressive with the hooped petticoat beneath it. She ended up going with a tulle petticoat and a flounced petticoat over the tulle to smooth things out.
I really love this dress and I’m so glad I had the opportunity to make it for my girl. We bought a book that showed how to do 1940s makeup and hair so she could go with the complete 1940s vibe. She did her makeup beautifully, and I am not known for my hairstyling skills so the hair was a little less than hoped for, but whatever, it worked…enough.
Renaissance informed me that Rachel’s dress was a star of the show the entire night. Girls were coming up to her over and over again to exclaim how much they loved her dress and how it was like a fairytale princess gown and how much they wished they had one like it. Now that I know how much work goes into constructing those precious princess ballgown skirts, I get why they’re not offered in your typical off-the-rack dance dresses. Whew! I’m glad she got to feel special at the dress in her dress! Who knows, the trauma may wear off just enough by next year for me to consider making another one for her…
Links to all posts about Rachel’s Vintage Purple Prom Dress
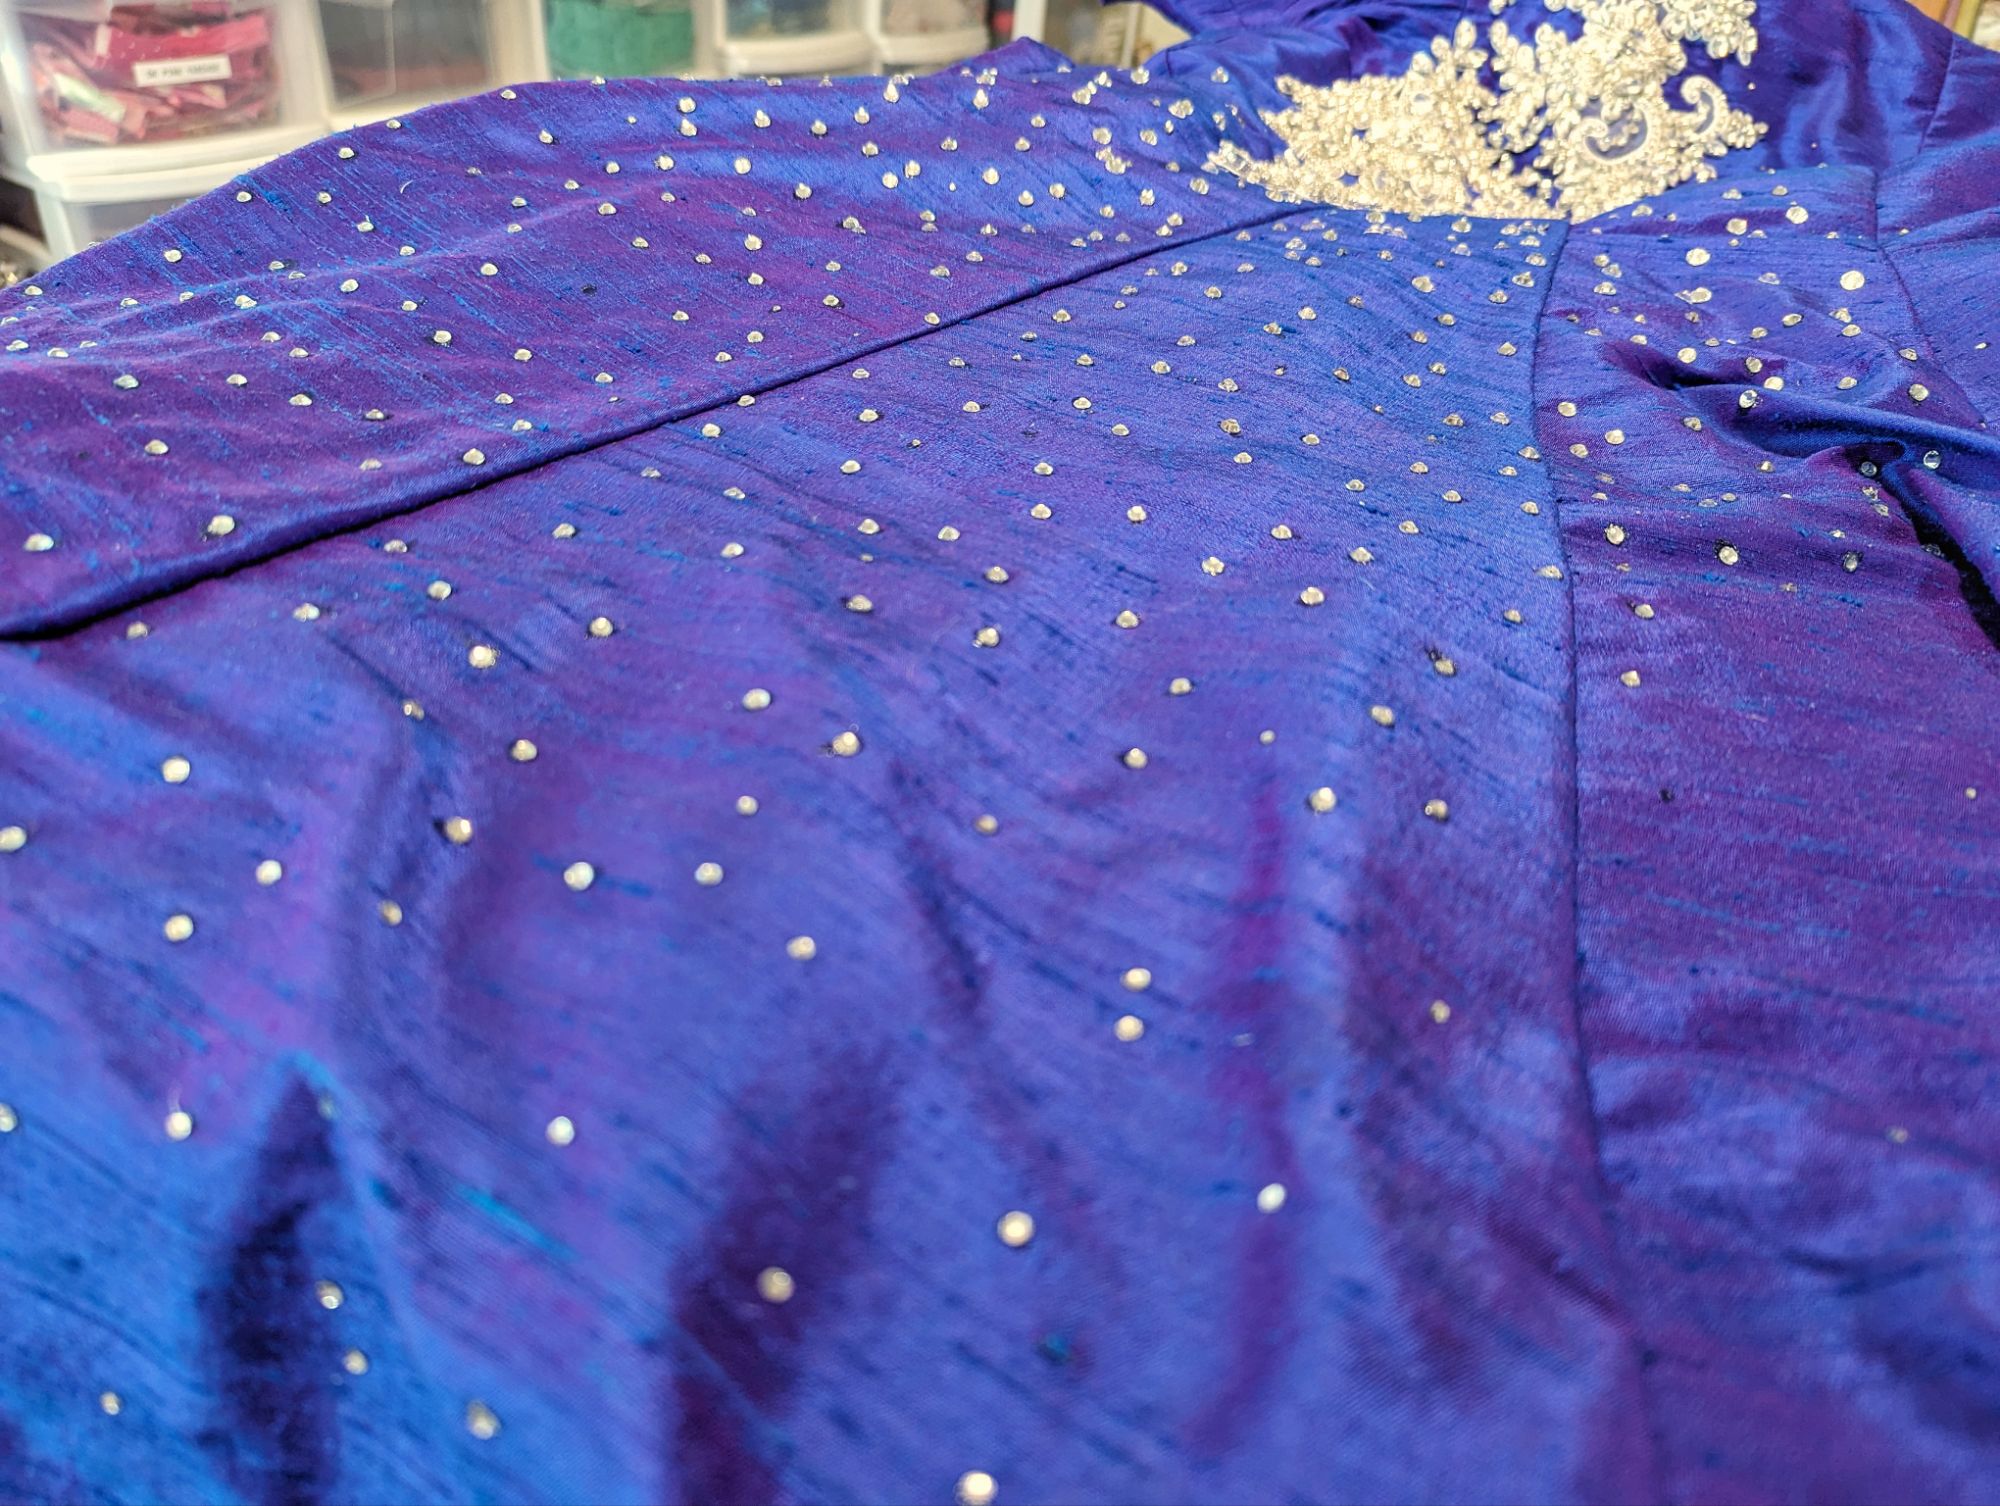
Alright, as promised, a debriefing on Renaissance’s prom dress:
Pattern
McCall’s #7091, discontinued but available online as a PDF file.
Caution: It’s a batch of three downloads with up to sixty pages in each download that you have to tape together. An A0 printing option is NOT available. It took me four hours to tape the one hundred and twenty-seven pages together.
Working with silk is a lovely experience. I opted to do all of my cutting of the fabrics with a pinked rotary blade in order to cut down on fraying, and that was an excellent choice.
I will not use the Batiste Silk/Cotton as a lining in the future because it has too loose of a weave and stretched and grew like crazy inside the dress, causing the neckline to sag more and more as Renaissance wore it. It’s a beautiful fabric and I want to make more things from it in the future, but it’s not well-suited to give structure to a garment.
Notions
Thread: Aurifil 50 weight #2780 when piecing “Comet Tail,” Superior Threads’ Pima 50 weight #8035 when piecing “Nolana,” and I used Coats & Clark Dual Duty XP All Purpose #3510 for piecing the “Apparition” gray lining. Ren used an invisible monofilament thread (that she hasn’t put back so I can’t tell you for certain who makes it) for securing the rhinestone appliques.
Zipper: I used a light purple invisible zipper from my zipper drawer, still leftover from the ill-advised purchase of the “scrap bag” of invisible zippers that really only included colors that I’ll rarely ever use. I used blue Sharpie on the zipper pull to camouflage it against the Comet Tail silk.
I originally planned to use silk thread for sewing this all up, but read online that it was a bad idea and that silk thread should really only be used for embroidery and the like. So I went with cotton.
Renaissance spent all of her free time in the week leading up Church Prom attaching the appliques, and Emily, Ren, and I spent a frenzied two hours on the day of Church Prom gluing the loose gems to the dress with Beacon Gem-Tac adhesive and toothpicks.
Time Spent
Assembling the pattern: 4 hours
Sewing the dress: My memory is fuzzy on this, but I feel like it was five weeks’ worth of sewing a few hours a day. My estimate is forty hours of work? All those princess seams took a long time to assemble, and I handstitched the contrast skirt’s hem.
Rhinestone application: Renaissance estimates that it took at least ten hours to sew the two appliques onto the dress. It was her first time doing something like that. And then three of us worked for two hours together to glue the loose rhinestones on, so 3 x 2 = 6 hours.
Total: ~60 hours of work
Highlights
First time working with silk and it was awesome! I ended up phoning Silk Baron to get advice on whether or not to wash the fabric before sewing and whoever answered the phone was incredibly friendly and took their time in explaining the situations where it would be ok and why this was not one of those situations because the dye and the shot weave would lose their coolness factors.
There is only one pucker in all of those princess seams! I really learned how to ease fabric with this dress. I’m a fabric-easing machine now. The trick is to cut the notches before you pin.
The lighter purple contrast skirt was assembled using French seams, which was the first time I’d done them and they turned out great.
Watching Renaissance work on sewing the rhinestone appliques to her dress while watching “The Simpsons.”
Working with Emily & Renaissance to glue the gemstones onto the dress. I always like family group projects.
Lowlights
Taping the pattern together. Seriously, McCall’s, you need to offer an A0 printing option. A lot of sewing happens on a deadline and having to spend four hours upfront taping paper together is brutal.
Owing to my background as a quilter, I default to a shorter stitch length when I’m nervous about a seam. It turns out that this is not the correct default when sewing clothing. My choice to go with a shorter stitch length on the two skirt hemlines resulted in bunchy edge finishes, which no one really noticed except myself. The swoopy hem could have laid down so much nicer if I’d realized that. I did redo the hem on the lowest part of the swoop because it had to be trimmed, but didn’t have time to do the upper portion.
I also wonder if I should have used a thin horsehair braid on the swoopy hem in order to make it stand out more? When the silk was fresh the swoop skirt stood out in beautiful rounded columns, but by the time it was finished it had gotten limp and didn’t do that anymore.
The lining grew a lot and the neckline sagged more and more as she wore it.
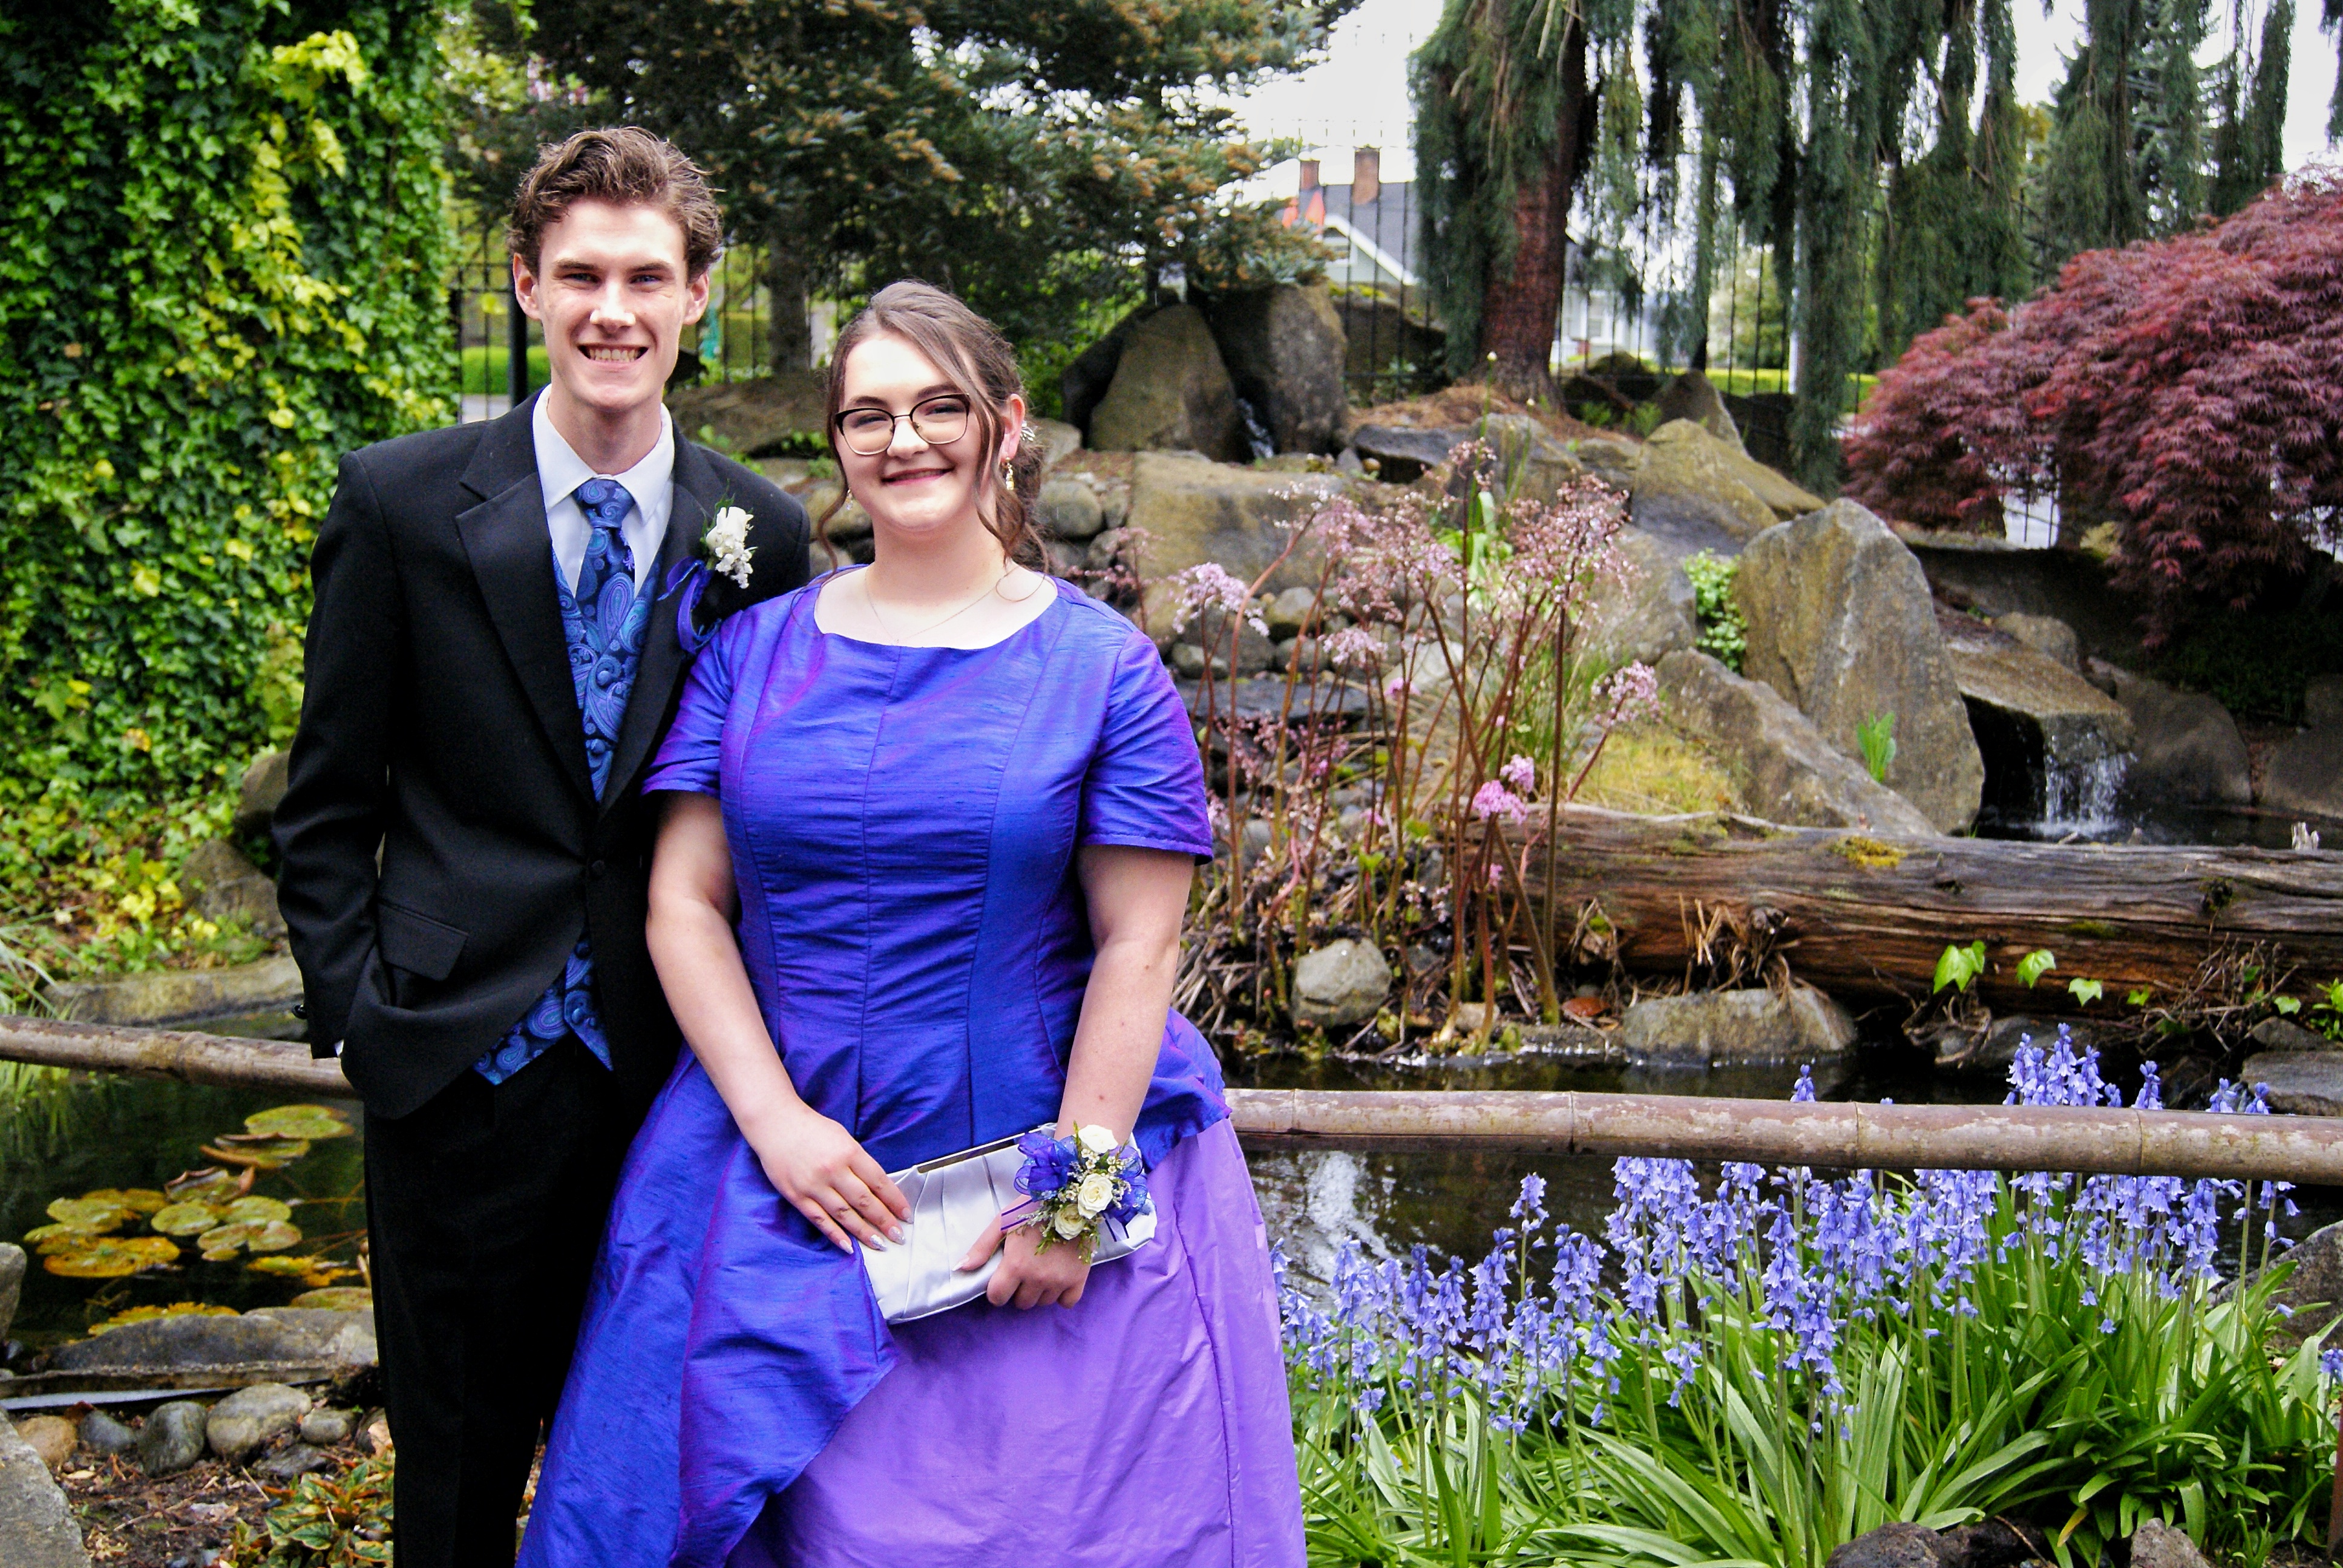
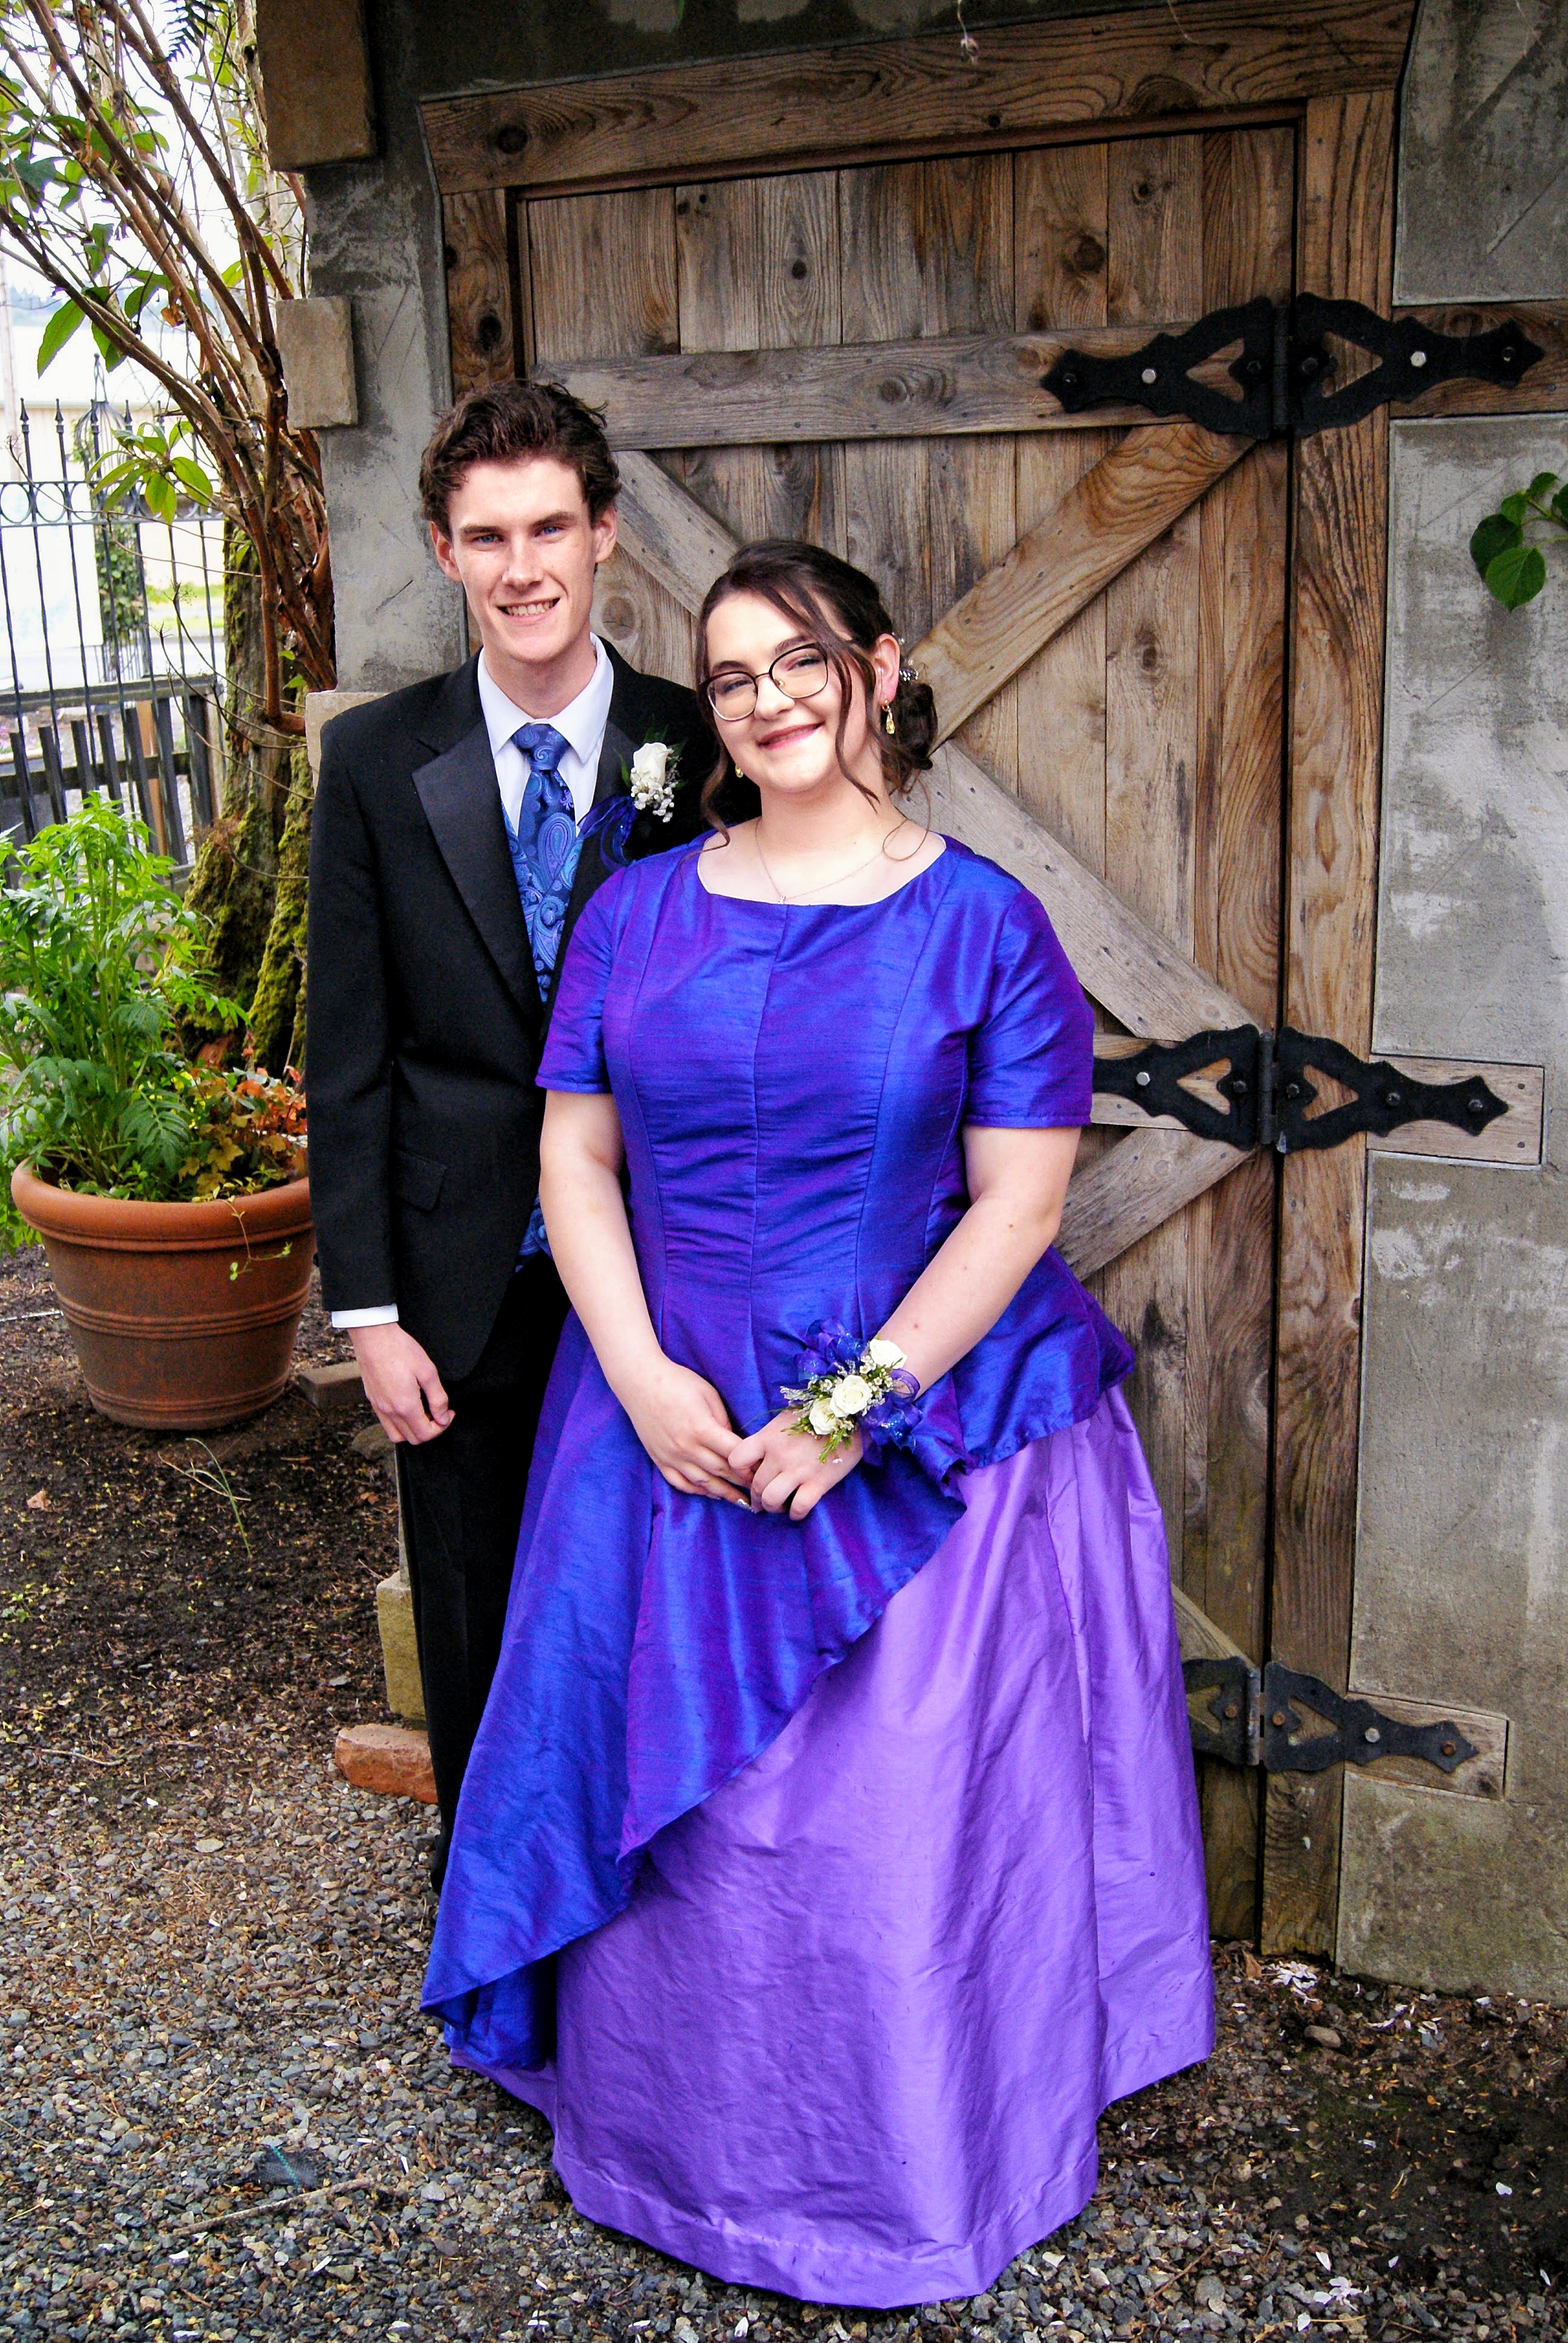
Lowlights aside, I am monstrously pleased with this dress! It had twenty-nine separate pieces to assemble because it was a twelve panel princess seam dress, and I made it work! It was beautiful plain and it was beautiful with the rhinestone embellishments. It makes a beautiful swishing noise when she’s moving in it. It’s just a beautiful dress and she loved it and I’d totally do it all over again.
Note: She is wearing a crinoline with the dress to help the skirt stand out more. I think it was this one. Or it could have been this one. I bought both and each girl wore one of them and I can’t remember who had which one.
Pattern: Baking Doodle Cowl, by Jamie Lomax of Pacific Knit Co., the pattern is being released TODAY!
Yarn: Knit Picks’ “Wool of the Andes Sport”* in colorways Baltic Heather, Blossom Heather, Camel Heather, Chestnut, Papaya Heather, Turmeric, White & Wonderland Heather
Needles: US 4 & 5 16-inch circulars
Modifications: I knit my cowl a little taller than suggested by the pattern, simply because Ren and I couldn’t cut any of the five charts because we loved them so much. I don’t recommend doing this as it makes it hard to see the charts when you’re actually wearing the cowl. I also used duplicate stitch for the dark pink stitches on rows 18 and 19 of the stand mixer chart.
When the email showed up in my inbox letting me know that I’d been chosen to be a test knitter for this pattern, I was so thrilled! I’ve been watching Jamie create her whimsical designs for a couple of years now, and promised myself that I’d allow myself to sign up to test knit once grad school was over. When the baking-themed pattern was announced, I was so happy because it’s absolutely perfect for my dear Renaissance, who loves all things baking.
I really enjoyed creating this project because it was a combined effort with Renaissance. At first I thought I’d keep it secret, but then I was having a really hard time choosing a color palette because I didn’t want to end up picking colors she wouldn’t actually like, so I brought her into the fold and she gladly went about picking colors and charts.
A heads-up to anyone considering making one of these: There’s more than two colors per row in many of the charts. I can rip along with traditional fair isle/stranded knitting because it doesn’t have more than two colors per row, but throw that third color in and BAM, slows me down to a crawl. Something to consider if that sort of thing matters to you.
Another note: The stand mixer chart, due to the almost-intarsia color blocking, ends up really tight, so you’ll want to knit that one with extra loose floats.
Oh my goodness, this cowl makes me so happy. It’s adorable! Ren loves it too, and I’m definitely going to purchase some of Jamie’s other doodle collections to make up some of her other themed cowls in the future! (I’m especially eyeing the winter/Christmas one, and the arctic one.)
Thank you again, Jamie, for selecting me to test knit this for you, I had a great time with it!